How To Whitewash Wooden Floors | A Guide
 [Sponsored content]. Over the winter months, we've been working hard on project 'strip the floors', most of which were given an orange pine varnish treatment many moons ago. Rob managed to sand his office (pictured) which was previously carpeted and the kitchen in three dusty, sweaty days. Despite the fact the floors are in great condition for their age, I really don't like having dark orange wood everywhere - it makes an already dark house feel darker. I did a fair amount of research into limewashing and whitewashing before jumping into this project, asking for recommendations from interior design friends who have done it before and they all came back with the same brand.So, on a mission to brighten up the house and lift the floors, I've put together a guide on how to whitewash wooden floors in partnership with OSMO, makers of wonderful oils and waxes, elixirs for all kinds of wood treatments. A look synonymous with Scandinavian style, whitewashing creates a contemporary feel, highlighting the natural beauty of the wood grain. The best thing about it is that unlike painting the floor which will show up wear and tear over time, whitewashing is far less high maintenance.Although traditionally done using lime or wood bleach which can be harsh (please don't do that!), tinted wood oils are now a far less complicated option, nourishing and protecting the wood simultaneously. All these oils and waxes are environmentally safe, meaning fewer harsher chemicals and the wood can still breathe underneath. For high traffic areas it stands up well to abuse, is water resistant and is easy to clean. It also works brilliantly on pine flooring and a little goes a very long way.
Spot Check!
Before you get too excited and rush out for tools, please make sure you do a swatch test first. Check what kind of wood floor you have. Pine is generally an all-round winner for this effect with its naturally pale qualities, whereas darker woods will have a completely different result and are sometimes better left alone. If you're desperate to lighten dark wood, I've read about a method called pickling that's worth looking into.Find an inconspicuous corner that you can sand back if you don't like it, purchase a tester of the product and follow my prep and cleaning steps before applying. A small area won't take long. Follow the drying times and then see what you think - has it been well absorbed and have you achieved the desired effect? If so, read on...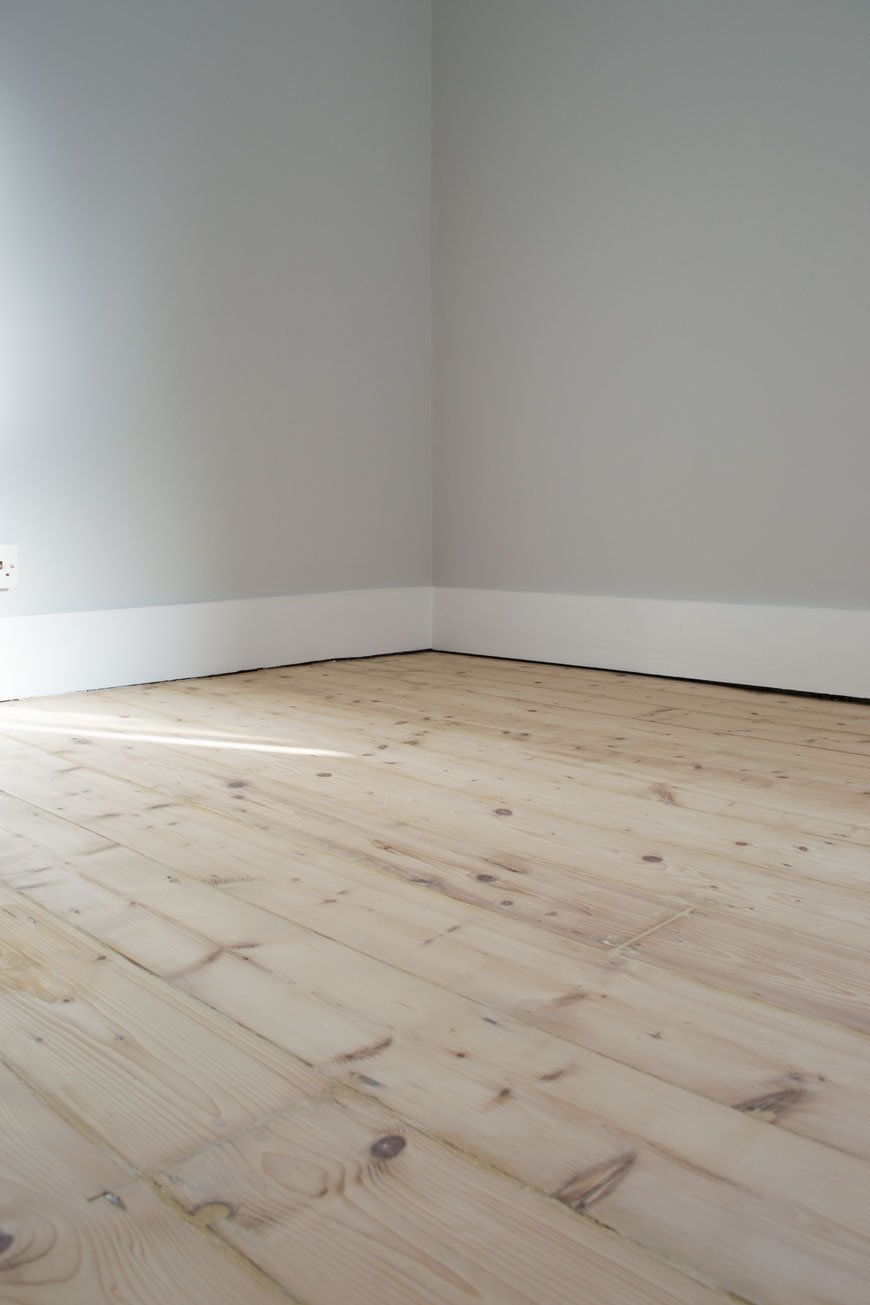 You Will Need:• Vaccum cleaner.• A good floor cleaner / stiff floor brush.• OSMO Wood Wax Finish** in white (code 3111). A 750ml tin will cover approx 20 sqm.• OSMO Polyx-Oil Tint** in white (code 3040).• Soft, lint-free cloths (you can only use these once per application) or a soft, wide paint brush (OSMO also have wide floor brushes).• Painter's pot or tub to pour out the floor oil into.• Gloves to keep your hands clean (it gets everywhere and it's hard to clean off your skin!).• OSMO cleaning solution.**find your nearest stockist here.
Before You Start - Prepare The Floor.
Make sure you've fully prepped the floor before you start staining it. This means removing any previous treatments with a heavy duty sander, repairing loose or broken boards and filling any gaps as Rob has done. You can find a step-by-step guide to sanding floors, including the prep from our previous project in the kids' room. Ignore the knotting step - you'll want to see all of the grain.Next to clean the floor. Vaccum up any dust and debris first - you won't want to be working this into the floor. Wash and dry the floor a couple of times until any marks and dust have lifted.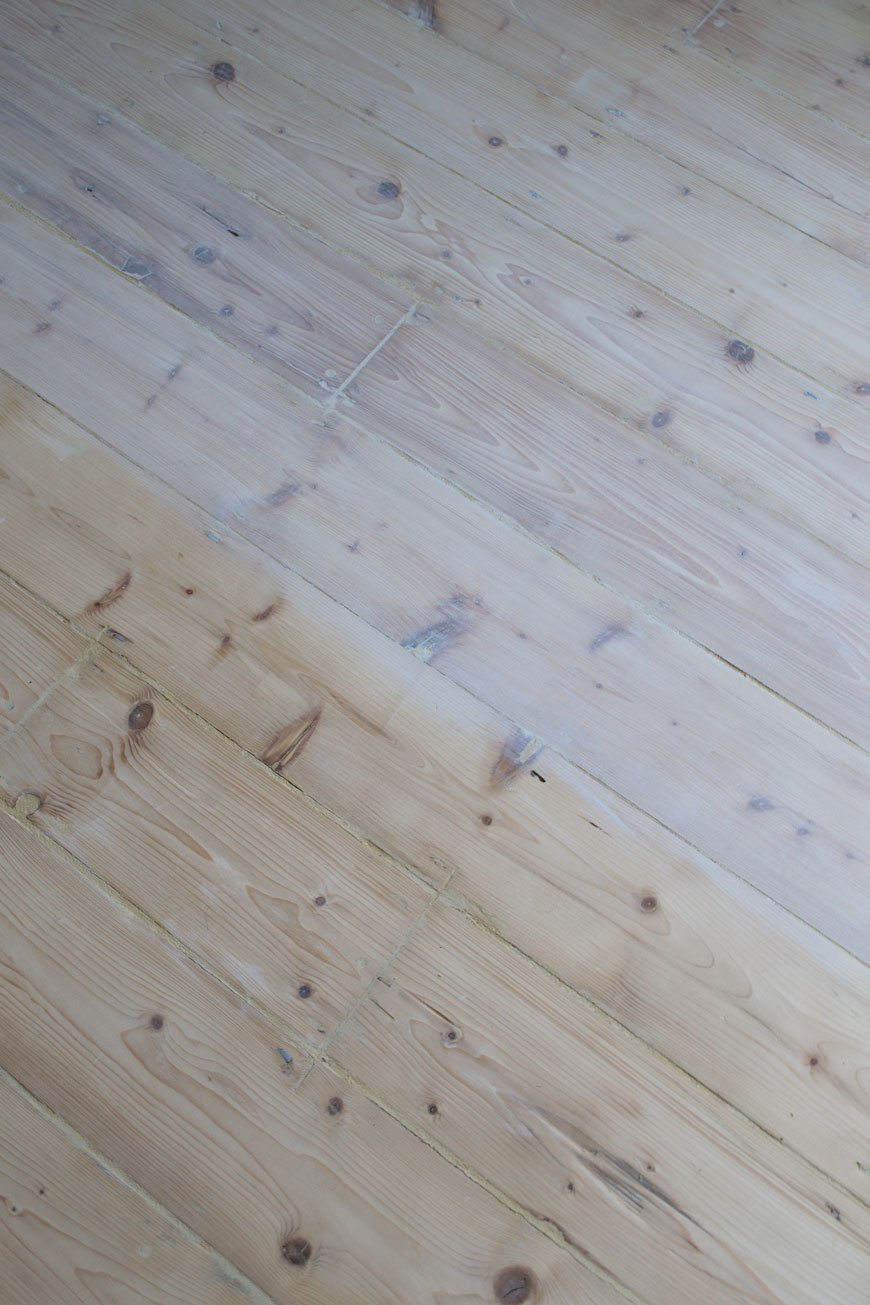
Step One - Applying The Wood Wax Finish
Stick on some protective gloves and decant a little of the Wood Wax Finish into a pot for easier access. Apply the wax oil in a thin coat along the grain with your brush or cloth, working it gently into any knots and cracks. Remember a little goes a long way. Allow twenty minutes soaking in time, then use a clean, lint-free cloth to gently rub away the excess wax oil until you're happy with the tone. You'll need to do the floor in sections so that you have a safe space to kneel while you do this part - otherwise you'll step on it while it's wet. This may mean leaving yourself a small path clear to the door whilst you wait for the rest of the floor to completely dry before you can finish the rest.TOP TIP: Because some floor oils turn yellow over time, OSMO has recommended applying a white oil tint as a top coat after the initial wax finish.
Step Two - Applying The Polyx Oil Tint Top Coat
Once the floor is completely dry, check that you're happy with the tone. If you feel it could be a little whiter, repeat step one. Next to apply the Polyx Oil Tint which will protect your base coat and prevent it from yellowing over time. Decant a little of the oil tint into a pot and do the same as in step one with either a soft brush or clean, lint-free cloth. At this point, you can either coat the entire floor, working your way back towards the door (don't maroon yourself!) and leave it to fully dry, or repeat in section and work off the excess. The Polyx-Oil Tint is a translucent white which will add ever so slightly to the finished colour with a subtle sheen. I didn't bother to remove any excess as I was happy with the finish so I left it to dry after applying a thin coat.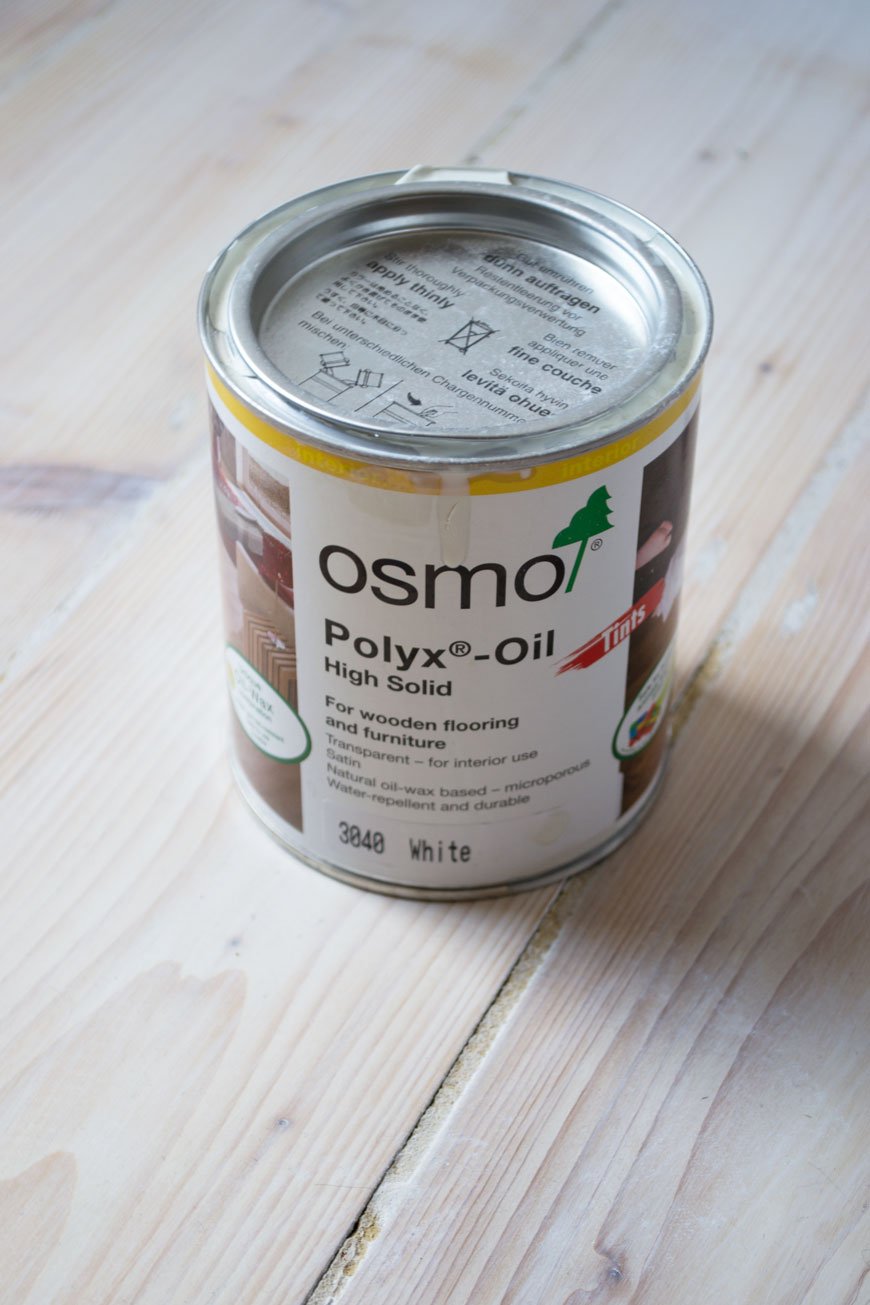 And that's it! Yes, it's pretty hard work - you're going to have to get sweaty for this job, but the finished result is well worth the effort...
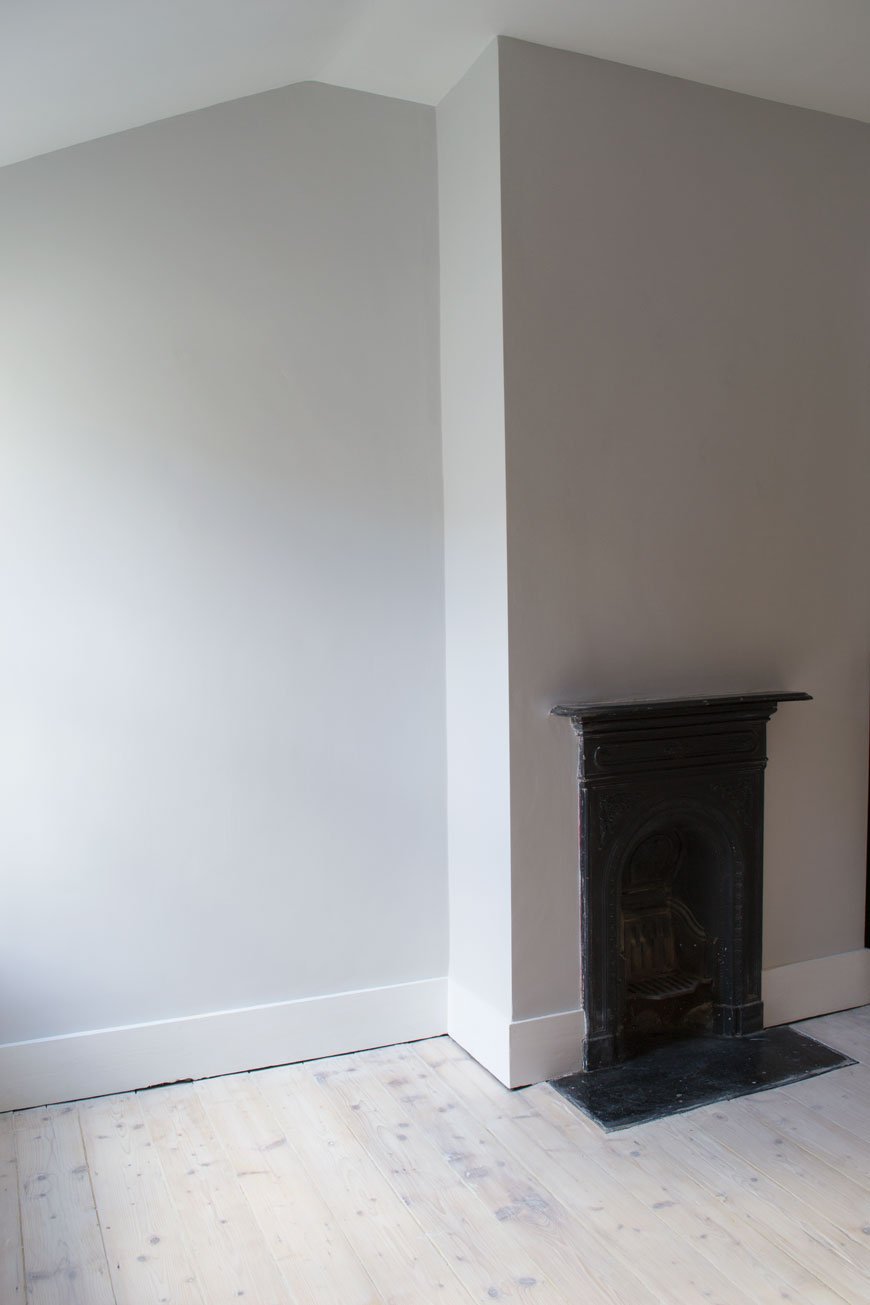 What do you think? Got any questions about whitewashing? Leave a comment below and I'll do my best to help.Can't wait to show you how our kitchen floor turned out and the difference the whitewashing has made to the feel of the room!Written in collaboration with OSMO who have kindly supplied product in exchange for this post.
Photography © Tiffany Grant-Riley
Moody and Minimal Christmas Table Styling
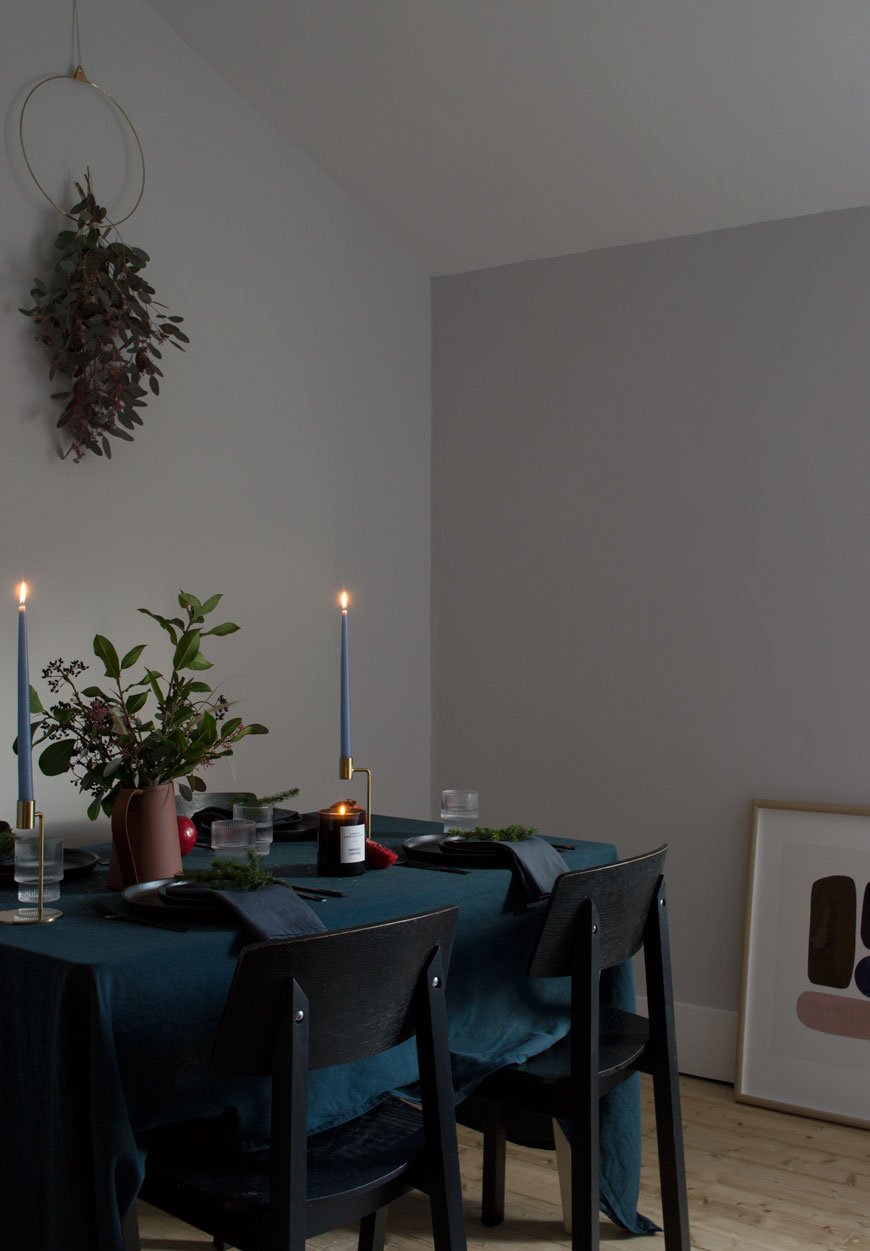 There is nothing I enjoy more about this time of year than styling our Christmas table. It's the part of the day when I can slow down my efforts in the kitchen and take my time setting the table, lighting the candles and adding finishing touches before we sit down together. When I worked as a wedding and events planner, this part of the process was without doubt my favourite part - finding the right colour palette, choosing the tableware and linens and creating an atmosphere to bring friends and family together to celebrate in style. Although our Christmas table is quite a bit smaller by comparison, it's not any less important.
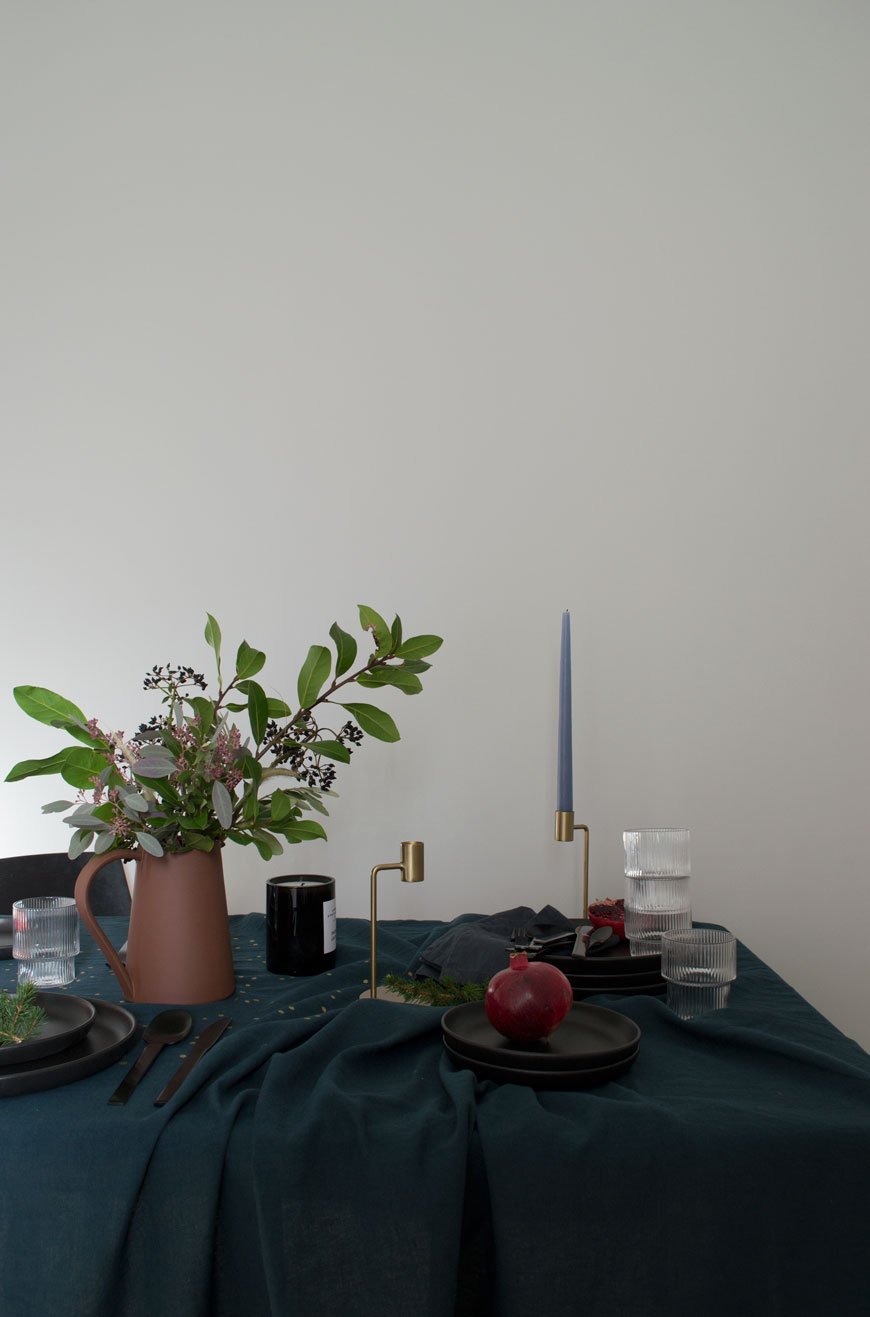
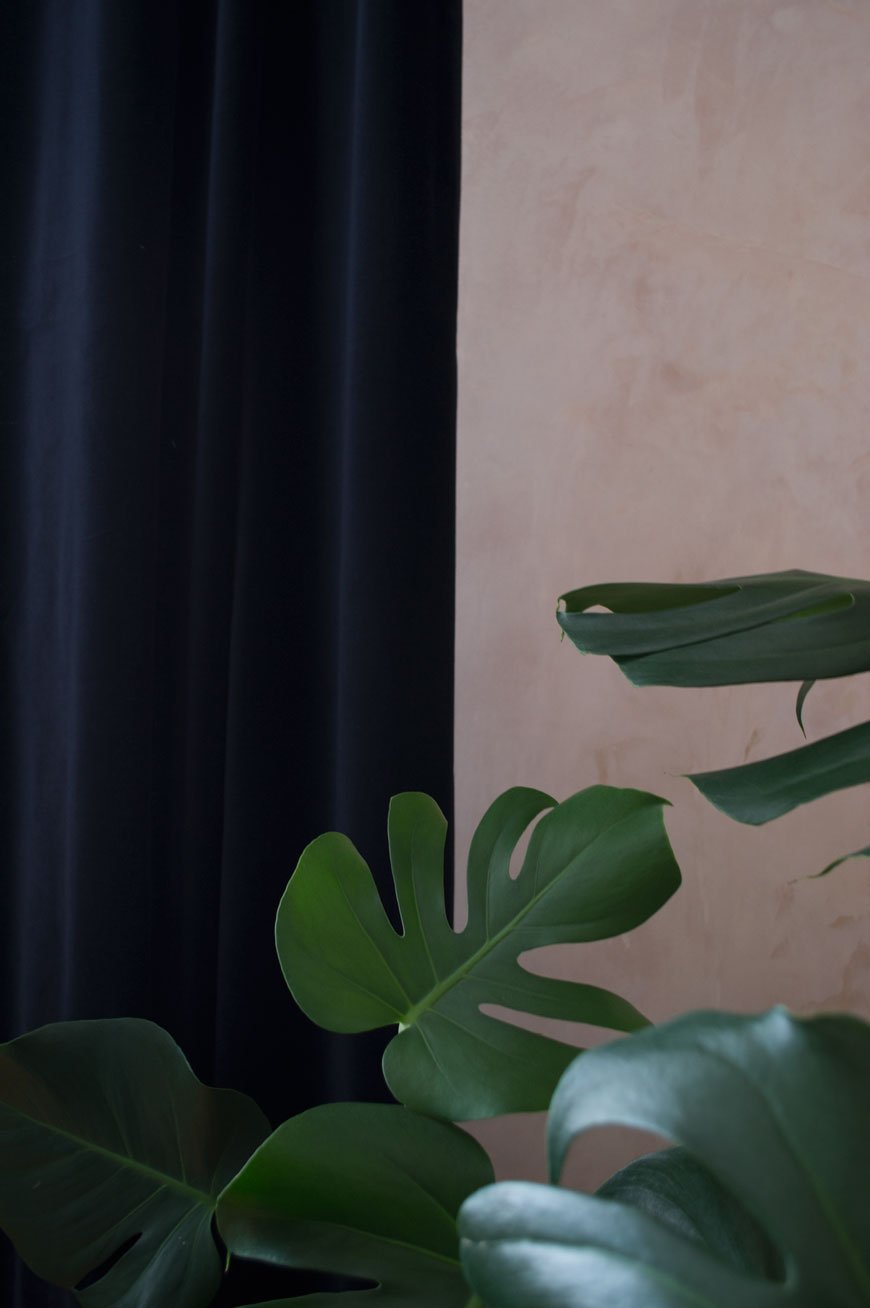
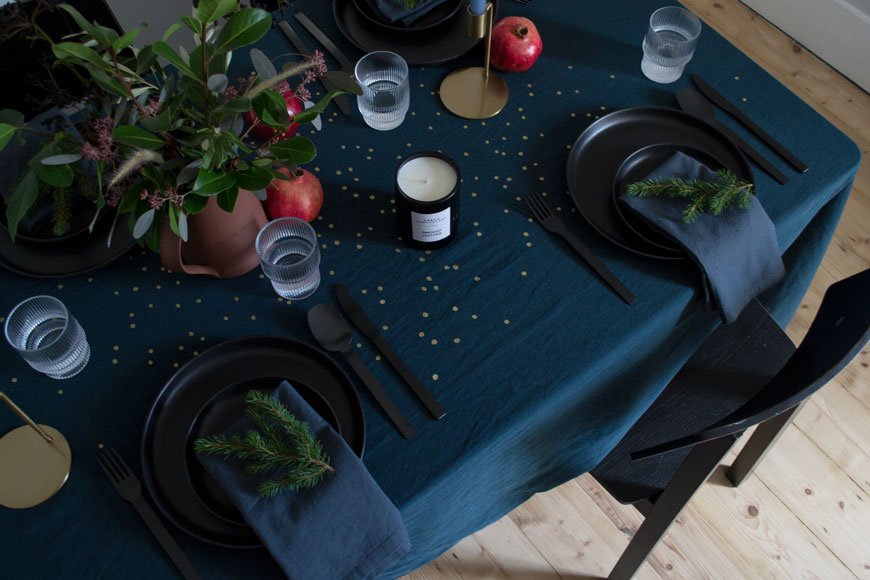 This year, I've been so inspired by all the rich and moody colour ways coming out of the Nordic design scene that I wanted to break away from white and do something different. This look is tonal with deep blue linen, black tableware, touches of earthy terracotta. No Christmas table is complete without seasonal greenery and I've used a mix of seeded eucalyptus from my local florist, off-cuts of fir tree and greenery foraged from my garden. You'd be surprised how much inspiration the hedgerows will give you too if you keep your eyes open, just make sure you're allowed to take what you find.I couldn't resist using the new table linen collection from French brand La Cerise sur le gateau as my starting point. A smattering of gold speckles across the centre of the cloth is a nod to designer Anne Hubert's playful signature style, picking up the warm glow of candlelight. You can get away without ironing it too as it's a linen and cotton mix. I much prefer the relaxed texture of the crinkles, don't you?
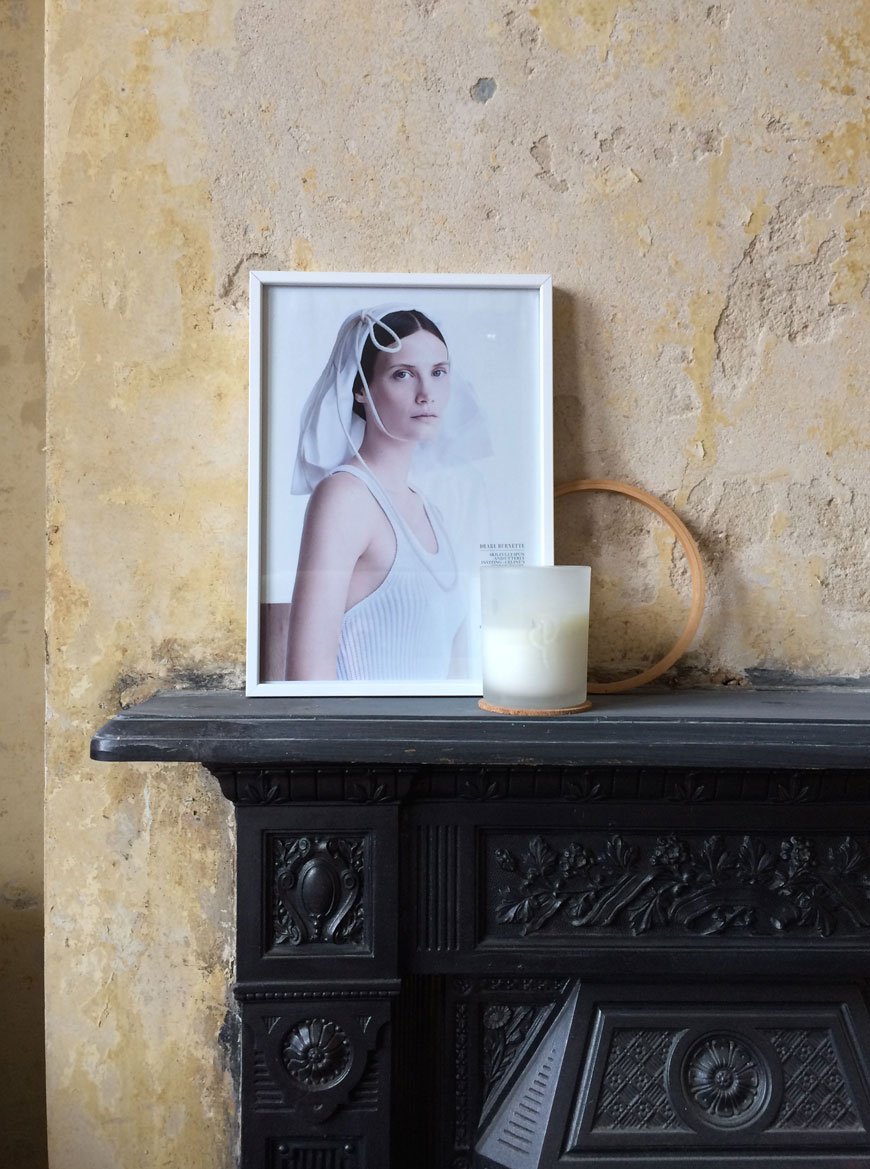
 The brass candlesticks are from the new MADE.COM collection which I saw at their supper club earlier in November. I love their simple shape and I've used my favourite Broste Copenhagen tapered candles in a blue-grey.I normally leave wine and champagne glasses on the sideboard for our guests to choose before they sit down, so I'm keeping the table simple with these Ferm Living Ripple glasses for water.Scent is yet another level of attention to detail that I bring to our table. Aside from the fresh smell of eucalyptus, I'm using the heady scent of Smoked Leather by Urban Apothecary. You may have spotted their travel candle in my recent gift guide and this one invokes the memory of lounging in a leather armchair in front of the fire. I'm down with that.
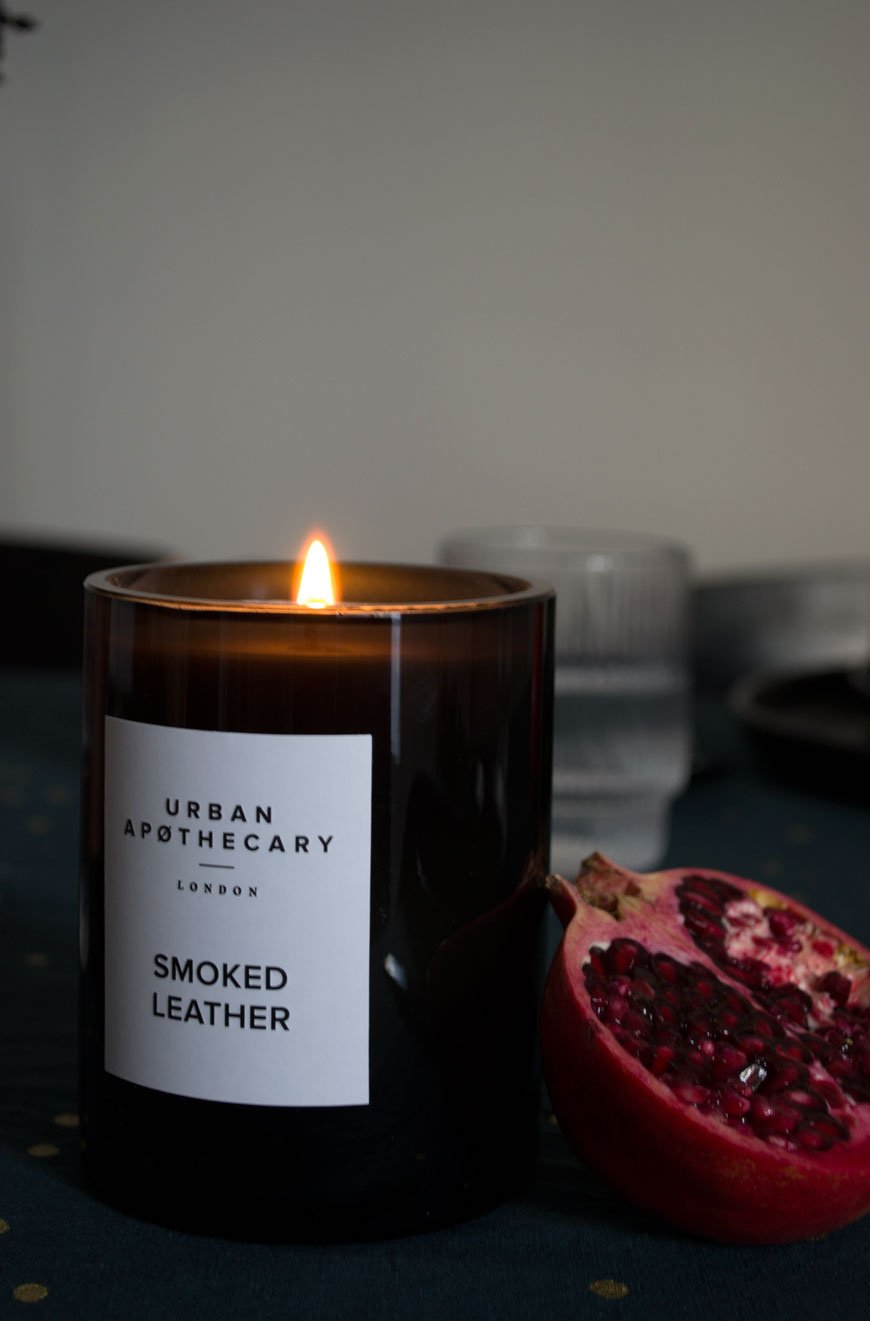
 Black flatware has been on my list of must-haves forever and this Turini set from Habitat adds a bit of chunk to an otherwise delicate setting. The Nordic Kitchen dinner plates make a striking alternative to white and I can't wait to see how the black brings out the pops of colour in the food - I'll be making a smoked salmon carpaccio to start!

My Tips For Styling Your Christmas Table
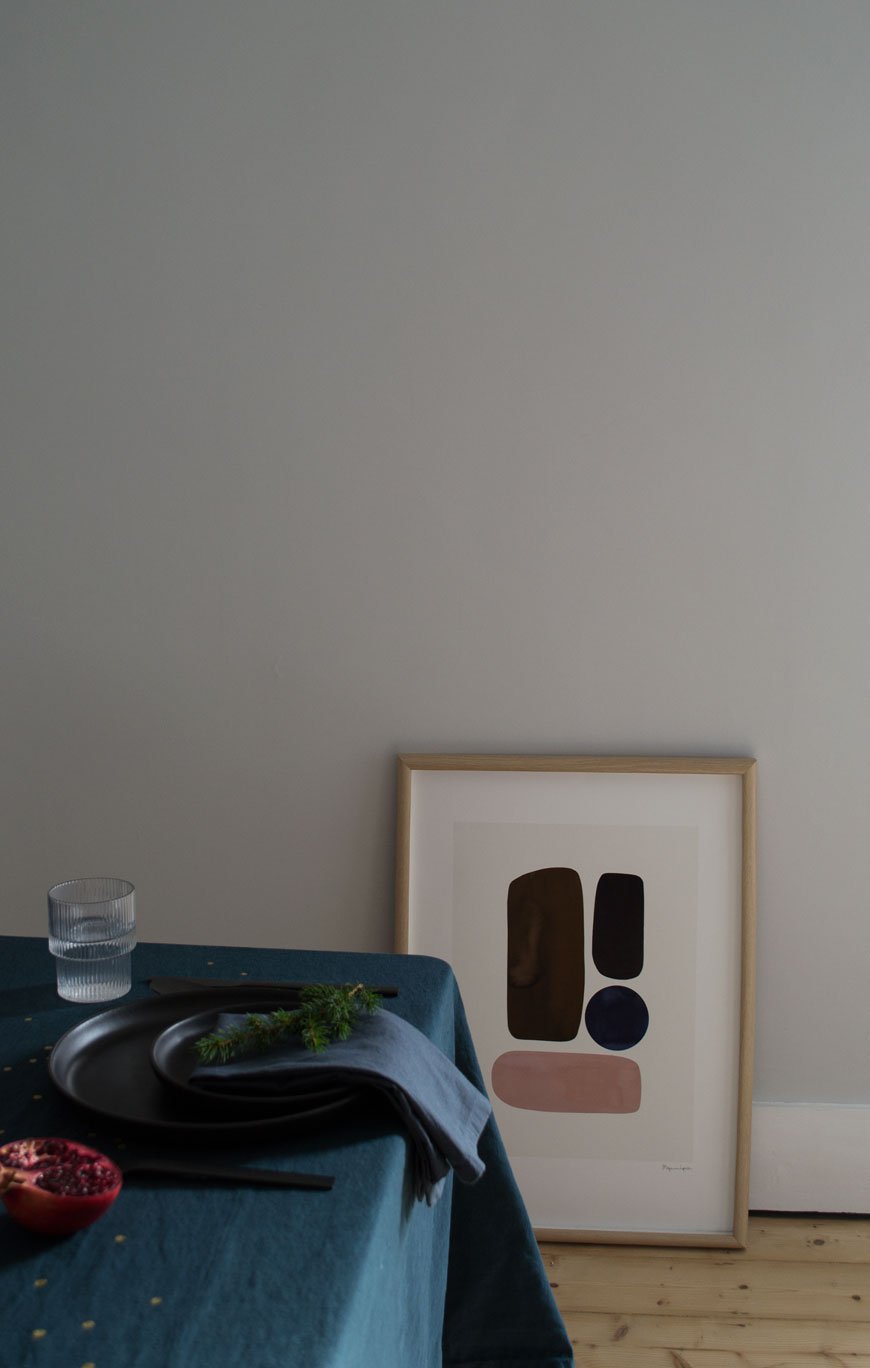
- Use paper napkins for a quick update. IKEA have an inexhaustible selection and Vitra's Eames Dot is a personal favourite.- Layer up your plates on top of each other. Not only does it save space but it also looks great with a carefully placed napkin tucked inside.- Mood lighting is everything. Use a mix of tall candles, tea lights or battery operated fairy lights woven into your greenery.- Make a runner of greenery down the centre of your table if you don't fancy a larger display. Simply layer sprigs together and hide the ends with interspersed candles or paper decorations.- Mix textures to give your styling depth. For example, linens mixed with polished metal and cut glass to refract the light. Use velvet or string to tie your napkins.- Supermarkets are full of herbs and small potted fir trees if you're stuck for foliage. Try a mix of rosemary and bay for scent and pomegranates, figs and clementines for colour.- Remember to leave space on your table for serving dishes, bottles etc. Less is more from a practical perspective too!Check out my Scandinavian Christmas table from 2015 and find more inspiration on my Pinterest Christmas board.Lina Ardoise Golden Dots Tablecloth* - La Cerise sur le gateauNordic Kitchen black dinner plates* - Eva SoloTurini matt black cutlery* - HabitatFerm Living Ripple glasses* - AmaraVerona brass candlesticks - MADE.COMTerracotta pitcher - Another CountryGrey candles - Broste CopenhagenSmoked Leather scented candle*- Urban Apothecary LondonBerit Mogensen Lopez abstract art print* - The Poster ClubDisclosure: This is a sponsored post - all credits and products involved are listed and marked* and have been gifted to me in exchange for this post.Photography & styling © Tiffany Grant-Riley
Bedroom Renovations | An Update On The Chatham House
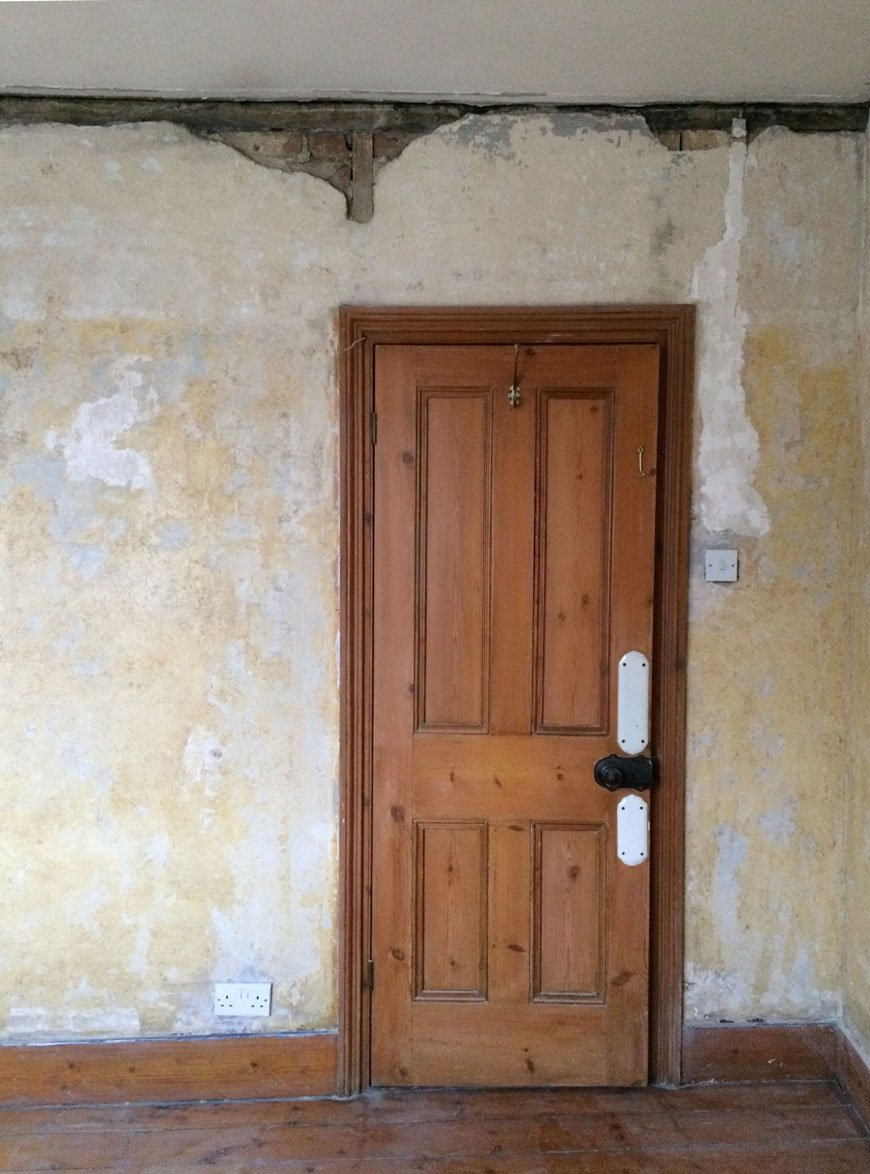
 Would you believe it's been an entire year since we moved into The Chatham House? As it's been some time since I last shared any progress of the house, I thought I'd show you what's been happening with our bedroom renovations. Firstly, the one decorating task I absolutely love doing turned into the biggest chore of our lives. Stripping wallpaper. I have no idea what paste the previous owners who put all that lining paper up actually used, but let's just say it was something close to super strength super glue. Wow. No amount of turning the room into a sauna and attacking the walls with super sharp strippers could get it to budge. And you know that where there's wallpaper, there's usually a whole host of blown out plaster? Yep, that. Take a look at what lurked beneath...
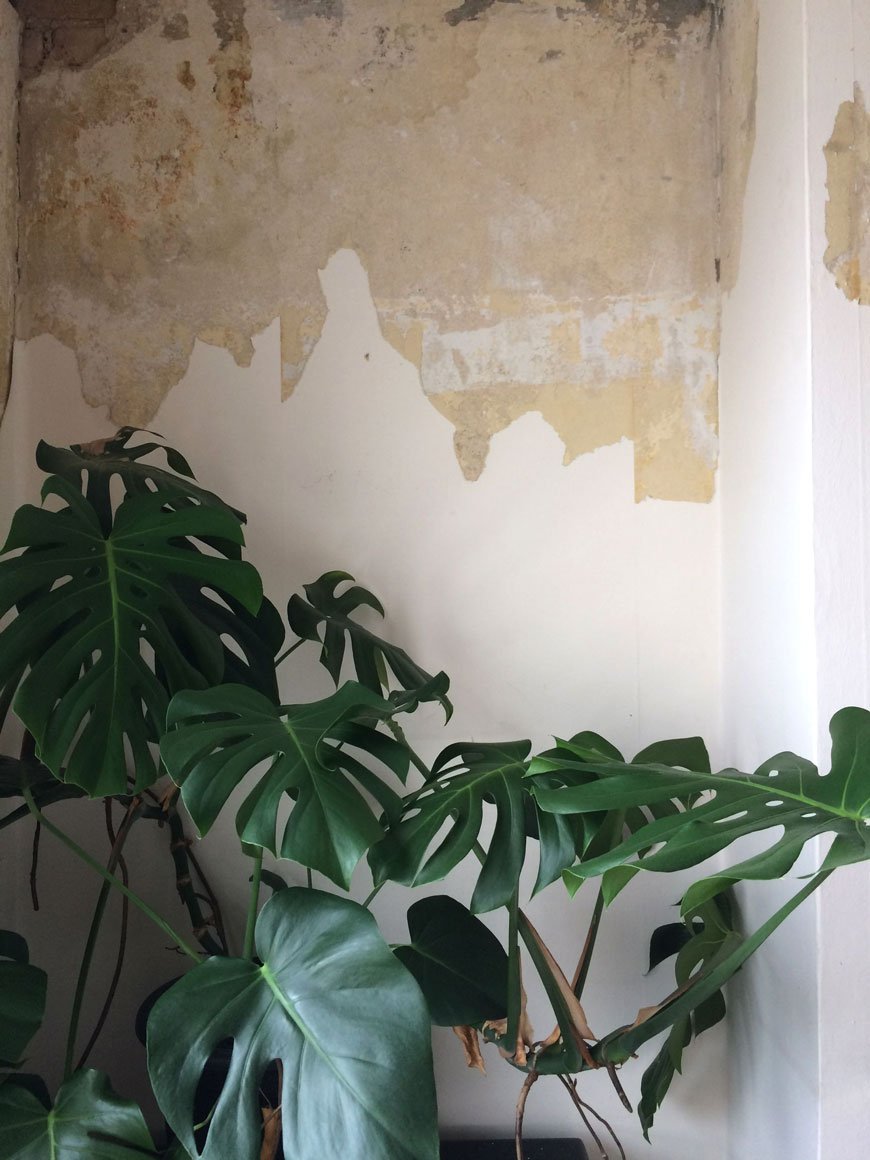
 Once we'd knocked out all the blown out plaster, we got a fascinating look into the past - right back to the old brick and timber structure and some of the original horsehair plaster. I really do find that fascinating! Unfortunately, what we weren't quite ready for is the howling gale the lack of plaster between the walls and loft above created during the night as it blew tiny bits of rubble onto the floor.
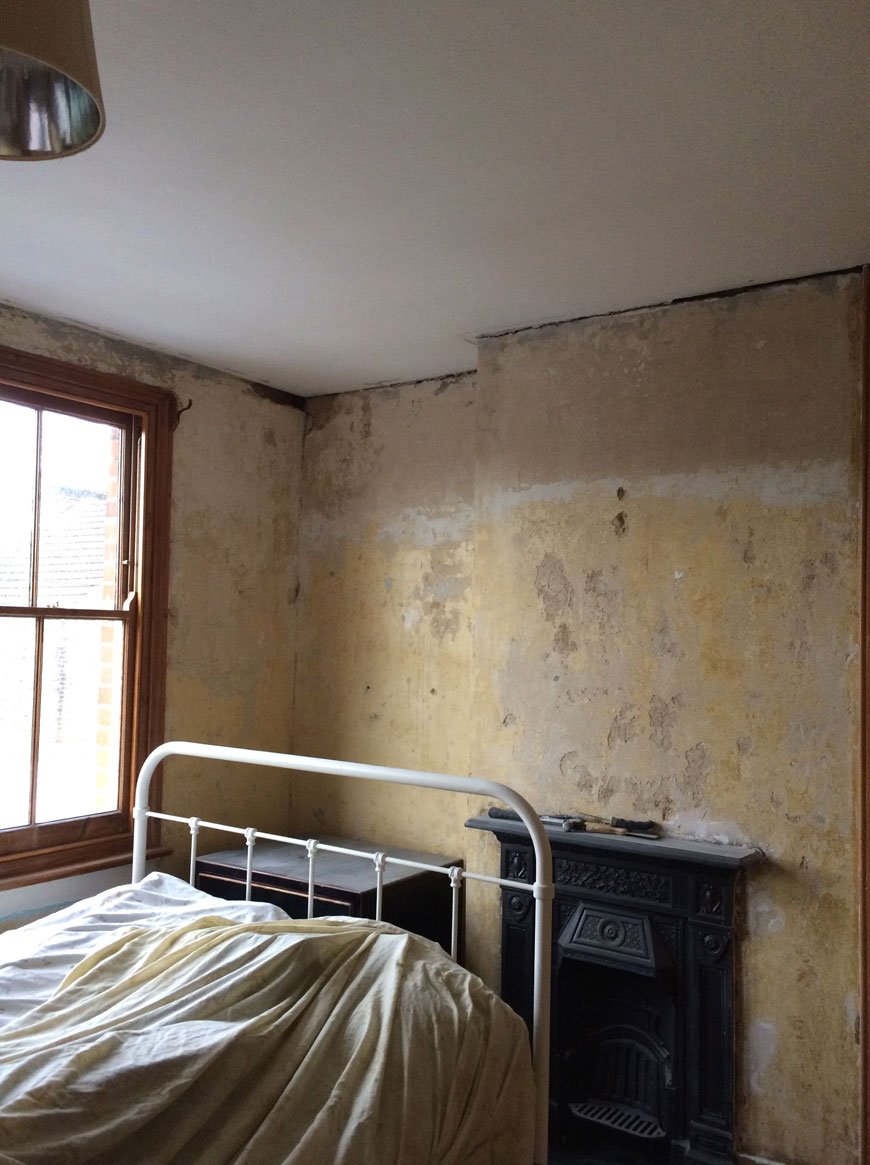
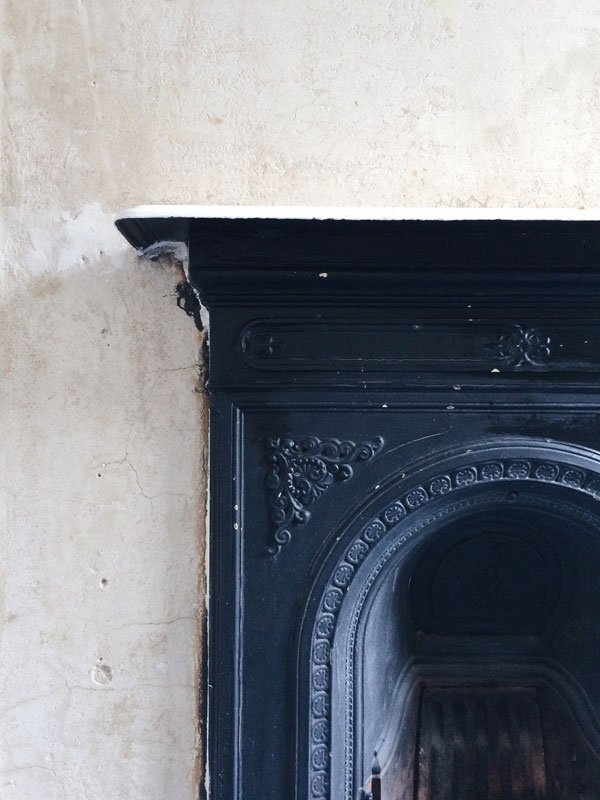
 It took the plasterer all of one day to smooth off the walls, seriously impressive. It's a little touch-and-go with parts of the walls where the polystyrene coving was as there are still a few small gaps. He recommended we get more coving. You can imagine what I said to that...
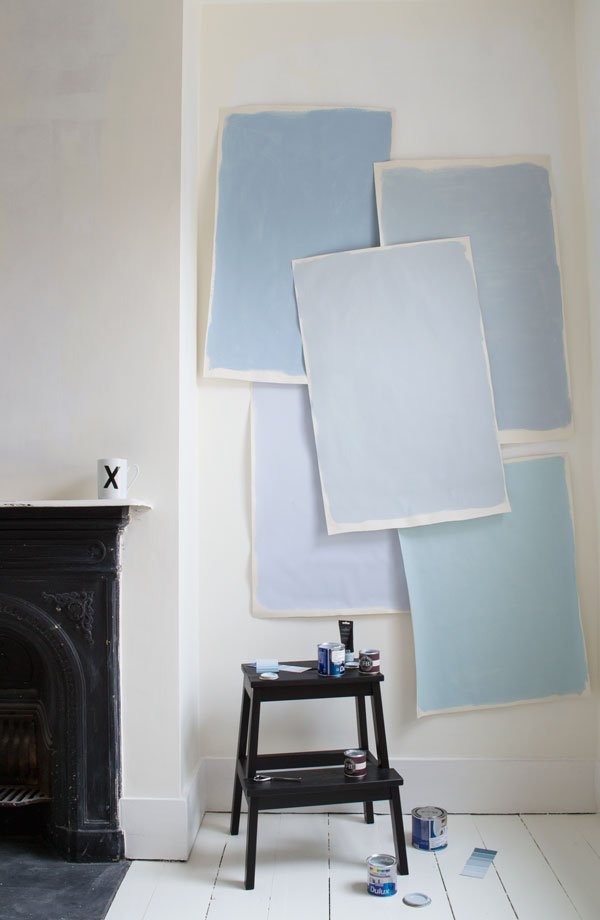
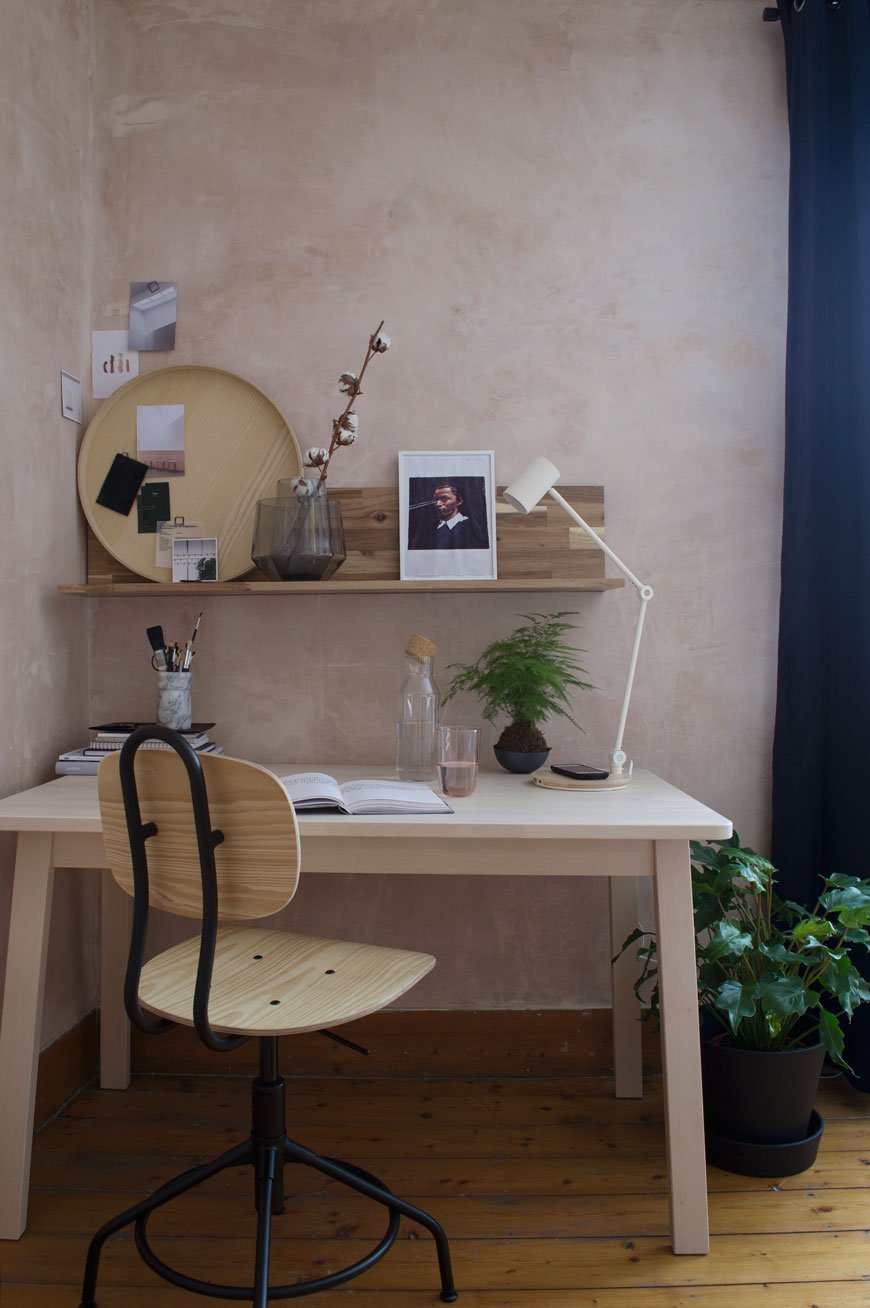 But anyway, this is how its been looking since April - admittedly I used an upcoming collaboration for 91 Magazine's spring issue with IKEA to get the walls done, using that blushing plaster as the perfect backdrop for the project. I turned a corner of our room into a workspace for me and gave the rest of the space an update more fitting to our style. We've really loved keeping the walls bare and honestly, I'm reluctant to pick a permanent colour right now. I change my mind constantly between plaster pink, pale grey and mid-blue. The next task will be to sand back and stain the floors with a light white wash to bring out the grain and I'd like to paint the sash windows to blend with the wall colour. When we eventually get round to choosing. Oh, and I've never painted sashes before - should I get the pros in? What do you think?


 Want to keep up to date on our house renovations? Follow #thechathamhouse on social media and check out The Chatham House Pinterest board for more inspiration...Photography & Styling © Tiffany Grant-Riley
Botanical Scandinavian Sunroom Makeover - The Reveal
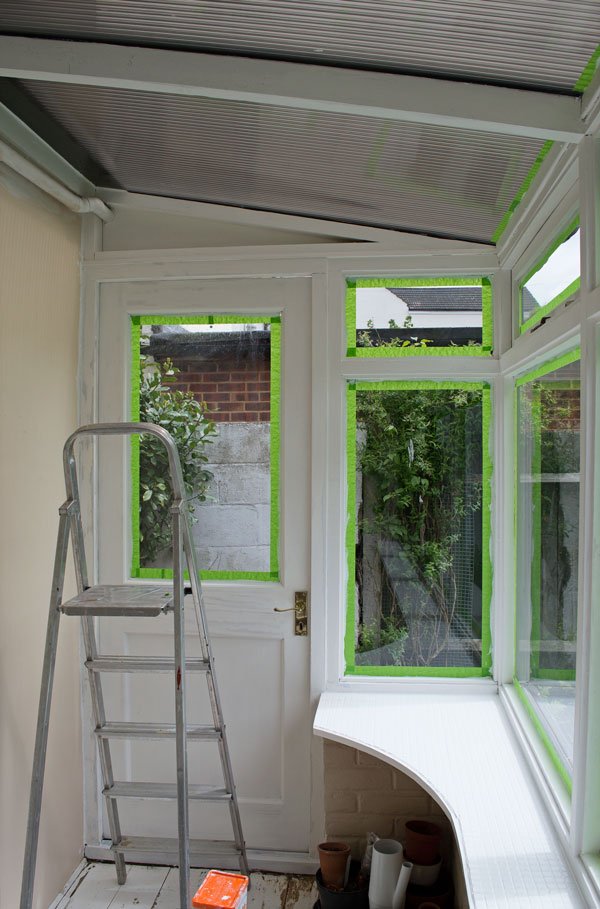 If you saw my last post, you'll know I've been working on a small scale makeover to give our tired little sunroom a refresh. When I started two months ago, I thought it was going to be relatively straight forward - and it was in that for the most part it only involved paint. But painting anything well takes time and preparation. So this is where I've been spending any spare moment of my time of late, come rain or shine, paintbrush in hand with a very clear vision of the finished look in my mind to spur me on. I might as well have moved in here, seeing as the kids always knew where to find me when they discovered I was missing!As this is really only a temporary space (no insulation or heating and windows rotting on the outside) there was little point in re-laying the floor or replacing the windows, so instead I focused on the cosmetics. The biggest challenge was prepping the woodwork, which was not only badly painted in several coats of aged gloss paint, but the wood hadn't been treated properly when the structure went up, so I was often sanding off sticky old wood sap as I broke through the layers with the sander. I gave everything a very brief keying to prep the surface and found a brilliant ultra grip primer, formulated for difficult surfaces and aged paint. It made life so much easier when it came to applying the top coat. You can find all the product information in the source list at the end of the post.
 I used masonry paint across all walls to help protect them in the colder months. The old paint had been peeling off in places so I needed something to stand up to all conditions and hopefully avoid it happening again. As it gets a lot of light in here, I chose a white with blue undertones to take the edge off slightly.
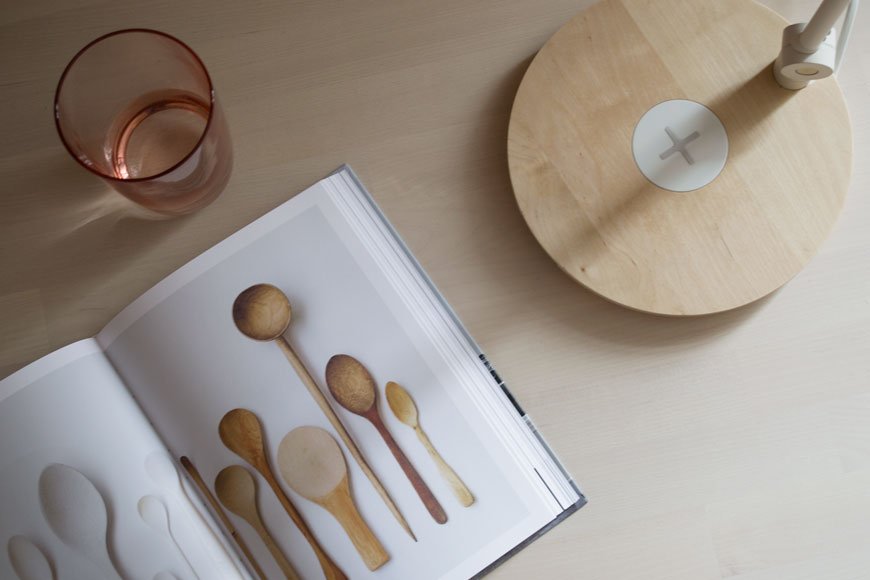
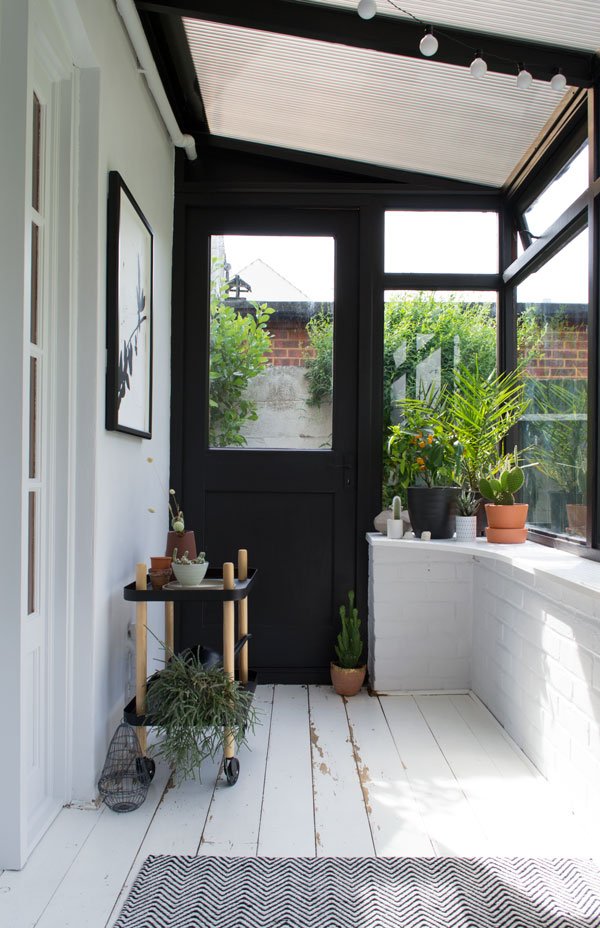 And here it is. Bright, minimal and contemporary, just the way I like it. It feels like the space I've been missing since we moved here and it's so lovely to see everyone drawn to it when we're all at home. Don't the black frames completely transform it? Not quite Crittall windows but it's a great start! Notice how they frame and bring the garden inside? There's space for additional seating - I have a couple of stools which can sit by the windowsill and there's enough floor space for one or two large floor cushions.I wanted to introduce a little warmth into the space, especially as a monochromatic scheme can feel somewhat cold, so I brought out the earthy tones to compliment the lush green planting. From a collection of terracotta pots, a beautiful Ian Mcintyre pitcher, to my newest love discovered at Clerkenwell Design Week - the DUO table lamp, these tones really pull the space together.The pine door was such an eyesore, it pulled the attention away from the garden when we would sit in here, like an orange beacon of misery. It was given a couple of coats of the same white as the walls to blend in with the rest of the space and feels much calmer now. You'll notice I did the door handles and window latches in the same colour to save replacing them all.
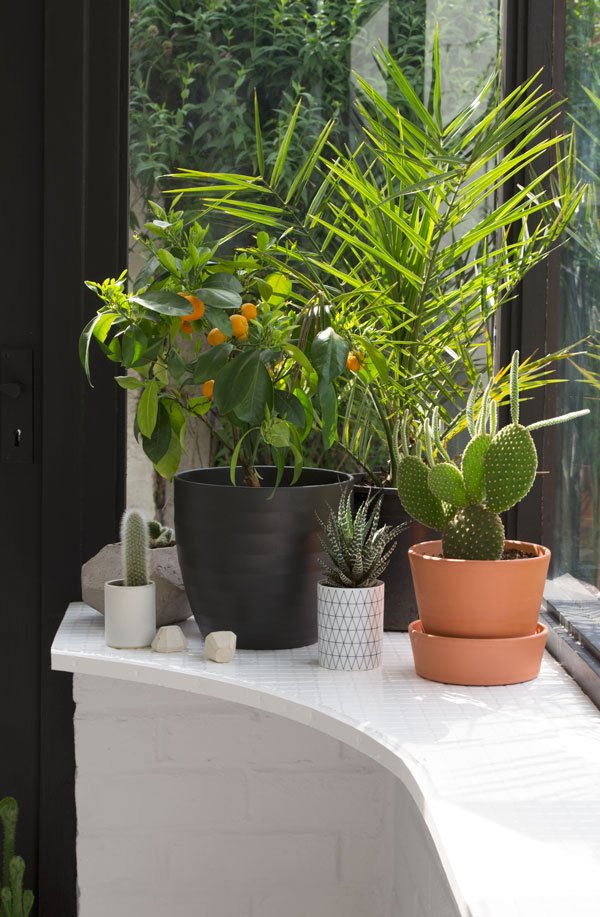
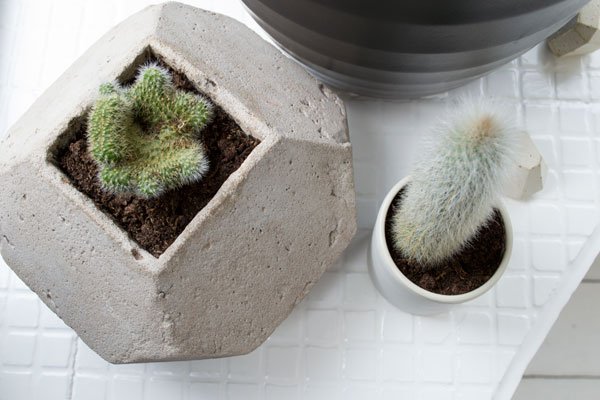


 At this time of year this room has the perfect conditions for heat and light loving plants. I've bought a date palm (pictured next to my citrus tree which was flowering heady scented blooms all spring) and an Areca palm for height at the back of the room. I took the opportunity to repot some of our cacti from the kids room too and I'm completely in love with the fig which comes from Valencia so it's used to sweltering summers and cold winters. I wonder if it'll ever bear fruit? Either way, everything in here will be happy until the colder months come and then I'll bring them into the main house and swap them with others.The black Normann Copenhagen Block trolley has long been a much coveted design, it's such a versatile piece. I can use it for repotting and watering, store blankets over winter or stack it up with magazines. I've already used to it host dinner on whilst I was still painting and it was a nice touch to serve from it.
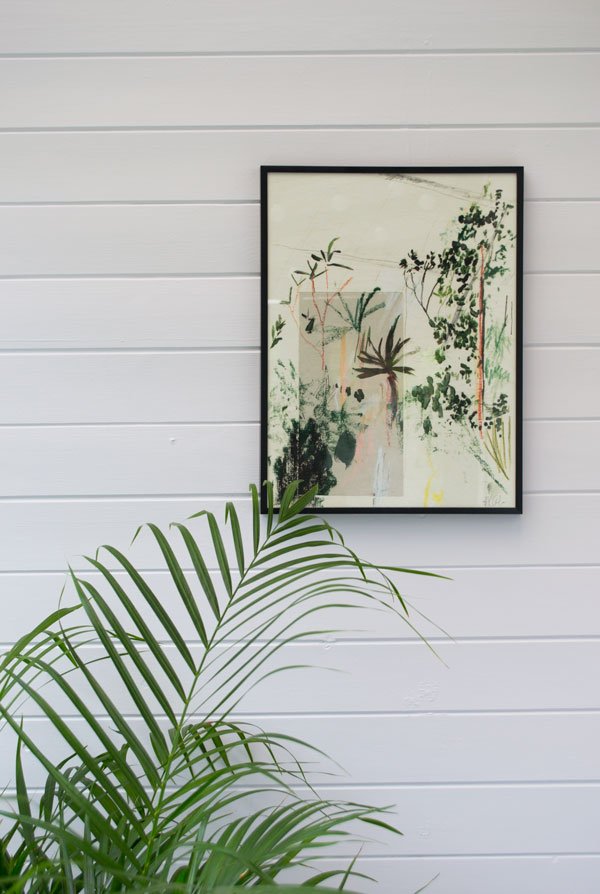
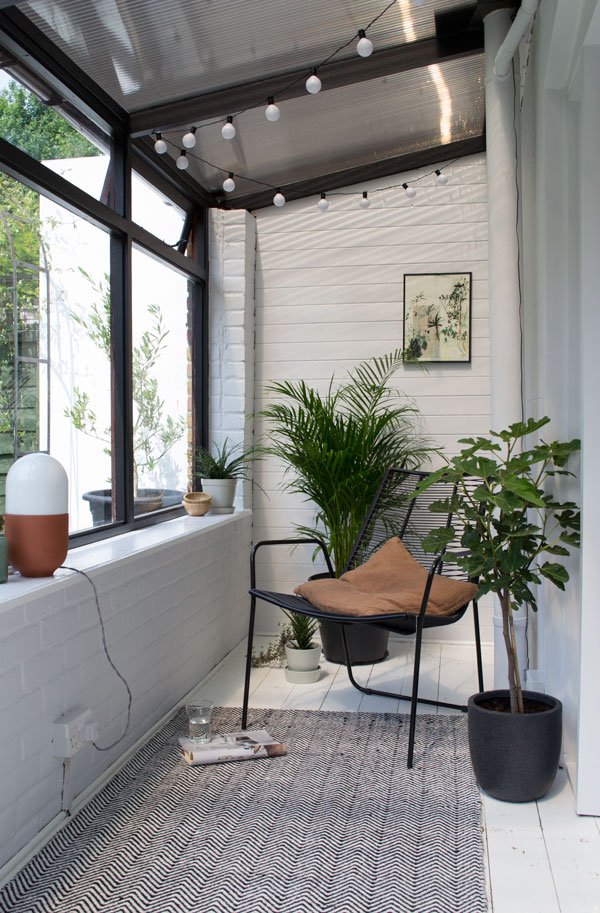 Initially, I'd planned to find an indoor/outdoor rug, but as the dimensions in here are so tricky I landed on the cotton and jute weave Ives rug in a herringbone pattern from Houseology. I love that it brings in a contrasting texture against the rough floor and echos the woven lines in the Lene Bjerre April lounge chair. The thin frame and see-through seat still leaves a feeling of space and it's extremely comfortable to sit back in.Over time I've been collecting botanical art work, and whilst I might eventually move these to the living room where I'd like to include them in a gallery wall, they sit well in this space.


 My next plan will be sourcing blinds for the lower windows as it can feel a little exposed to the houses at the back in the evening. I also want to make sure I can protect the plants from strong sun. Oh. And fill it with a lot more of them, of course.So, what do you think? Maybe I've inspired you to give your garden an update?Source List:Wall paint: 'Sleeping Inn' white masonry paint, Valspar.Wood & metal paint: 'Village Smithy' black paint in premium eggshell, Valspar | 'Sleeping Inn' matt premium eggshell, Valspar.Tile paint:Wood primer: Ultra Grip white primer, Dulux Trade.Herringbone Ives rug: Houseology*.Black Normann Copenhagen Block trolley: Houseology*.Linum jute cushion in rust: Holly's House.Lene Bjerre April lounge chair: Houseology*.Terracotta pitcher: Another Country.Black and white botanical leaf print, Chocolate Creative.Abstract botanical print, Alicia Galer.Terracotta and opaline glass Duo table lamp: Hand & Eye Studio.LED Festoon lights: IKEA.* This post was written in collaboration with Houseology.Styling & Photography © Tiffany Grant-Riley Want to see more of our home renovation projects? Follow #TheChathamHouse on Instagram for all updates...
Botanical Scandi Sunroom Makeover - Before
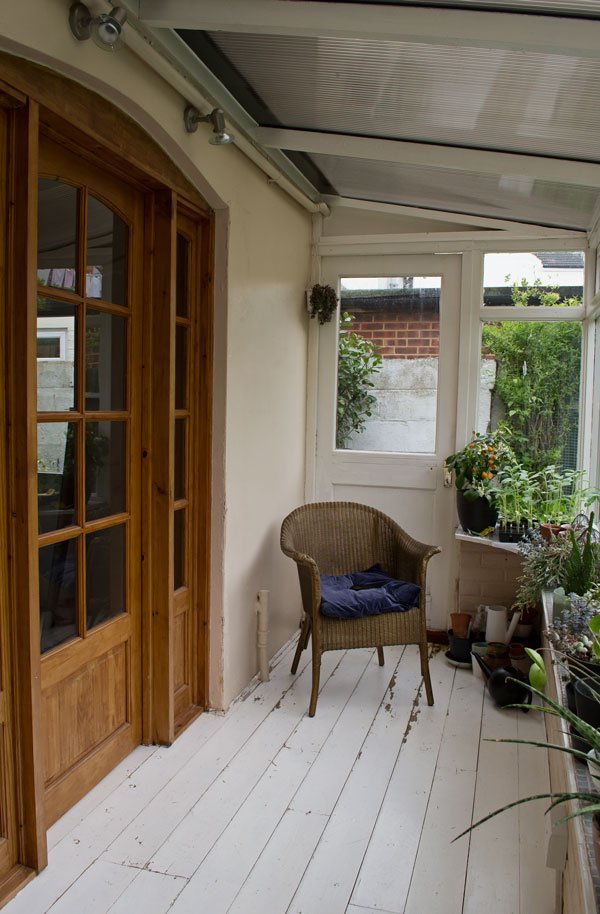 There's all sorts of quirky spaces in this house, one of which is my favourite to spend time in although technically it's not really a proper room. The 'sunroom' as it was called when we bought the house is a borderline dilapidated structure, clearly put up in a hurry. The floor is rotting by the external door, as are the window frames on the outside. Methinks I spy a bodge job! Those things aside, I absolutely love to sit in here, watching the birds flit from the hawthorn tree across to the feeder. I watch the sun sets, thunder storms and listen to heavy rain drumming on the roof as I tend to my family of plants. If we decide to stay long term, we'd like to pull this extension down and rebuild it, knocking through from the kitchen behind, but for now I just want to give it a unified look so that it feels like an easily identifiable space.
Hot, Hot, Hot
As a makeshift room, it's not insulated or heated, meaning sweltering temperatures in summer and freezing cold in winter. I learnt a very big lesson before we officially moved in. Trying to get ahead of the game, I'd started moving some of my plants into here but then had to lock all the doors and windows while the house was left unattended. Needless to say, the high temperatures made only worse by the unseasonably warm October weather and the perspex roof slowly cooked them all to a crisp. Some of those succulents I'd had for over six years! Six years I tell you! Not to let something like that put me off though, I've sinced researched plants that enjoy high heat and lots of light, so for the summer months they'll be in here and in winter I'll switch them out for the plants that love colder climates.
Awkward Space
The sunroom is very narrow and long which rules out having a small sofa or bench inside. As a compromise, I've decided on a combination of lounge chairs, stools and floor cushions which can be changed around and moved depending on who is using the room.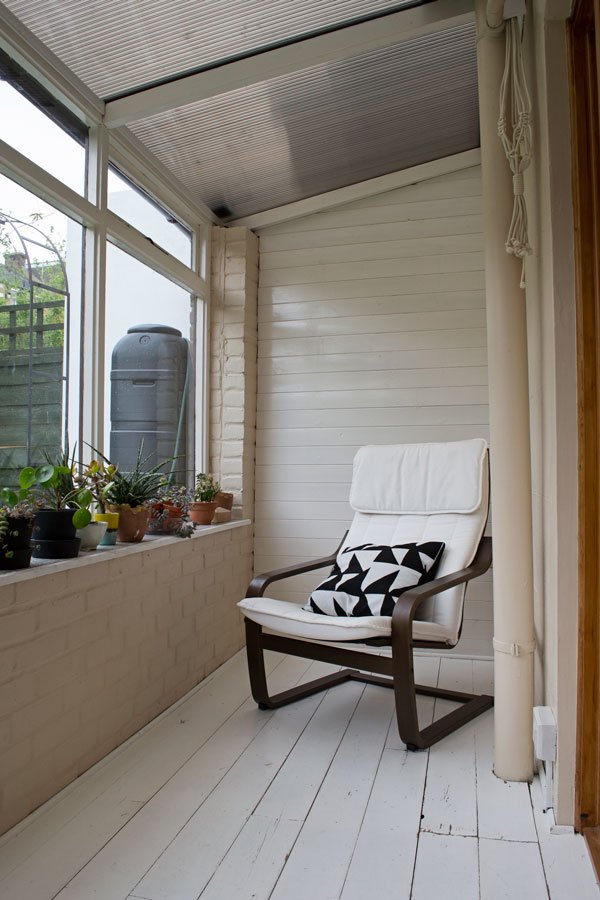
The Inspiration
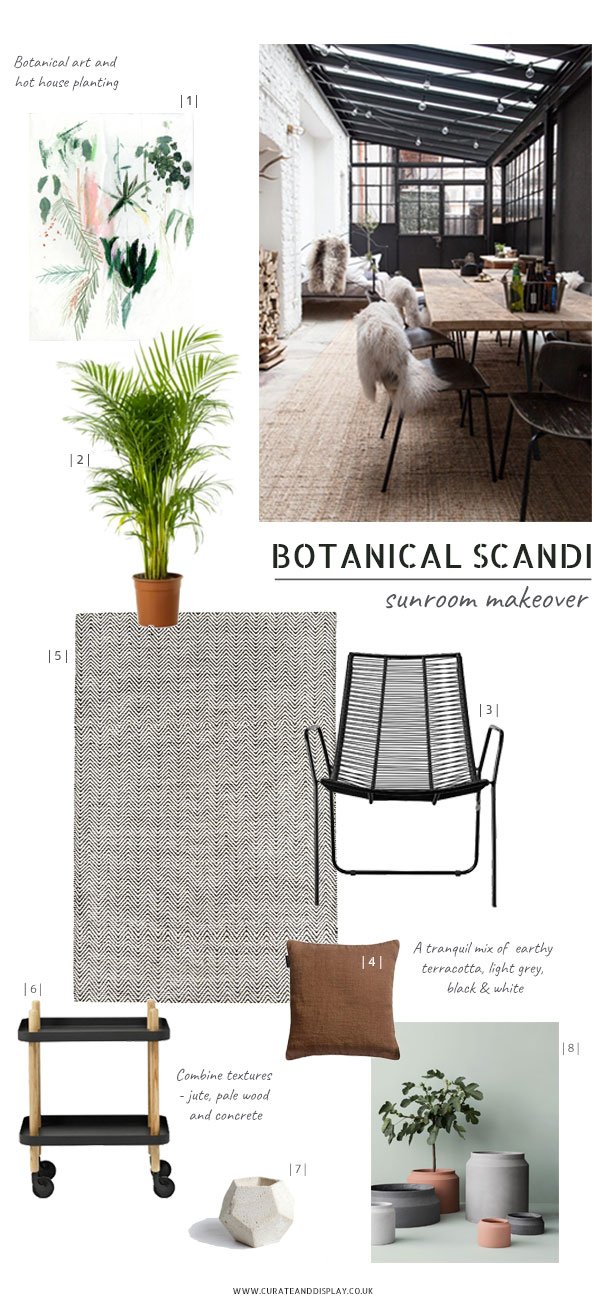
|1| Art print, Alicia Galer |2| Palm |3| Lene Bjerre April lounge chair, Houseology |4| Raw cushion in Rust jute, Holly's House |5| Black & white herringbone Ives rug, Houseology |6| Normann Copenhagen Block Trolley, Houseology |7| Leila concrete planter, Concrete Jungles |8| Terracotta pots, Ferm Living | Image © Wertvoll Fotografie
Ever since I came across this jaw droppingly beautiful garden room on Pinterest (above) belonging to photographer Petra Reger, I've had it in mind to take the best elements from it and apply it to what I have. No, I don't have the structure of those black aluminium framed windows, or space for a dining table, but I have textured brick walls and window frames I can paint. I want the space to feel contemporary, to draw the eye towards and frame the garden outside. I'm going to blend a monochromatic base with terracotta details and layer up on the plants - I never need an excuse to do that!
The Plan
To refresh the ambiguous pink walls I'll be painting them white, but I want to choose a shade with blue undertones so that it's not so glaringly white in full sun - I don't want to be wearing shades in here!The wooden floor will stay as is, the distressed look gives the room character and added texture and I always like to leave part of a room untouched in some way.You might not be able to see from the photos, but the window sill has been laid with a pearlescent blue mosaic tile. I hate it, so I'm going to give it a couple of coats of white tile paint for a better backdrop for the plants to sit on.The orange pine door will also be treated with a coat of fresh white the same shade as the walls to blend with the rest of the space. There's just no excuse for 90s orange pine now people.The two spot lights above the door are pretty awful when you're trying to relax in the evening - you feel on display to the neighbours behind our garden. I'll be using festoon lighting hung across the roof struts for a softer, more intimate light.If you've noticed my absence from the blog in recent weeks it might go some way to explain that - I've been working all the hours I could find to get the room ready to share with you next week. Let me tell you, it's quite the transformation! What do you think of my plan? Do you have a garden project of your own?Want to see more garden inspiration? Check out my In The Garden board on Pinterest and follow #thechathamhouse on social for more of our home renovation updates.
IKEA Room Refresh in NEW 91 Magazine
 I know, I know - I've been quiet for a while. But there's good reason, I promise. For one, I've been having a ball styling and shooting a feature with IKEA for the latest issue of 91 Magazine. As part of their Room Refresh series, I've used our newly plastered bedroom (don't you just love those beautiful walls??) to show how I've integrated a bedroom workspace using the Norråker table. The magazine is out now and you check out how stylists Clare Piper and Laura Sawyer used the same table in completely different ways. It's yet another gorgeous issue, exploring slow living, independent shops and interior style, a perfect accompaniment to your Saturday morning coffee.WIN - IKEA is also giving you the opportunity to win a £250 gift card when you share your own Room Refresh with Ikea products using #ikearoomrefresh.In the meantime, I'm working on a little house project here to transform our sun room into a more liveable room - look out for the first post next week...
 Pick up a copy of 91 Magazine S/S17 in digital or print directly online or through a local stockist.
Styling & Photography © Tiffany Grant-Riley
Modern Scandi Kids Room Makeover - The Reveal
 When we bought this house, it was sort of a given that we were going to tackle the kids room first as we wanted them both to feel settled in the new place as soon as possible, surrounded by familiar things from their old room but with a few new and exciting additions too.The room itself is on the whole really light, so we wanted a clean, modern space with accents of grey-blue (check out my inspiration in this post). We knew it wasn't going to be a quick job as four out of the three walls needed re-plastering and we'd decided to sand back and paint the wooden floors, but it took longer still to finish whilst navigating the chaos of moving and settling in and every day life. Aside from the plastering and replacing the radiator, we did everything ourselves and its been a great starting point for the rest of the house...although I won't be painting any more floorboards.
 Essentially, everything needed stripping back so we could get a better idea of what needed attention. The carpet came up really easily (no underlay underneath either) revealing the hearth plate on the fireplace underneath and beautiful, really dirty floorboards. Seriously exciting. The walls were a little tricker as we had to remove the shelves from the alcove which had more or less been screwed in and painted onto the wall. Years worth of gloss paint to hack off to get them off. And then there was the polystyrene coving across the top of the ceiling which had to be chiselled off at the same time as the lining paper. The other delightful thing about this house is trying to locate and remove all the strange cable and phone line ports which have been added over the years - there were a few in here too.
 The floors were given two coats of Wimborne White by Farrow & Ball which gave great coverage and I have to say is holding up well to the sort of everyday abuse wooden floors get from small children-toy car traffic, chairs dragged across the floor etc. If you're tackling a similar project and are as clueless as we were when we started, take a look at out (almost) definitive guide to sanding and painting wooden floors.
 Rob did most of the fiddly painting such as a fresh coat on the ceiling and the cupboard doors were really his project whilst I focused on the walls and skirting boards. After weeks of umming and ahhing over the perfect shade of grey-blue for the woodwork, I picked 'Celestial Blue' by Dulux. The paint didn't need thinning at all and only two coats were needed.
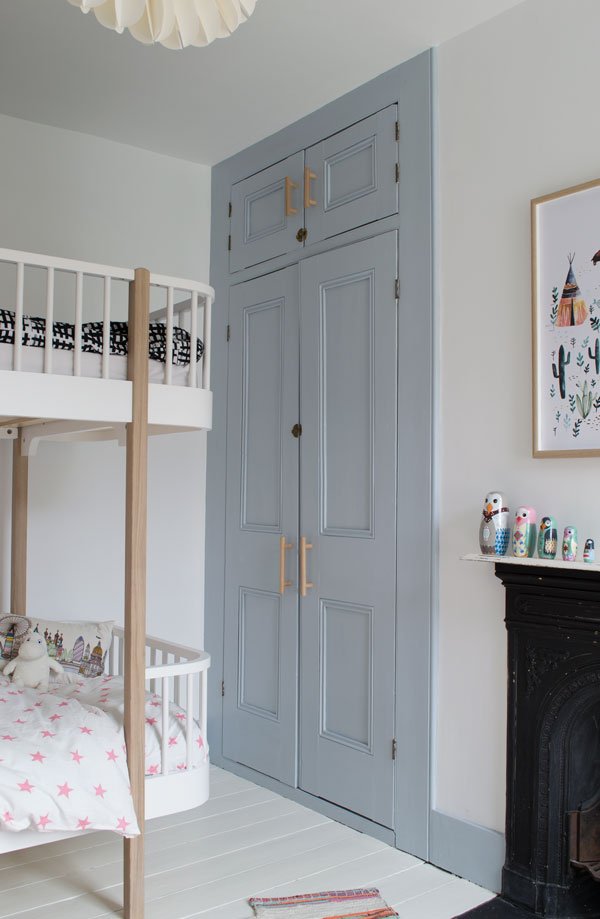
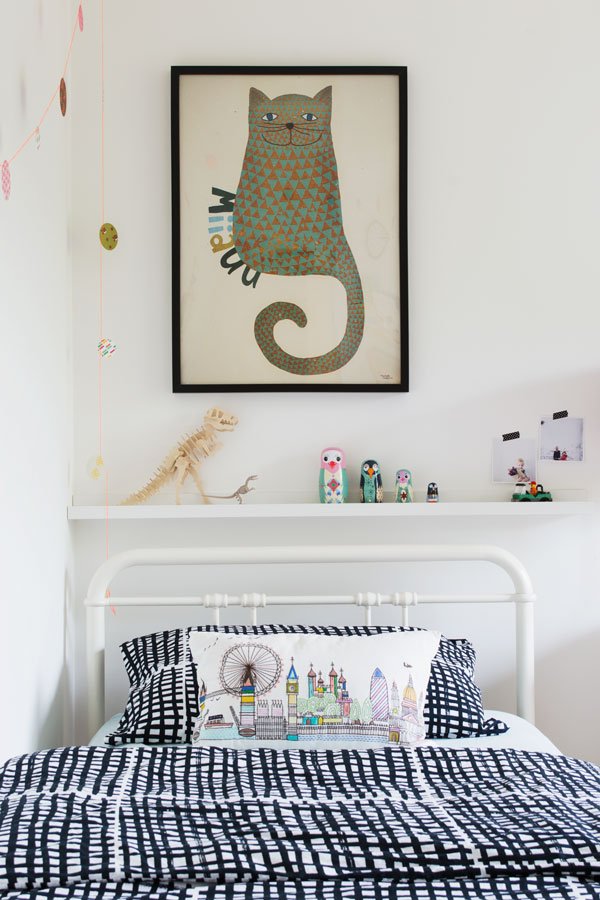
 The original Victorian cupboard is my absolute joy. I'm honestly so chuffed I took a gamble and decided to paint it. There's so much orange stained pine in the house which I find a little over-powering, so I overcame my fear of painting original features and jumped in with both feet. This is generally a really bright room, although typically it was cloudy on the day I shot it, but I love the way the tone of the blue changes at different times of the day. The beautiful minimal door handles are a bespoke design by Chocolate Creative (listed on the source list below) from plywood and birch and give a very traditional cupboard a more contemporary feel. It also means the kids can easily access all their books, games and clothes inside and I plan to restore and decorate the inside properly a little further down the line.
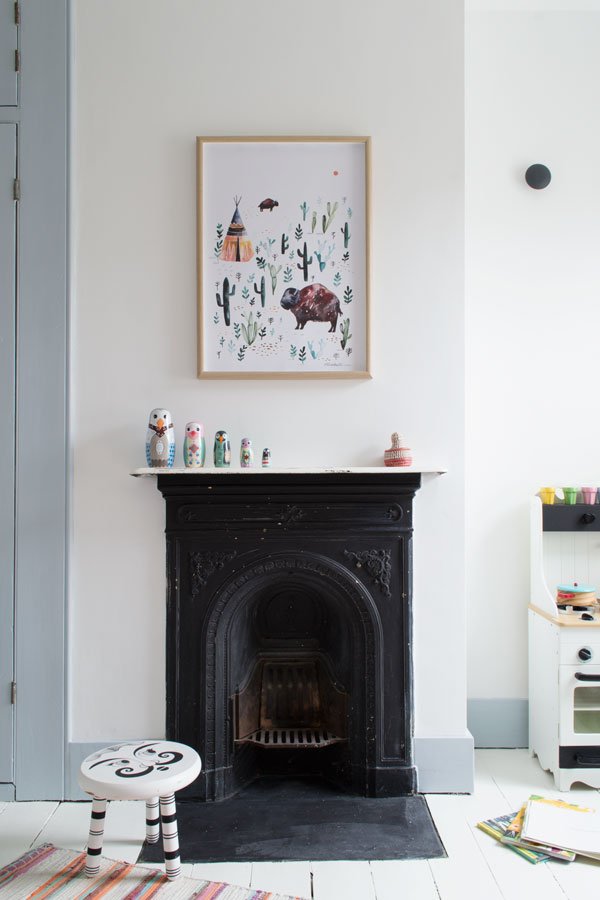 The only feature we decided to leave as was is the fireplace.You can see there are layers of paint underneath which over the years have been rubbed off in places. Much to my mother's dismay (she wants us to restore it) we love how rough and patchy it looks against the otherwise quite polished decor.
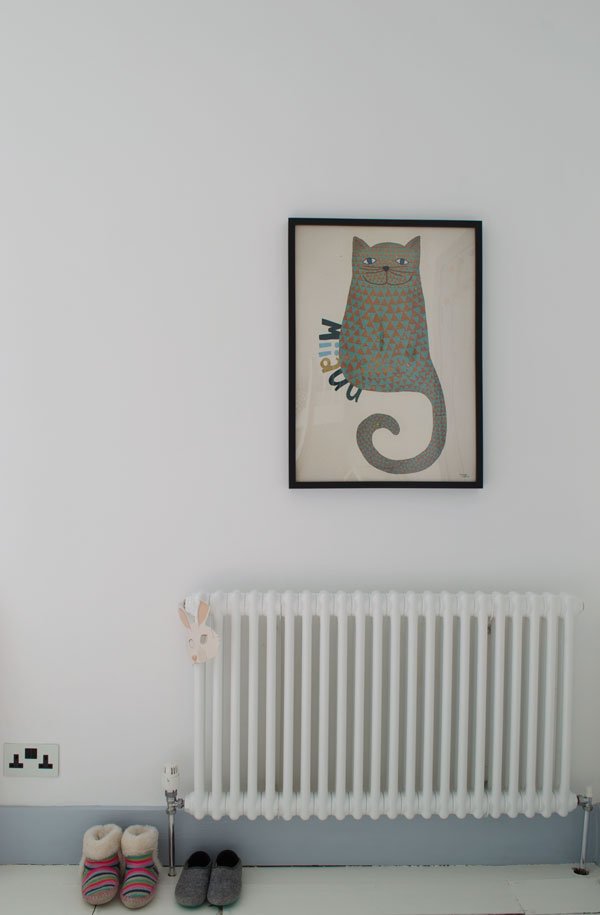 We replaced the old radiator with a new column and chrome pipes. I much prefer this style in keeping with the age of the house, but without the inefficiency which comes with original styles. Rob also wired in new white metal fronted sockets with black inserts, a new black toggle light switch and black ceiling rose from Dowsing & Reynolds. Small details make all the difference is a space this small.
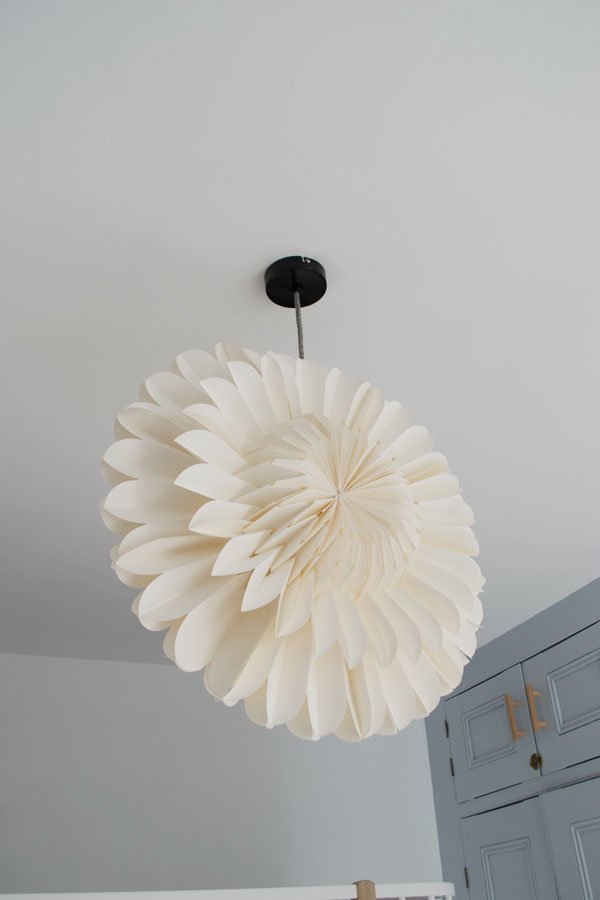
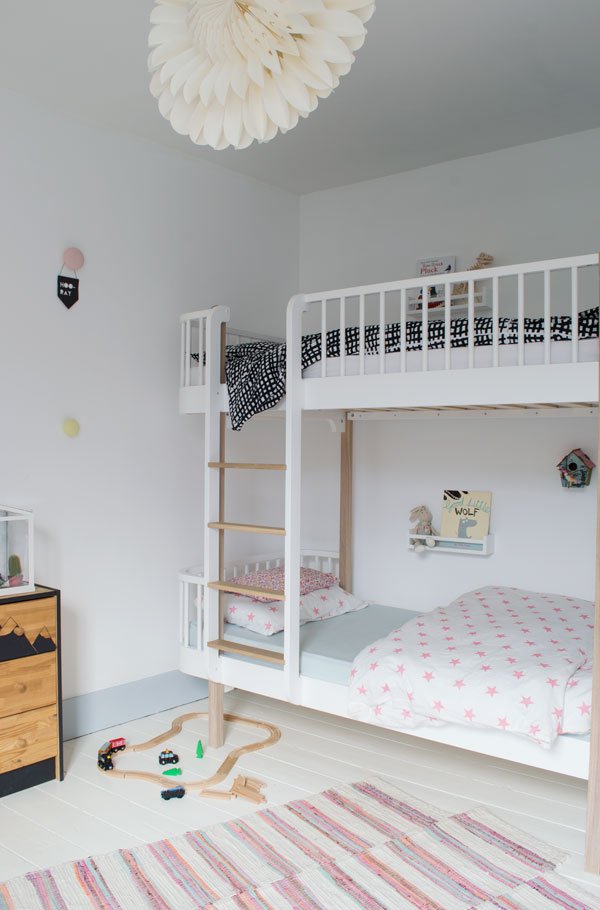 It was only when we put their new bunk bed together and moved it into the room that we really saw it all pulling together. This was the bed I'd had in mind for this room before anything else and I knew the kids would love the novelty of sharing it. The pale oak details tie in with other wooden details in the room and its fun, contemporary shape brings the room up to date. We bought two organic cotton mattresses that are curved to fit with the bed and are made from a combination of coconut coir, natural latex, natural fleece wool and unbleached cotton. They're a dream to lie on (which we've had to do several times) and the covers are completely removable in case they need to be washed.
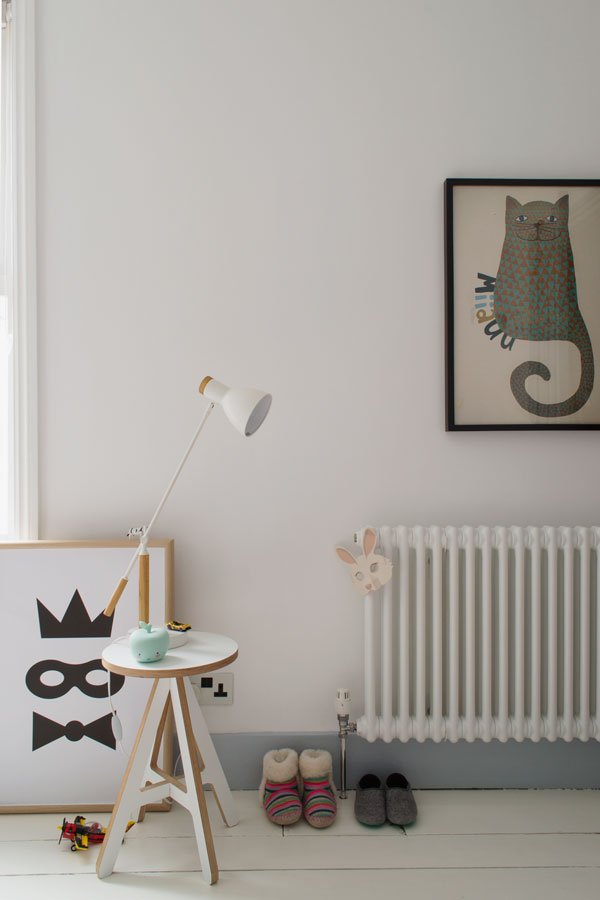

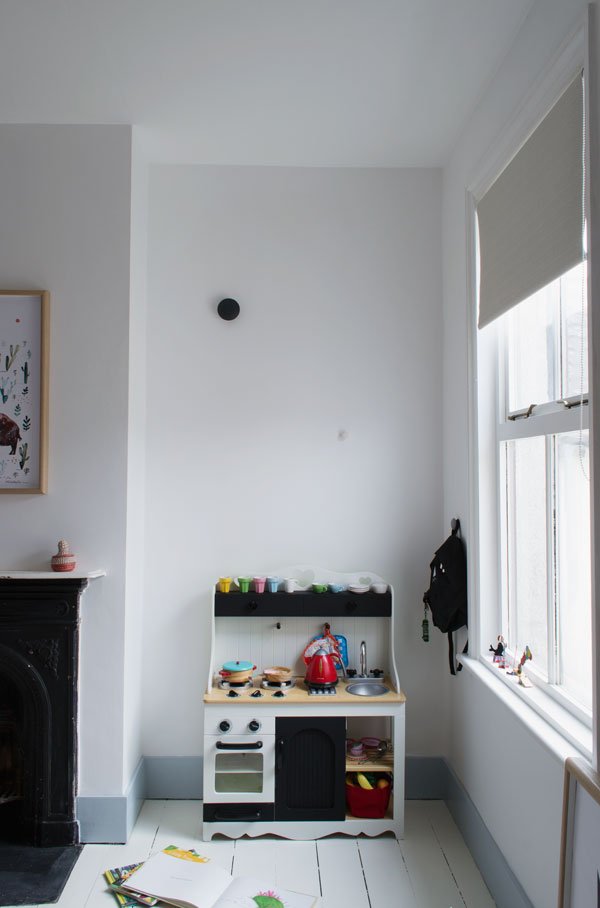 The little kitchen was given to us by a friend whose daughter had outgrown it. It was pink and green then, so I took it apart and gave it a monochrome revamp
 because I can't help myself. My daughter still isn't quite into playing with it yet, so if she's still not keen after a year or so, my plan will be to build a plywood box desk into this alcove that they can both sit at and be creative together.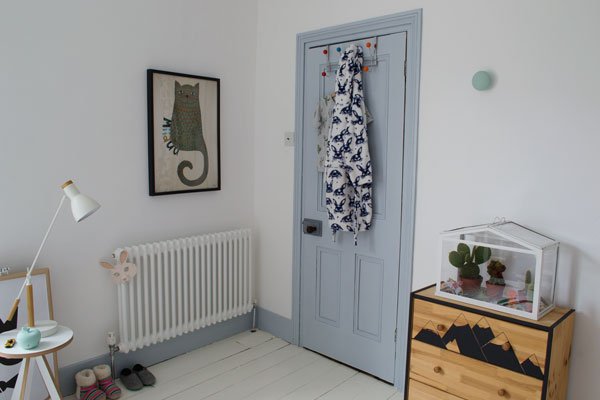 And there we have it. Room one down. Only the rest of the house to go...
•••
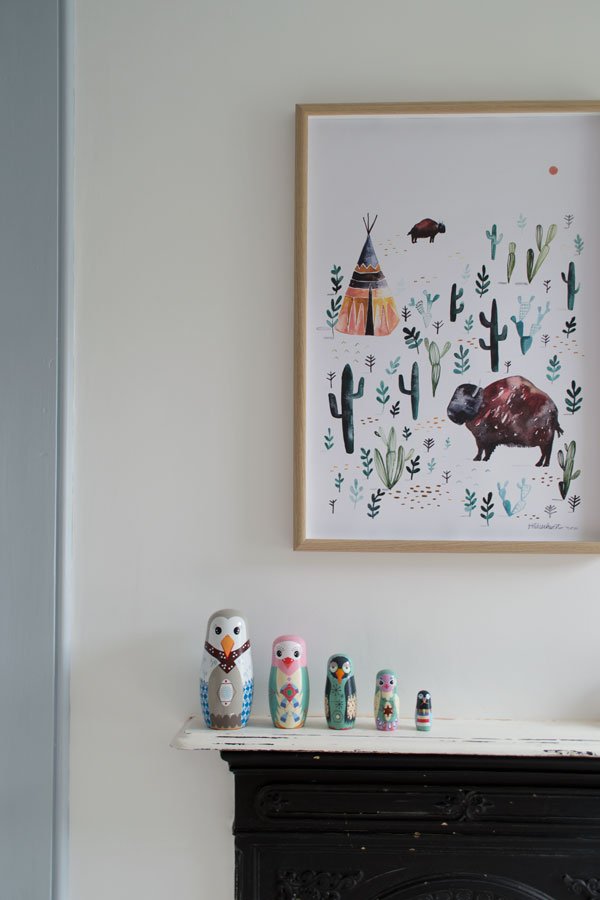
Source List:*White and oak bunk bed - Oliver Furniture, Nubie.Organic cotton mattresses - Little Green Sheep, Nubie*Dulux 'Ultra White' emulsion paint - Homebase.*Dulux 'Celestial Blue' wood paint - Dulux, Homebase.Two column radiator - Wickes.Porcelain wall hooks - Anne Black DK.*Bespoke 'bench' cupboard door handles - Chocolate Creative.Oatmeal linen look roller blind - Homebase.White 'A' Stool (used as side table) - ByAlex.White 'Cohen' table lamp - MADE.COM.'Socker' greenhouse - IKEA.Cacti, from a selection at The Hendersons.*Black and white sockets and vintage style toggle light switch - Dowsing & Reynolds.Black and white vintage stool - charity shop find.'Rast' chest of drawers - (painted) IKEA.Mini bedside shelves - (painted) Bekväm spice racks, IKEA.Pink, orange and blue rag rug - Zara Home (discontinued).'Bison' illustration poster - Gretas SchwesterBlack and white grid bedding - IKEA (discontinued).Pink and white star bedding - H&M Home.White paper lotus light - Bungalow DK.'Miiaaw' cat poster - Michelle Carlslund Illustration.Mask poster - Wild Boys & Girls.* Indicates where product has been gifted as part of this collaboration. Photography & Styling © Tiffany Grant-Riley
Sneak Peek Kids Room Update | When You Paint For Days
 No one ever tells you when you start renovating a place just how long it will take. Or that there may be minor set-backs, like when you choose the same shade of white for the walls as the floor and it turns out that it actually isn't the same after all (let's call it cream). So you then you complain and the paint company "runs tests" and tells you that actually it's fine and must be something to do with the way you prepped the wall (it wasn't, by the way).But it's all good. I've calmed down now, resolving to plump for Dulux's Ultra White (did you know it has light reflective particles in it?!) and I'm back with my last update on the kids room before the big 'before & after' next week. Before we do that, let's take a look back over our progress...Following this post where, having had three out of four walls re-plastered we then worked on painting the wooden floor, before cracking on with painting the walls, woodwork and installing a new radiator. Rob worked flat out repairing and painting the ceiling and putting in new electrical points (just you wait!)
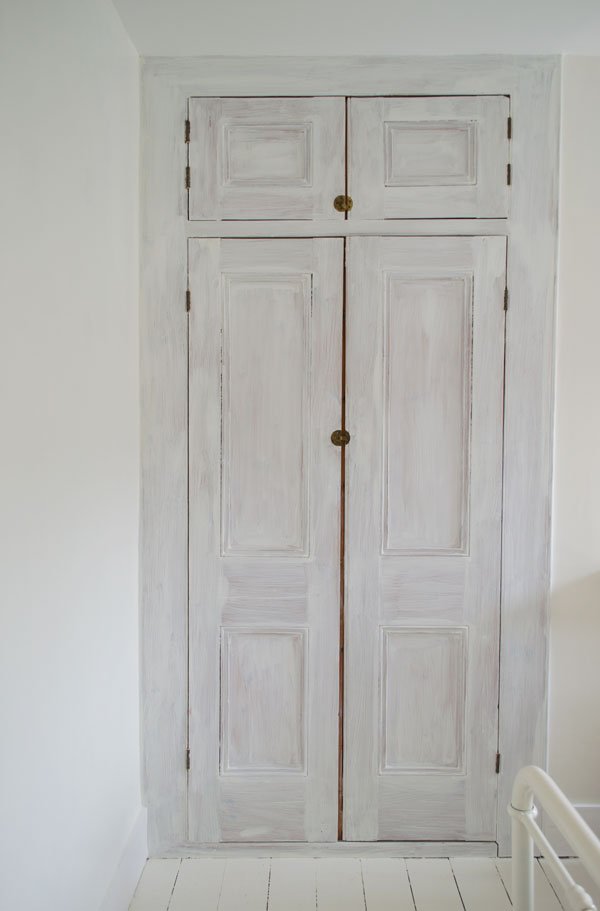 The original cupboard doors, which started out in orange pine, have been given a refresh and if you saw my recent post sharing kids room style influences, you'll have seen I was going all out on finding the perfect grey-blue to paint it with. Let me tell you, it wasn't easy finding the right shade - I must've stood for hours with tester paper all over the wall studying the light, trying Farrow & Ball's Parma Gray and 'Mount Fuji' by Crown to name a few but yet again Dulux came good with 'Celestial Cloud #4'. And it really is celestial. Ahhhhhh.
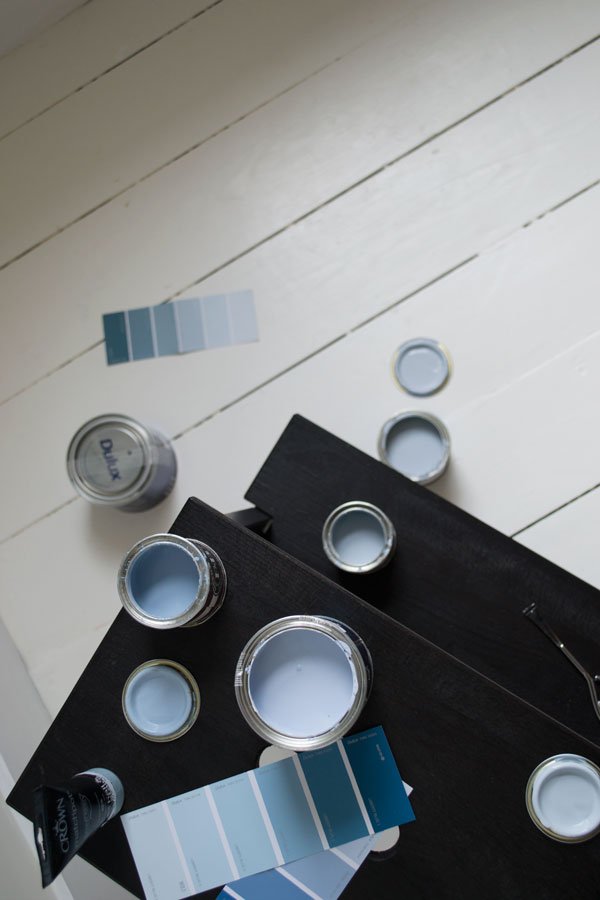
 It instantly makes the room feel calmer, don't you think? We extended the blue out to the skirting board and the back of their bedroom door which I thought was an effective way of bringing more of the colour in without it being overwhelming. To finish the treatment on the cupboard, we reattached the brass catches and added two sets of bespoke handles - I can't wait for you to see it all come together!
 Eventually all the radiators in the whole house will be replaced with modern column styles, so we started the process here with a simple two column design. It did of course mean that some of the boards had to be pulled up to get it plumbed in, but it was a minor cosmetic job.
 And that's all you're getting for now. I'm spending the next few days adding a few last minute touches and tweaks and I'll be back with the first complete room in the house next week. Progress!
Photography © Tiffany Grant-Riley
This post is in collaboration with Homebase.
How To Paint Wooden Floors | A DIY Guide
 In the weeks before we finally moved in we'd been working on our new home and I thought now would be the perfect time for an update on progress in the kids room with a guide to help you paint wooden floors.Having stripped away the thick layers of painted wallpaper (see how it looked in the before tour) and discovered the good and the not-so-perfect crumbling walls beneath, we called in an excellent plasterer who got the job done in a couple of hours. The blue carpet came up without a fight (or any underlay!) to reveal the floor which aside from a small amount of carpet glue and a few layers of dirt on top, were in great condition. As it's a really bright room, we wanted to go with a white floor, picking out a couple of shades from Farrow & Ball and settling on Wimborne White which has warm tone to it.They say the best way to learn is on the job...we began the process virtually clueless but now with experience under our belts I think we have a definitive guide here. Let's get to it...
 FOR SANDING AND PREPARATION• Commercial floor sander-we hired ours for around £70 a week from a local company.• A mix of grade sanding belts for the sander ranging from 40 to 120 grit - you can purchase these when you hire the sander.• Palm sander for the edges of the room. The Bosch PSM 200 AES has two different configurations for sanding at angles with a built in dust box.• A punch tool (these allow you to drive the floor nails in without damaging the wood).• Drill - the Stanley Fatmax cordless is pretty nifty with two batteries.• White spirit.Before you go anywhere near a sander, check that all nails and screws are well secured into the floor, otherwise you'll go through all your sanding belts in no time when they tear them. If your floor has the original nails, use a punch tool and hammer them in to just below the surface of the wood, otherwise you can secure any wobbly boards with screws.On an older floor you'll find that boards have often been cut and removed at some point to make way for electrical and plumbing work. These will need to be secured. Lift the loose boards first to make 100% sure of what's underneath before you start drilling or screwing - you don't want to hit a pipe or wire.Drill pilot holes and use a countersink bit (fairly generously) before screwing to ensure screws sit below the surface of the floor. Then you can simply fill over the top and you'll never see them. Obviously leave exposed any that you may need to unscrew again in the near future - these can always be filled and touched up at a later date.Vacuum any loose dirt from the surface and grooves between and scrape the join between the skirting and floor if you have one to avoid painting in bits of dirt. Give the floor a wash to remove any more surface dirt before you sand.TIP: Is there any carpet glue left? You can use white spirit and a scraper to remove the worst of the residue, then the rest should come off with the sander.You can now begin the fun part-the sanding!
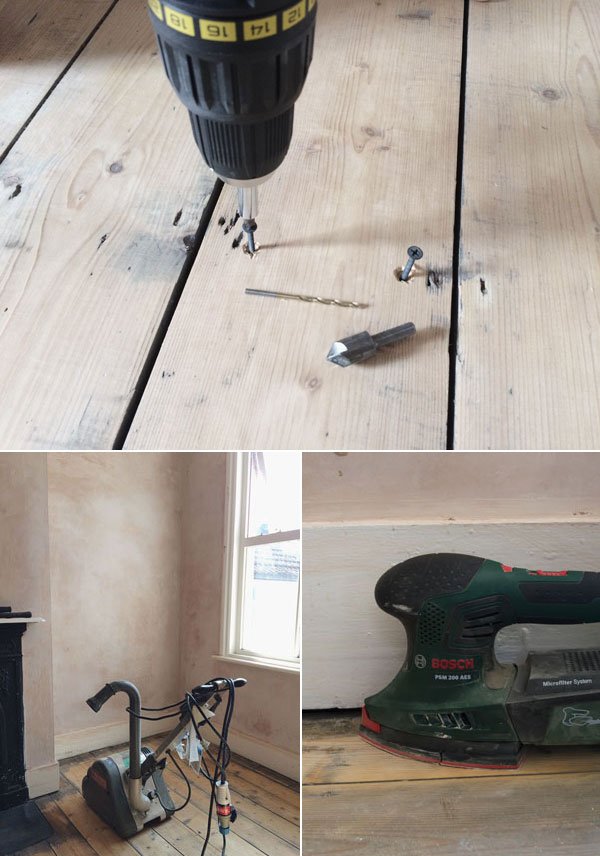 It doesn't matter which way round you approach it - we did the main part of the floor first and the edges last, but you need to make sure you remove the layers until the wood is looking brighter. Start with a heaver grade such as a 40 grit first to remove the ground in dirt, then finish with a finer grade for a smooth finish. Make sure you're happy with the feel of it under foot as once you've painted there's no going back.
TO PREP FOR PAINTING
• Wood knotting solution.• Wood filler. You can make your own from the sawdust mixed with Bona Mix & Fill or use an all purpose filler.Vacuum and wash the floor again to remove any residual dust and dirt and leave it to completely dry. You might need to repeat this stage a couple of times so as not to paint the dust into the floor. Not nice. It's always advised when painting any wood to ensure that you treat all the knots with a coat of knotting solution to stop them showing through the paint afterwards. In some cases, the knots might be sappy and I'm told that if you treat them with a heat gun you can draw the sap out and scrape it off before you knot them. Just be really careful.Fill any large gaps in the boards with the filler, allow to fully dry and then sand smooth by hand.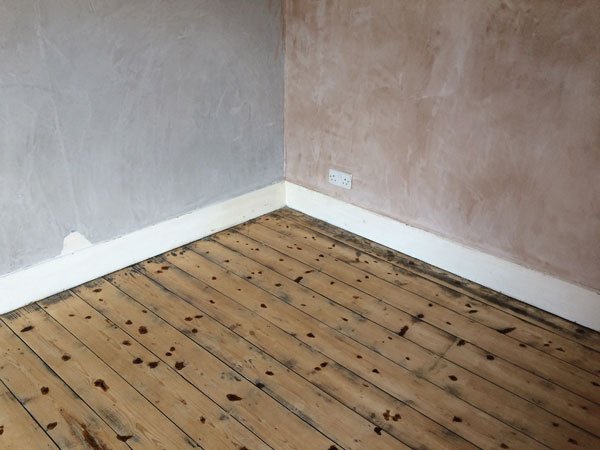 READY TO PAINT• Undercoat and primer - try Farrow & Ball's light and pale undertones for white floors.• Good quality floor paint - we used Wimborne White by Farrow & Ball.• Good quality paint brushes. Trust me, you don't want to be picking loose hairs out of the paint.
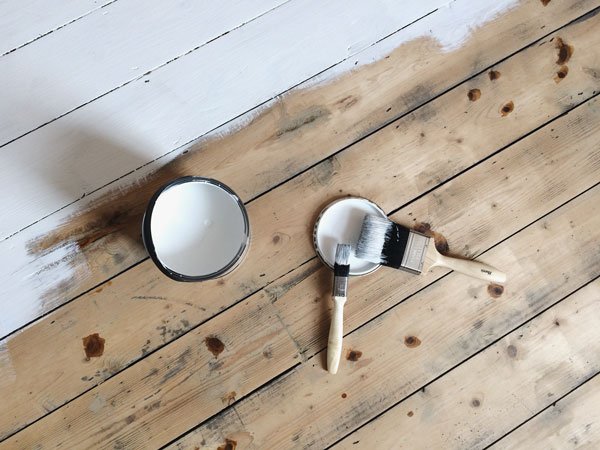 Now you can get on with the painting. Give the floor another vacuum to remove any last bits of dust including underneath the skirting boards then apply a layer of undercoat and primer. Go around the edges of the room first with a small brush, then fill in with a larger one, making sure to paint yourself out of the room. Don't maroon yourself! Once the undercoat is dry, follow the instructions of your paint of choice for the topcoat. This floor required two coats of the top coat and it has a slight satin finish for heavy duty wear.TIP: You might not like the look of the wood showing between each board - I didn't, so I was quite liberal in working the paint in between the joins.If you've time to, leave the floor to cure for a few days. We left ours for approx. 10 before putting any furniture onto it and I think it made a difference to the finish.
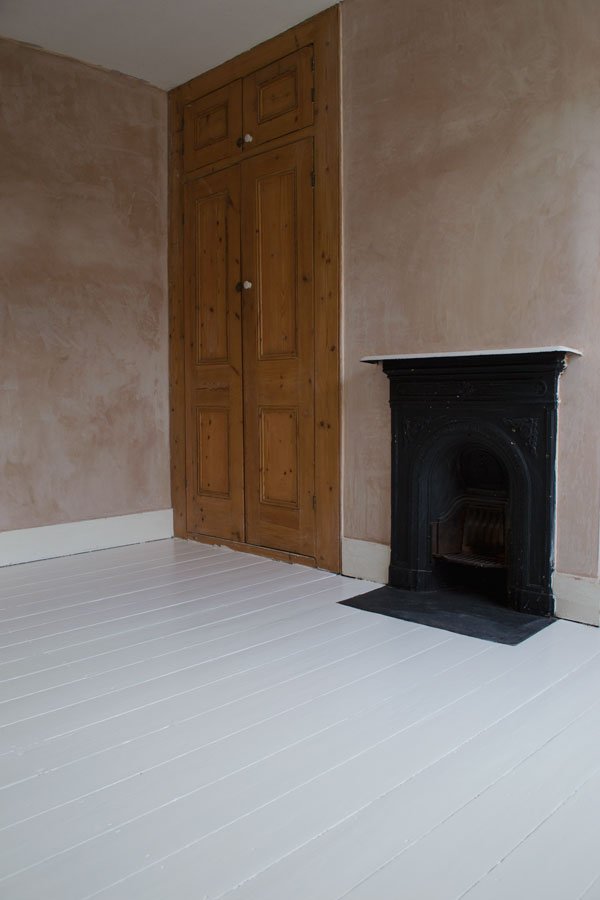 And here's the finished floor. Pretty sweet, right? It's worth remembering that painted floors will always chip eventually, and that's part of the charm, but for now, the kids are enjoying playing on it!Next step? Prepping the ceiling, walls and woodwork. More on that and the colour we've chosen soon...Got plans to paint your floors? Has this been useful? You can follow our journey with #TheChathamHouse on Instagram and join the conversation.Photography © Tiffany Grant-Riley
*This post is in collaboration with Homebase.

The New House / Before Tour
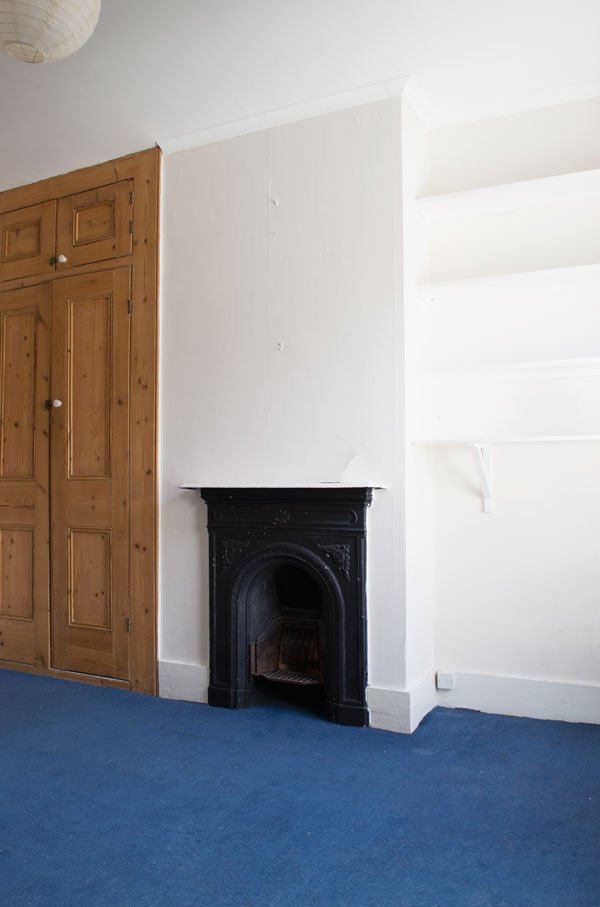
 So I have some news. It's been the hardest thing to keep under wraps these past few months with a few ups and downs and a lot of nail biting, but now we're out of the woods I can say...we have a house! And breathe...We were first to see it when it came onto the market back in June, first to put in an offer straight after the viewing, have it accepted and then rejected a week later, only to be offered it back another four weeks on from that. Emotional roller-coaster is a complete understatement, but it was worth it, because this was the only place that ticked 99.9% of the boxes, and we have some interesting requirements with us both working from home. And the crazy number of large plants we have. Oh, and the children and cat, of course.The house is a beautiful late Victorian build with three bedrooms just up the road from where we are now, in Chatham. Thankfully, as far as the nasty historical interior updates go, this house has narrowly escaped most of them. Beyond the 70s foam coving in the upstairs rooms and gloss painted anaglypta wallpaper in the hallway, we are relieved that most of the pinewood flooring has been restored along with some of the sash windows. That said, where would the fun be in writing an interior design blog if I didn't say that we're staring down the barrel of a lot of decorating. Come on now. Earlier last week I went up to the house to take a few shots and strip walls. Would you like a tour?
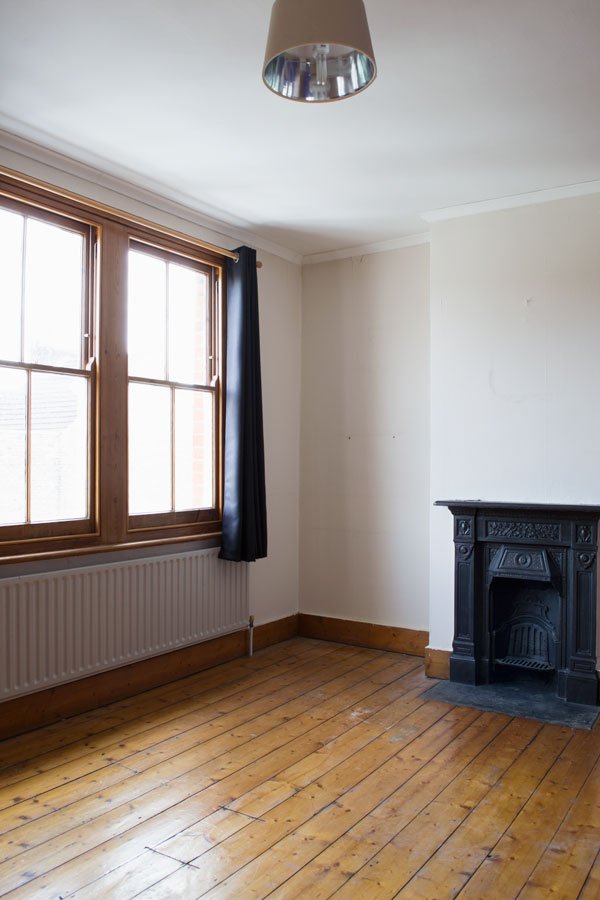
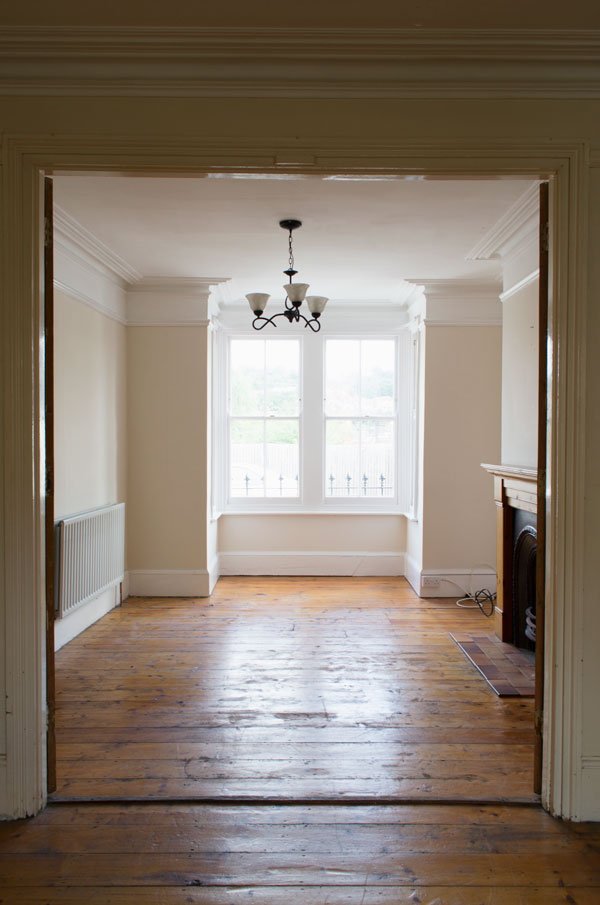 I absolutely love this space, the front of the house gets a lot of light although it gets gradually moodier the further in you go. It'll take some getting used to from where we're living now and I'm not sure white is going to work quite so well in every room, but that's part of the fun, right?
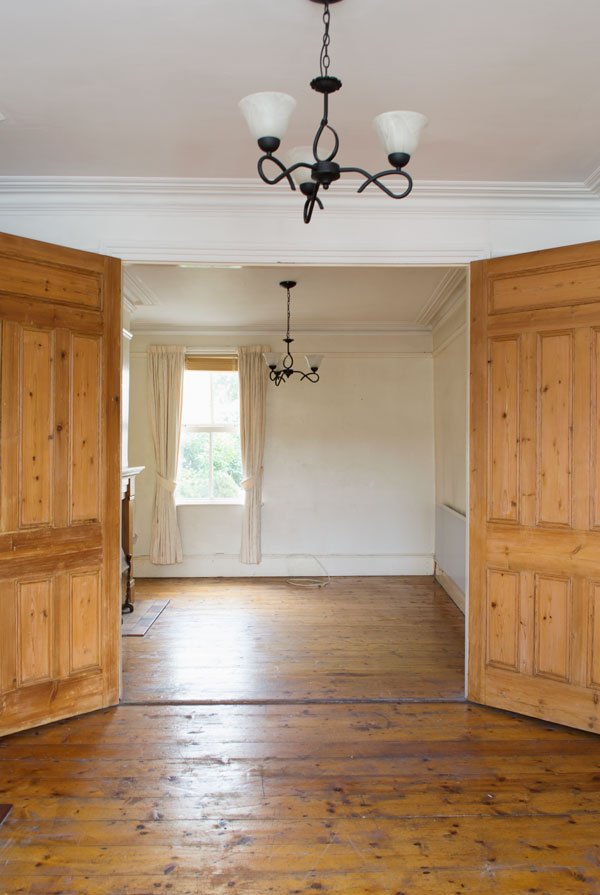 We're moving in at the end of October but aside from the kids room and maybe ours and Rob's office room (not pictured), not much else is going to be done until then. You don't realise how much time things take until you move in and really look and we want to live in the house for a while so we can decide how we want to use each room. Eventually, we're going to sand back the floors again, stain them with a white oil to give them a paler look and seal them with a semi-matt wax. A mammoth job, but I'm happy to do it.So for now I'm focusing mainly on this room which will be the children's. I've since stripped the wallpaper off and removed the coving and shelving ready for re-skimming in a couple of weeks. The carpet will come up, floors sanded back and painted.
 In keeping with the bright colour theme, the bathroom is yellow. Eeeesh. We're definitely keeping the bath (painting the feet black) but we'd like to change the floor and other units as they have a traditional Victorian feel.
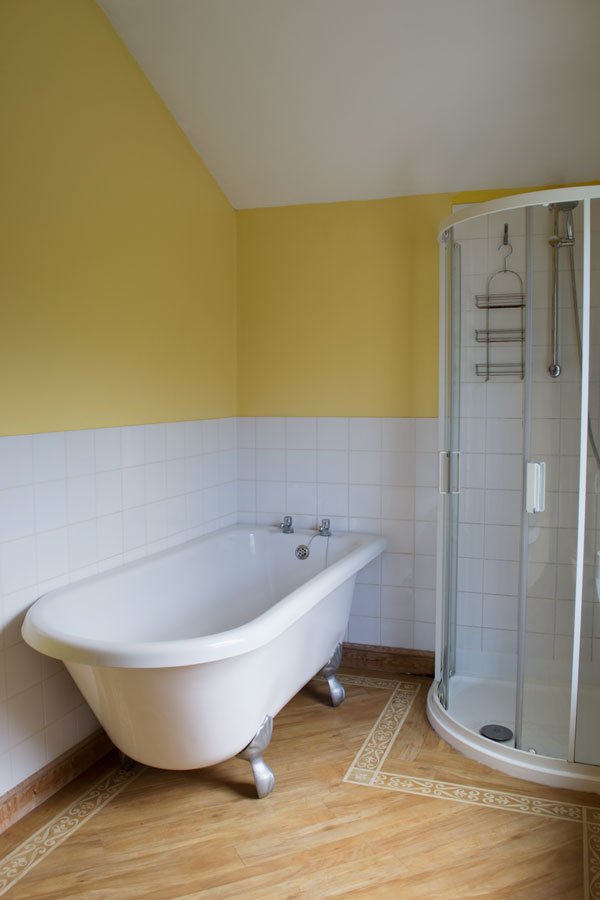 At the end of the hallway is the kitchen which has a sweet window looking into the yard. And eventually we'll completely rip out the units and plan the layout from scratch, although we love the old open shelving in the corner. It looks like those cupboard doors above the sink were repurposed from something else in the house, no idea what but the previous owner said they'd been here a very long time.
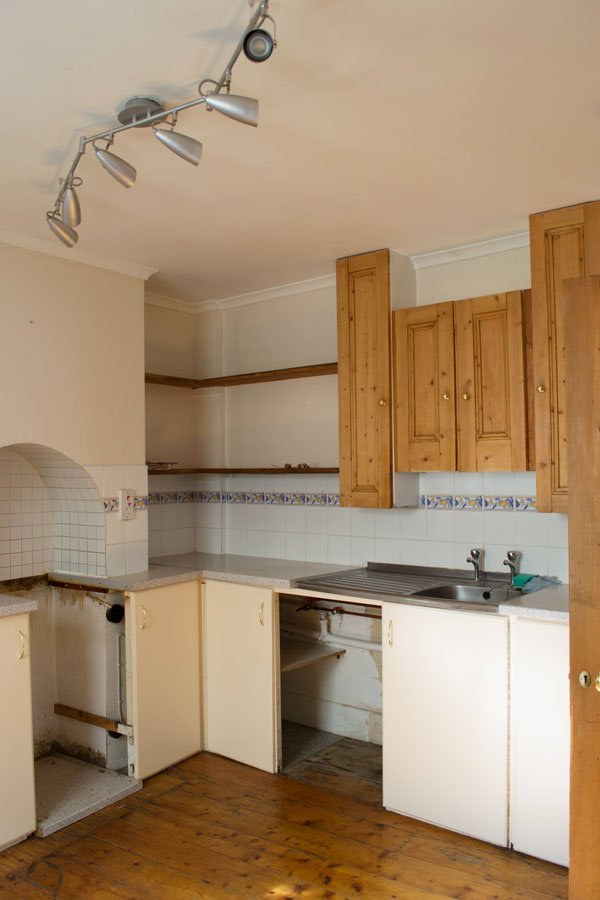
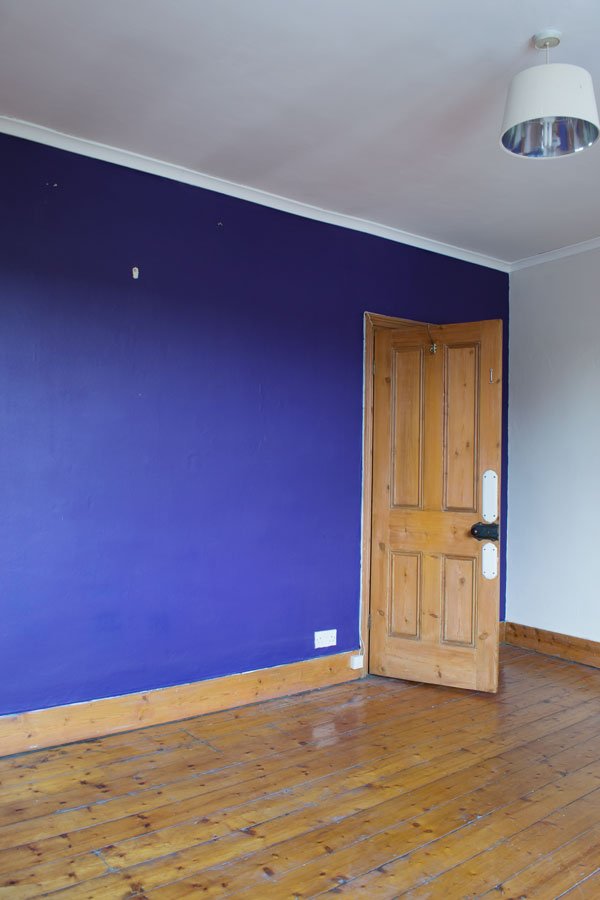
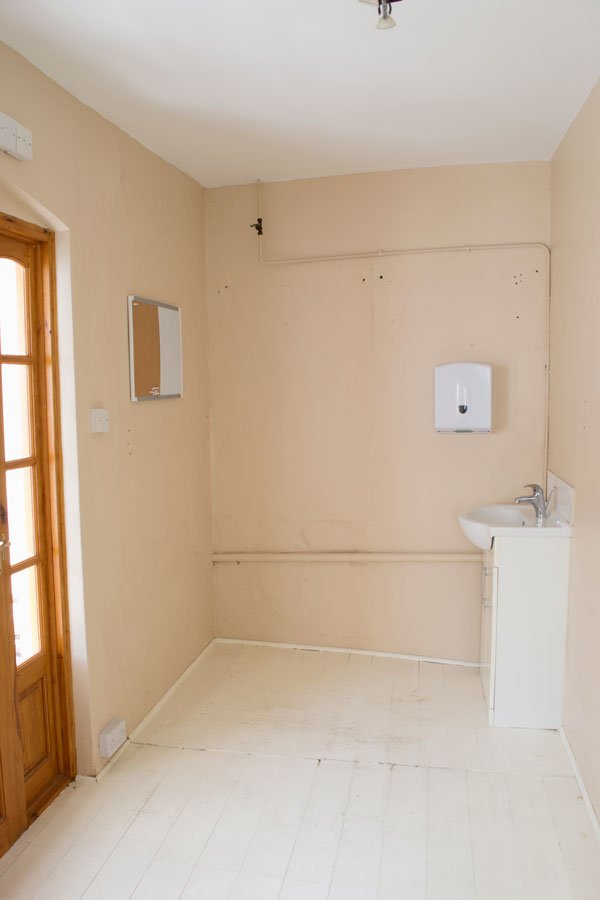 This room is what will be my workspace. Yes, there's a sink in it and a naff cupboard which houses the boiler. I think there were plans to convert it into a downstairs toilet but never happened. The floor is sloping and needs levelling. As I don't think I can remove those pipes, I'm considering covering them with a false plywood wall so they can still be accessed if need be. And maybe soft grey walls? Stay with me on this one. Through that orange pine door (not staying) is the sun room. The floor will also need to be replaced along with the windows, but it's not top of the list right now. Eventually I'd love a real urban jungle in there to sit with and look out onto the garden. When we get round to it.
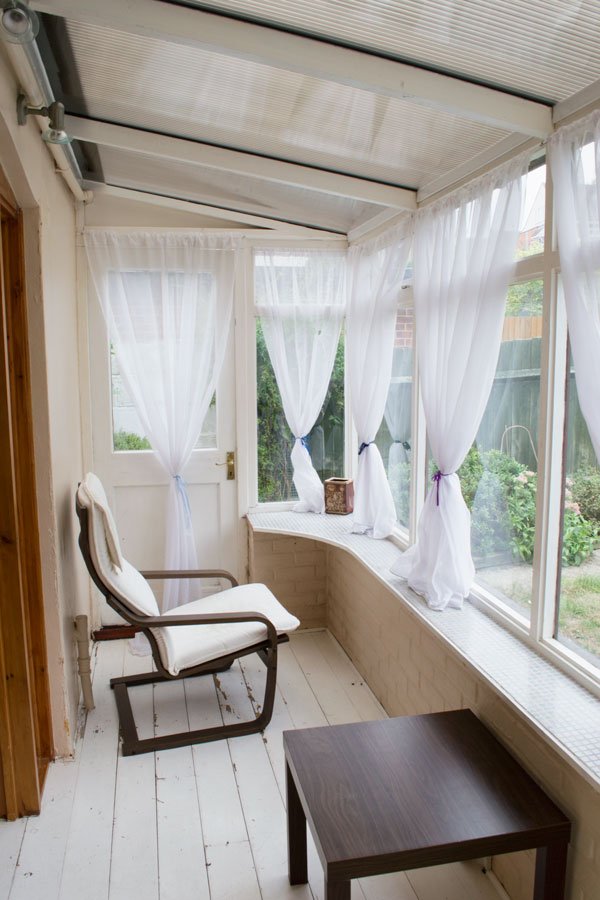 So there we have it. Heaps of potential and heaps of work. Looking forward to sharing our journey of renovation, decoration and DIYs with you and all those in-depth conversations over paint. I'm not even kidding...Follow our progress using #TheChathamHouse on Instagram and follow Stories for regular updates. You can also see how we're gathering ideas and inspiration on The Chatham House Pinterest board...Photography © Tiffany Grant-Riley
Bright Creative Renter Friendly Kids Room Decor
 I'm hoping today's post will fill you with inspiration if you're looking for some creative renter friendly ideas for kids rooms. Given that it's newly decorated and I haven't as yet shown you the reveal, here's the kids room which is shared by my five year old son and two year old daughter. It's ok, I asked their permission and they were totally fine with me sharing it.In my usual fashion, it's taken me months to get this room finished! I've had some of the decor in my possession for almost three years since moving here so typically some items have been discontinued and I don't actually have any before shots, but if I tell you 'Magnolia' walls, grey carpet and not much else, you get the gist!The biggest stumbling block in putting their room together has been the standard restrictions of living in a rented property. There are the things we definitely can't change like the flooring or anything structural, so we focused on what we could. Luckily our landlord is pretty hands-off and we're allowed to put screws into the walls and paint, so I was more or less free to create a room that was bright and colourful (for once) without too many stumbling blocks.Here are some useful tips to get you started...
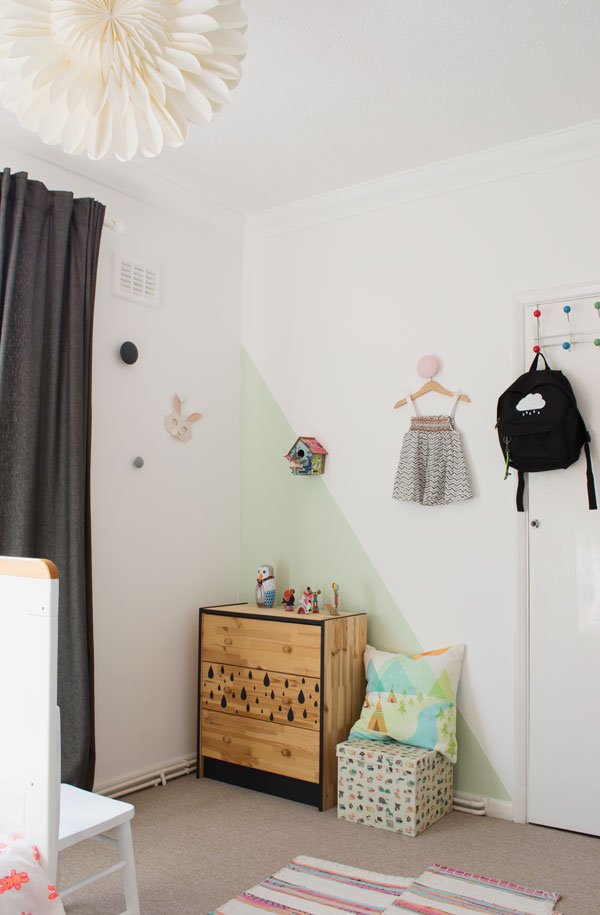
Be Clever With Colour
We're lucky in that this room gets a lot of light during the day, so I started with a clean base of white on which to build up the colour. If you're able to use coloured paints on the wall, think beyond the fully painted block wall and introduce shape instead. Using Frog Tape, I marked out and taped the angle before applying the paint with a roller in two coats. In doing this I've zoned the bedroom without any physical dividers - see how the angled touch of soft green on the wall cleverly separates my daughter's side from my son's?As a temporary alternative, try hanging colourful garlands like these by Engel or think about using wall hooks - a functional piece for hanging up clothes and other bits and pieces that look fun too. I've installed five matt coloured porcelain wall hooks made by Danish ceramicist Anne Black, in fact I loved the green design so much that it inspired the accent colour for the whole room.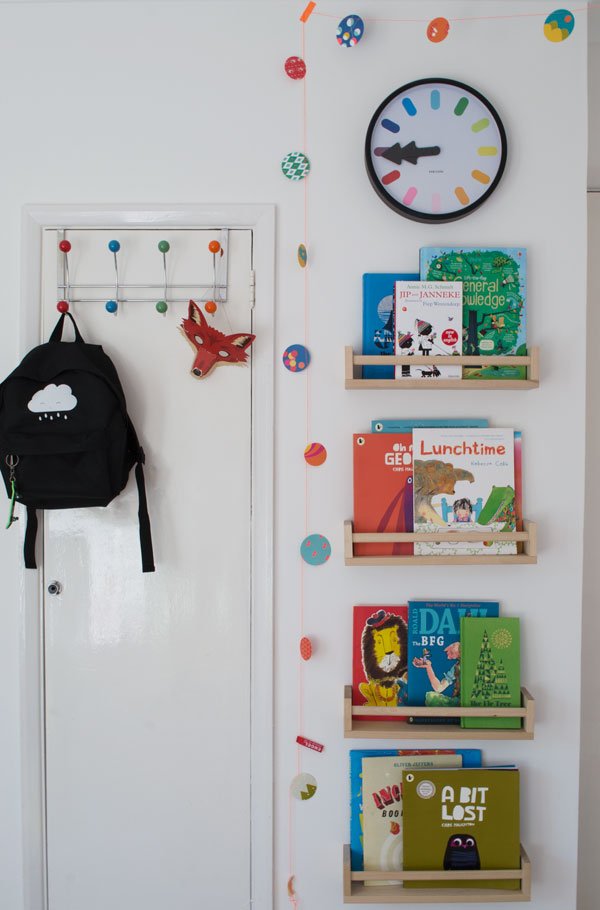
Customize + DIY
Choose pieces of furniture that you can customise with a key colour or pattern to hold the look together. I love the raw plywood look, so plumped for two IKEA Rast chests of drawers that I painted with a black trim and simple design on one drawer. Pinterest has tonnes of Rast drawer tutorials if you're stuck for inspiration too.The rag rug was a brilliant find (I'll tell you where from next) but if you wanted to create something similar, try stitching three inexpensive runner rugs together. A large rug or collection of several layered up will break up any boring carpet - I love the shots of woven orange from the rug that are picked out in the organic cotton bedding by Lulu & Nat, my daughter loves the neon bunny rabbits!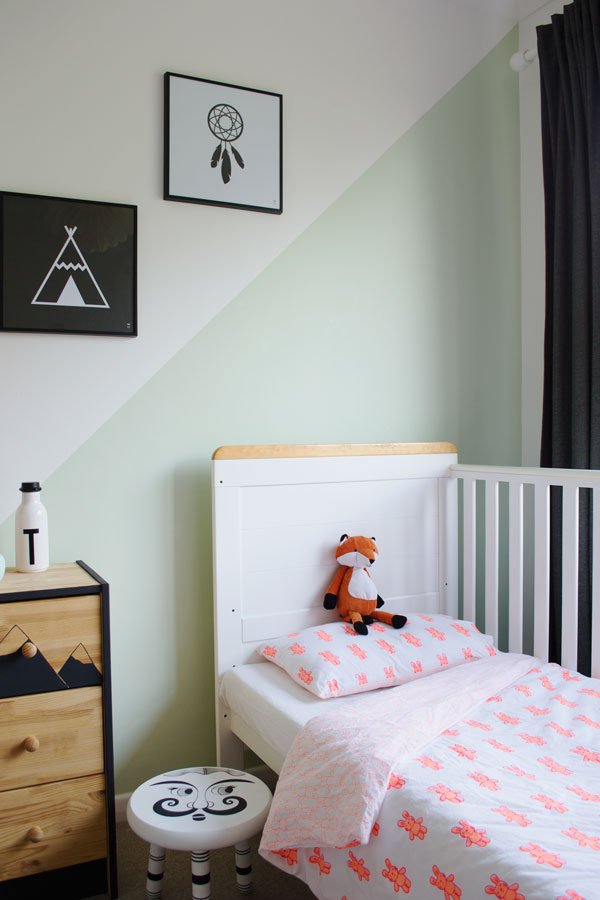
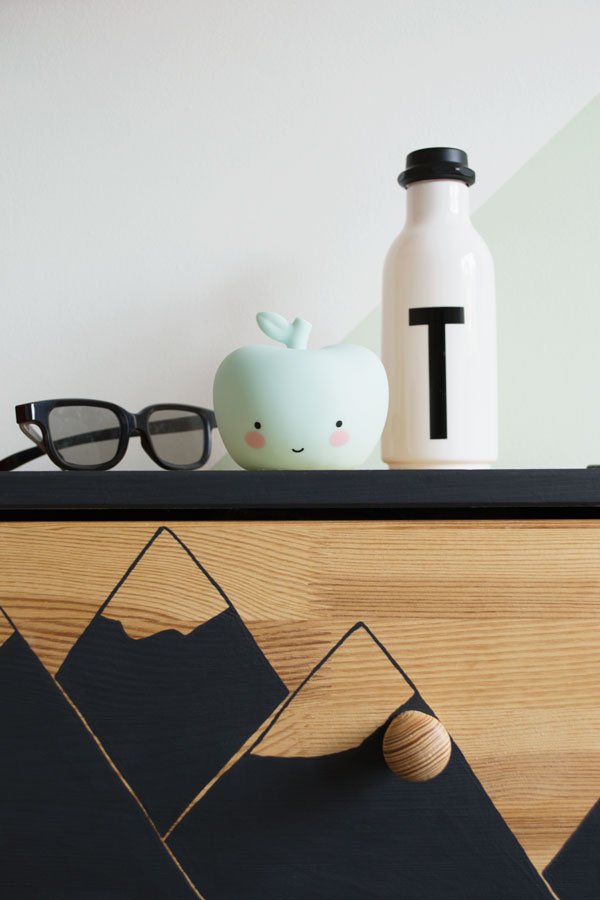
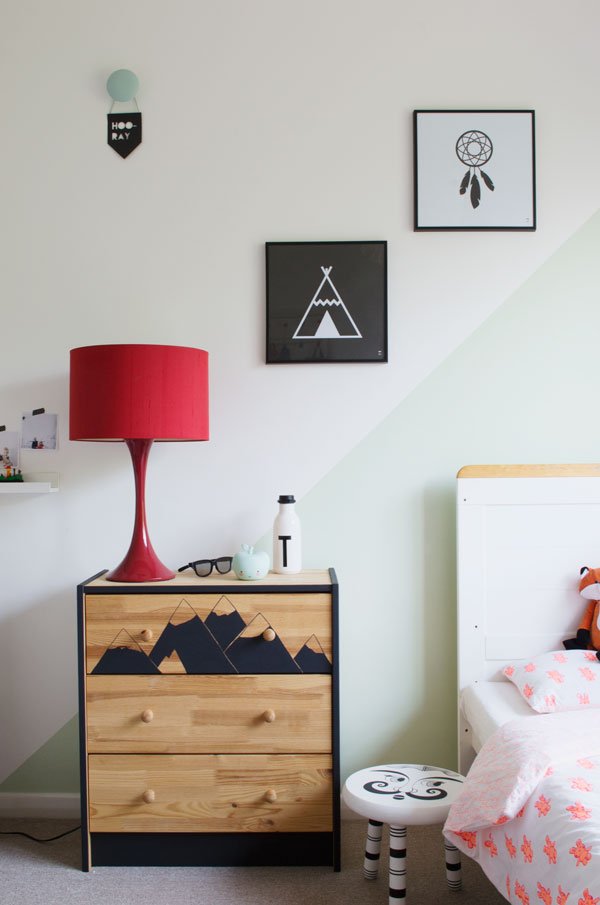

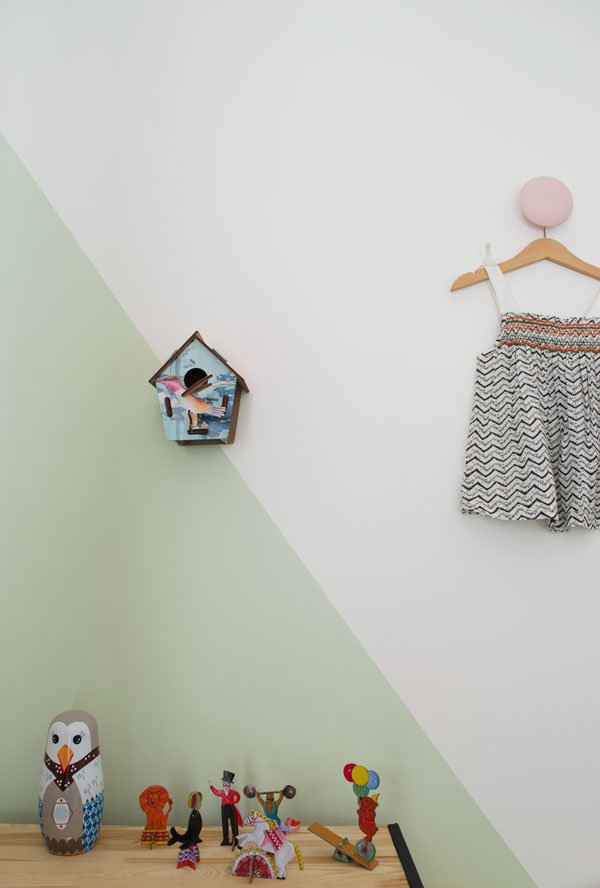
Shop Savvy Accessories
The accessories are really what makes a room if you're limited with what you can do with it. Don't overlook charity shops when you're shopping for kids decor. The absolute star buy in this whole room is the rag rug, which was ex-Zara Home display, discovered in my local Oxfam in Rochester, was £200.00 and I got it for £20. And the little black and white footstool by my daughter's cot bed, which I think is a handmade piece was just £10. Not bad eh?
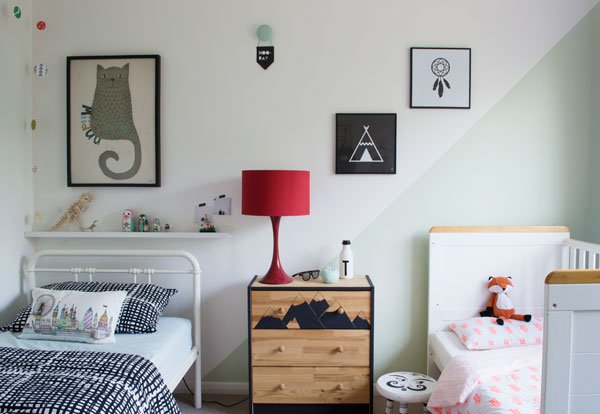 No need to say that they both absolutely love spending time in here together now, although bedtime usually take hours as they're far too excited to sleep!Looking for more kids room decor ideas? Try my Pinterest board which helped inspire this look. And I'd love to hear your thoughts, particularly if you're renting too and found this helpful?Shop The Look:Wall paint: 'Swan Dance', Valspar | Wall prints: Cat by Michelle Carslund from Mini-Mi Rochester, Tipi and Dreamcatcher poster by Wild Boys & Girls | Storage: Rast chest of drawers, IKEA, Book shelves (spice racks) , IKEA | Wall chart: Corby Tindersticks, Amara | Superliving DK Nesting Dolls bird family, The Kid Who | Metal Bed: Livy Home at Tesco Direct | Bedding: Black and white grid bedding, IKEA |
Photography & Styling © Tiffany Grant-Riley
With thanks to Lulu & Nat for the gift of the Neon Bunny Rabbit bedding.
Arne Jacobsen Flowers | Summer Workspace
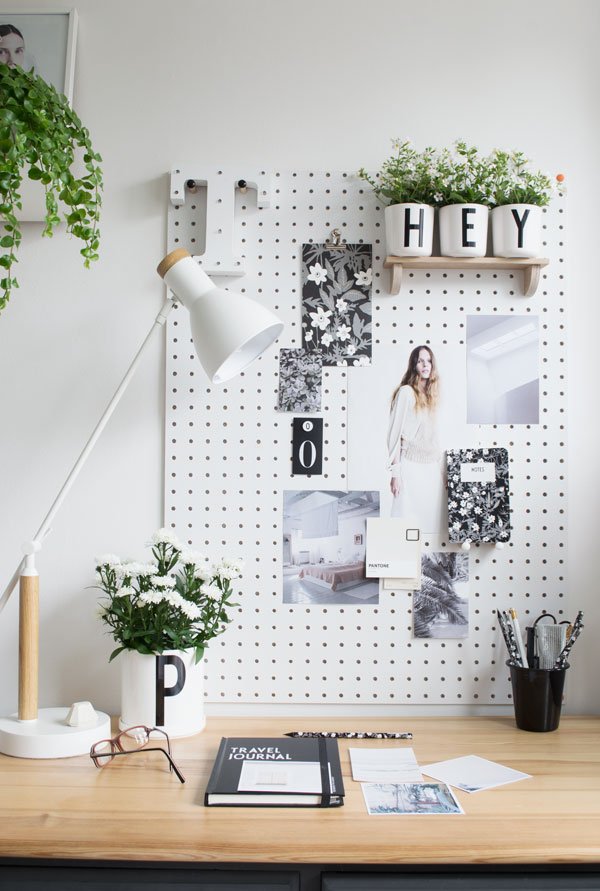 Summer might be having a laugh at us all from behind a cloud of rain (welcome to British summertime) but it hasn't stopped me making an effort to bring a little into my workspace.Known for his rich contribution to the world of Danish design and architecture, Arne Jacobsen paved the way for bold, graphic style, particularly in his monochrome typography created in 1937 and now popularised by Danish company Design Letters & Friends. You will no doubt recognise his alphabet collection, but perhaps you're not so familiar, maybe even surprised to see a softer side to his work. Inspired by wildflower meadows, his sketches and watercolours produced while in exile to Sweden during WWII informed what is the new vintage flowers anemone collection. The soft, freeform black, white and grey floral motif has given my pegboard a new dimension which I've worked into a summer inspired moodboard.
 My brilliant pegboard shelf is currently home to three sunny melamine letter cups spilling with tiny white flowering Bacopa, a sweet little nod towards the floral stationery and voluminous porcelain pot of white Asters on my desk.
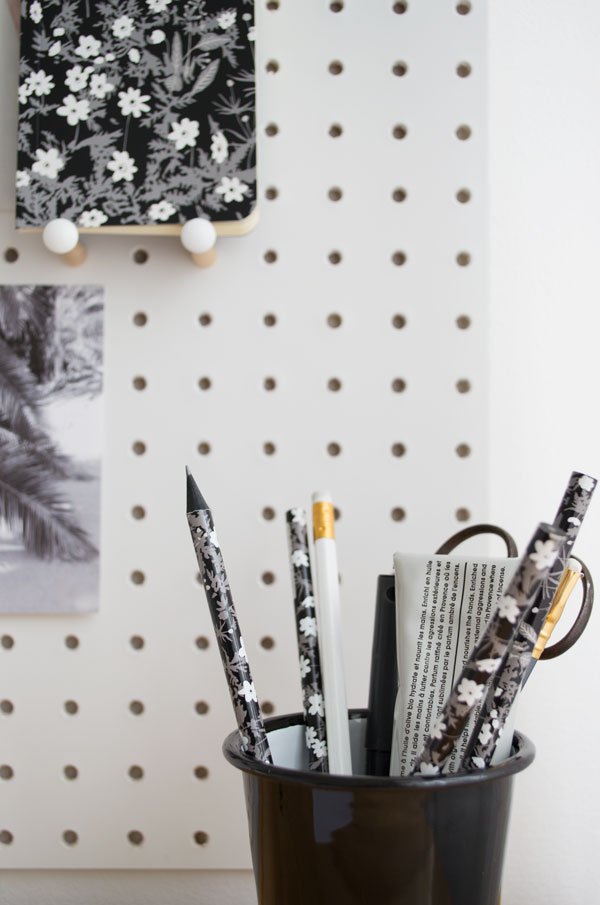
 In a bid to be a little more "offline" this summer, I'm hoping these fresh new notebooks will help keep me focused. I miss scrapbooking the way I did before Pinterest and there's nothing better than a blank page to fill you with optimism, am I right? This Travel Journal will also be joining me on a design tour to Spain next month-I can't wait to share more of that with you soon, but in the meantime I'm filling it with Instagram photos from last year's wanderings.
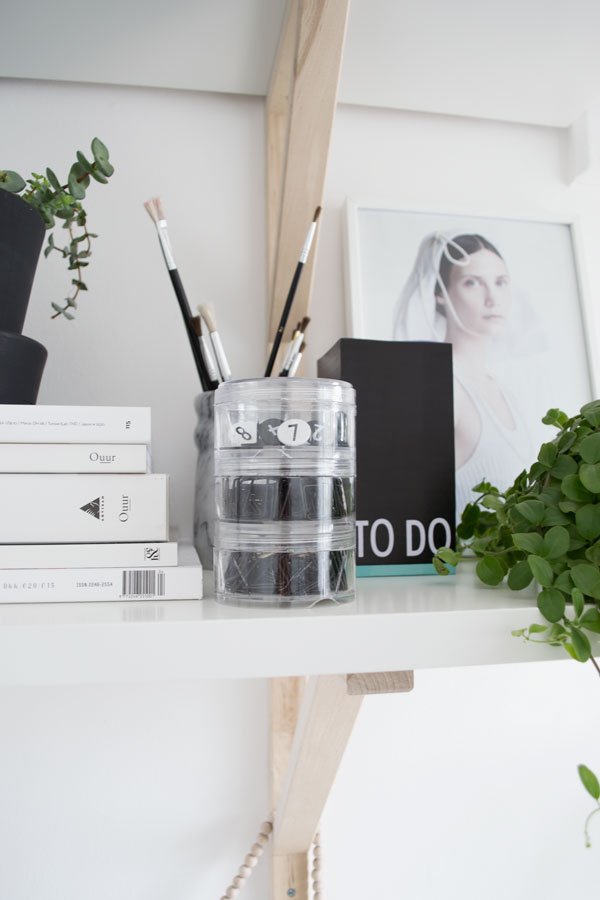
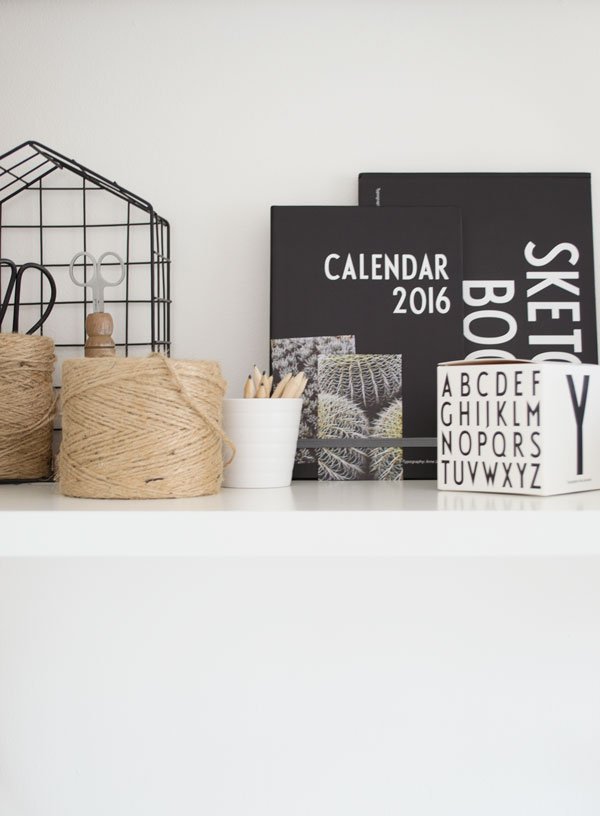
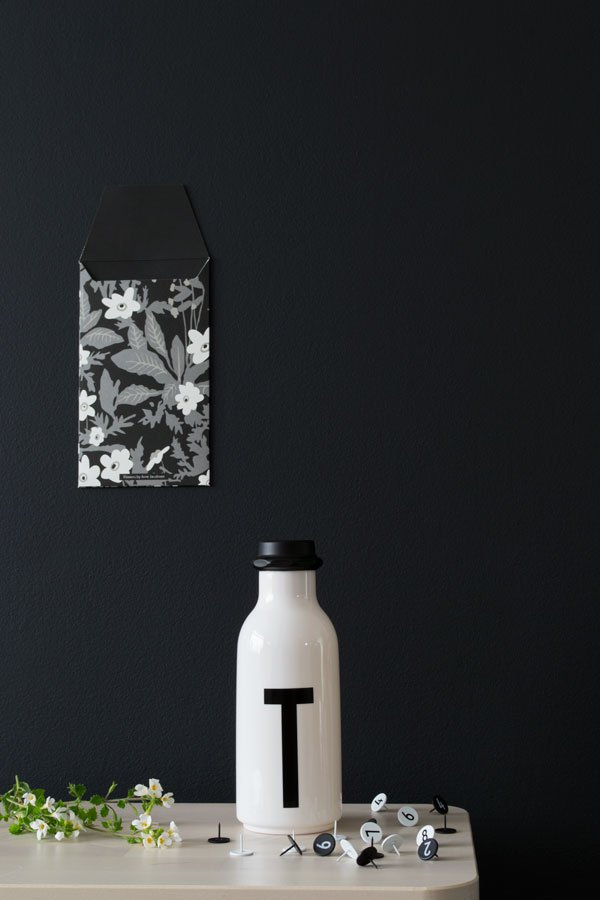
 So hello from my summer inspired workspace! What do you think of the new Design Letters collection?
Photography & Styling © Tiffany Grant-Riley
**This is a sponsored post in collaboration with Design Letters & Friends.
The Scandinavian Christmas Table
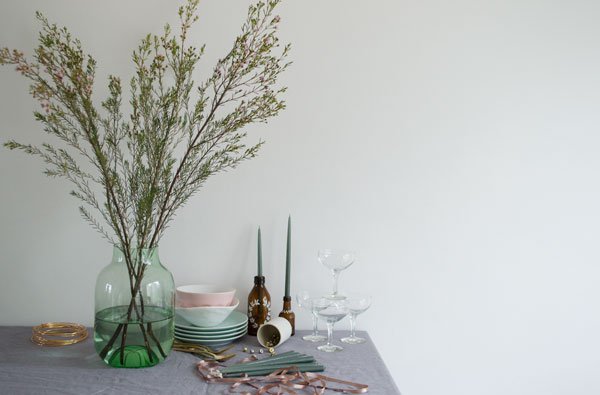 At this time of year I love to indulge my romantic side-there's just something about snuggling up inside with family that brings it out in me - the smell of spiced cookies wafting from the kitchen, a warming boozy beverage in hand and candles throwing soft light up the walls. Table styling is absolutely my bag and I could spend all day playing with different combinations.Whilst I'm not keen on fuss and frills, I do like to focus on the small details which I'm sharing with you in my Scandinavian inspired Christmas table post today. In part two of my collaboration with Not On The High Street, I'm igniting your creative juices with three variations on a look to bring your Christmas table decor to life in sweet, subtle style. The palette is soft, muted and very romantic...
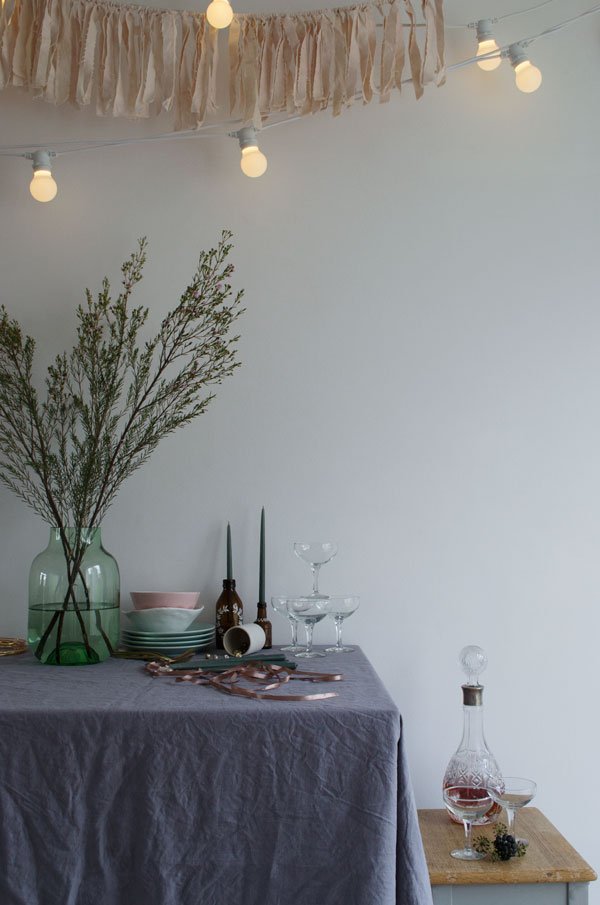 When you've got a last minute gathering of friends planned and you don't have time (or inclination) to go all out on the decor, here's a way to make it look like you put a whole heap of effort in with very little input. It'll take a little preparation on your part to gather your kit but will save you heaps of time in the long run.
- A linen table cloth lends your table an instant feeling of occasion. I hate ironing and don't bother pressing mine as I love the deep creases (my Grandma is probably horrified) but it's all part of the charm.
- Eclectic tableware-put out a mixture of cutlery and plates for a more informal look. I use our every day plates in a mint green mixed with white and pink and gold cutlery for a touch of luxury.
- Glassware. Nothing says "party" like vintage champagne coupes and decanters - if you're offering sparkling drinks they're a win (not so much for beer, mind!) You can usually find these in charity shops if you keep your eyes peeled and they look stunning in candle light.
- Use one large arrangement as a focal point. You could use gathered branches from the woods and hang a handful of small glass baubles from them or, as I've done display tall stems of pink or white waxflower-you'll find them easily at your local florists at this time of year.
- String up garland lighting above your table and introduce small tapered candles displayed in old bottles for some soft mood lighting. This instantly changes the atmosphere in your space and gives it a sense of intimacy.
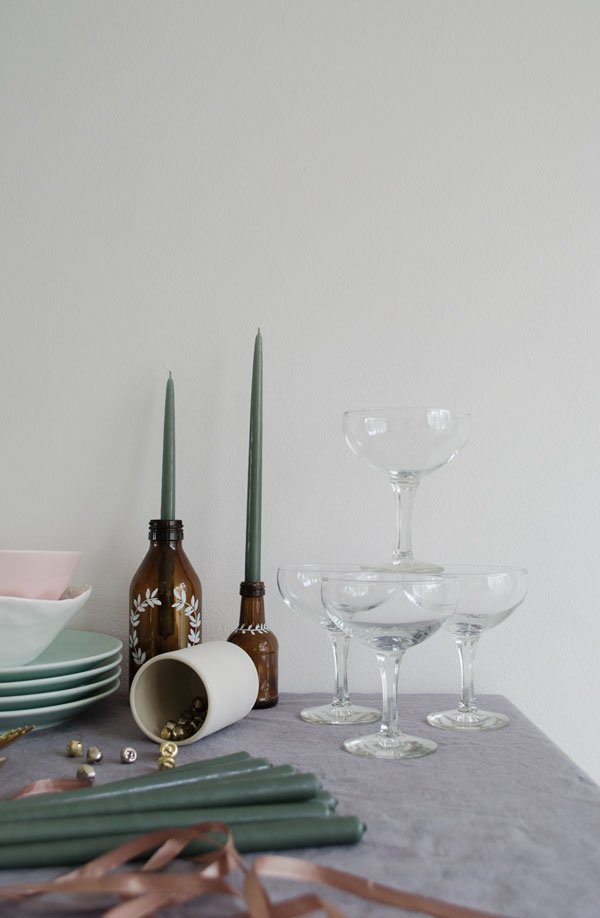


Advent DIY
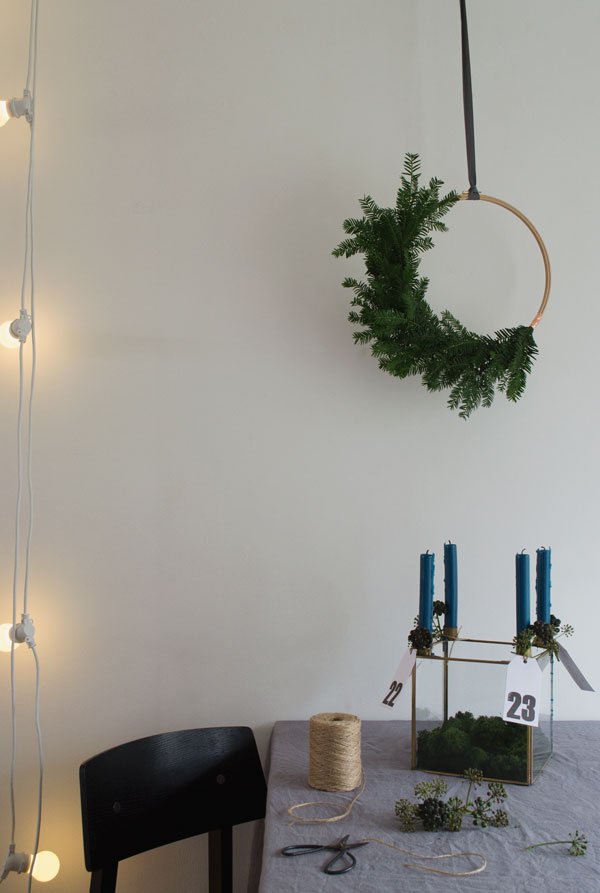 I created a quick advent candle DIY with this square brass design by House Doctor DK. Bringing in a statement colour in the teal blue which really sets off the brass, I've tied a set of printed number tags to each corner (also House Doctor), tucked in a sprig of black ivy berries from the garden and loosely filled the centre with moss. Because I can't get enough of moss. Ever. Not my usual colour palette, but I'm enjoying some of the rich blues at the moment and it sits well with the velvet cushion in my last post. I could see this working as a focal point on the Christmas table or even as a feature on our coffee table to watch flickering away in the evenings. There's something very mesmerising about fire and flame, isn't there?
Wreaths & Garlands
Once I've neatly trimmed our tree into its corner I'm always left with a bag full of off-cuttings which I use to turn into a wreath. Because we don't get our tree until closer to the 20th though, I'll go out and find some fir trees to take clippings from instead if I want to put some up earlier. Have you seen some of the more minimal wreath styles coming out on Pinterest lately? They're not completely covered, which I really like - less is more of course. So I built mine using small bunches of fir tree, tied with florists tape and attached to a medium sized embroidery hoop with copper tape. That combination of pale wood and sweet smelling pine needles is spot on and if you want to keep your table decor low-key this year then consider hanging one of these low down on your wall near your table instead.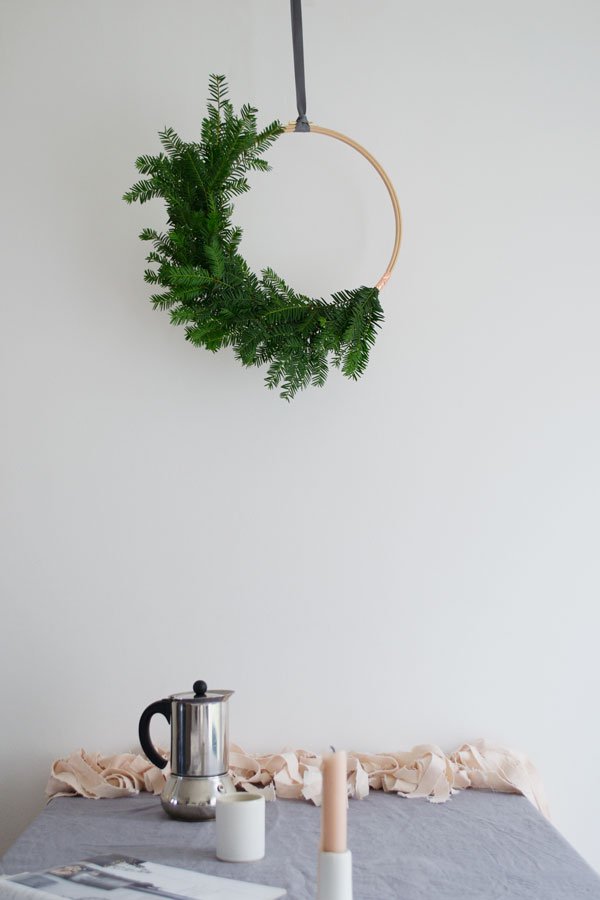 If you love the soft, blushing pink garland in this post, it's actually a DIY avocado dyed garland I created last year. Somehow, it looks a dream against that grey linen cloth, like the calm before the chaos and excitement on Christmas morning. Oh for a quite coffee moment like this...
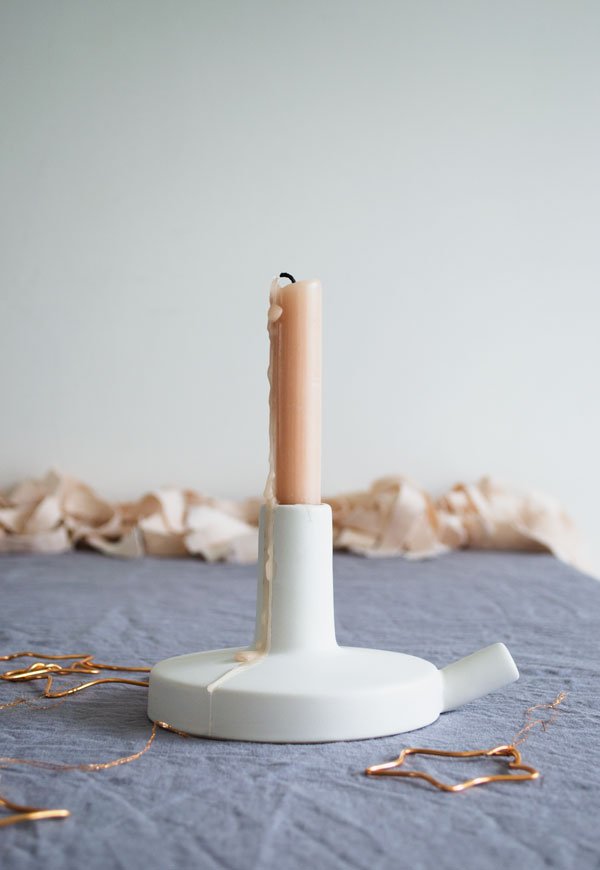 Are you trying something new with your table top this year? Maybe I've inspired you? I'd love to hear your plans...
Shop The Look
Green glass vase, Brighton Beautiful | Mini Taper Candles, Rowen & Wren | White handcrafted beaker, Rowen & Wren | Brass square candle stand, Brighton Beautiful | White Lovatt candlestick, Henry & Future
Photography & Styling © Tiffany Grant-Riley
*This post is in collaboration with Not On The High Street.
A Natural Look For Christmas
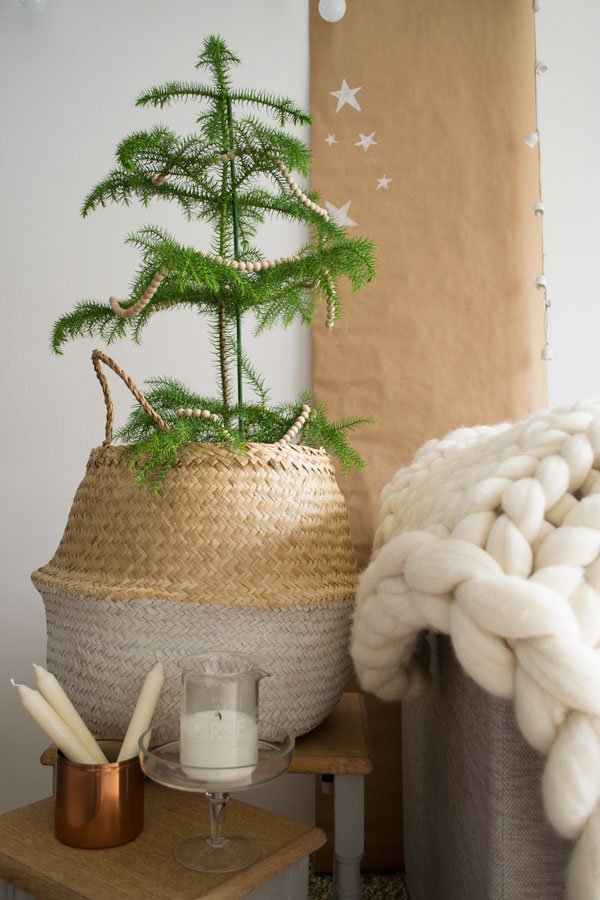
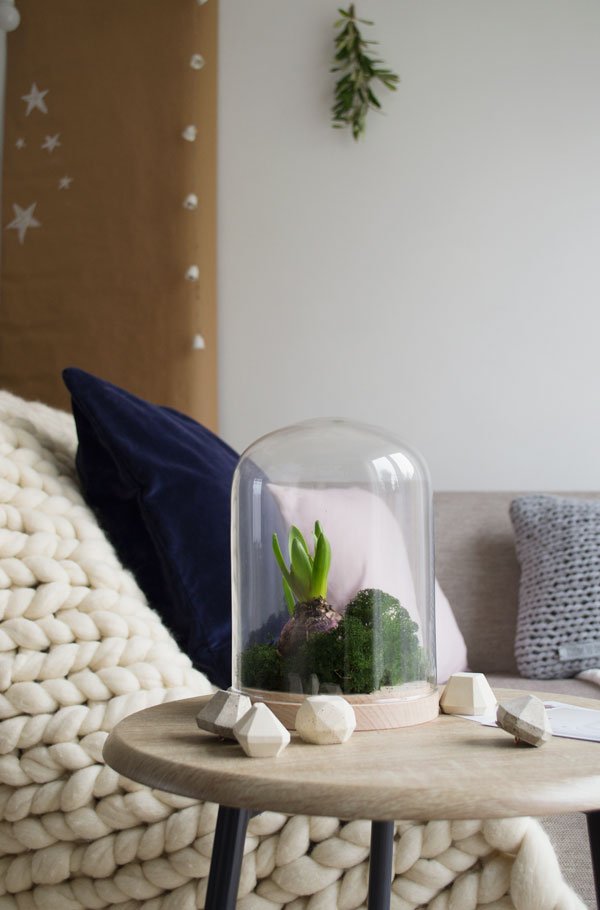
Natural All The Way
Tonally speaking, I prefer to keep a soft and neutral palette. Whilst we have a dark and moody black wall at one of our living space, the rest is clean and white. Monochrome interiors can come across a little stark, so to warm it up a little choose your decor as natural as it comes - plenty of greenery, a jute rug, pale untreated wooden decorations, cotton and linen cushions (mine are soft pink and grey), and brown paper wrapping for gifts under the tree.
Ramp Up The Texture
It goes without saying that introducing a variety of textures into your homes helps to give your space depth and interest, but at this time of year it's like you're being given permission to go crazy. I'm doing just that with extreme chunky knits (give me all the wool) an incredibly luxurious and tactile throw designed by Lauren Aston who hand knits all her own designs, using knitting needles so enormous she had to make her own as they didn't exist to do the Merino yarn she knits with enough justice. Heavenly, don't you think? I've combined it with a mix of blankets in cream and grey and picked given it a little more depth with a navy blue velvet cushion which plays off well against the soft pink canvas cushions I brought in last year.Although I don't do shouty decor, I will always have a soft spot for metallics, so I'm mixing brass (this year's fore runner in the trend stakes) and copper to lift the look and reflect all the candles and warm lighting in the evening.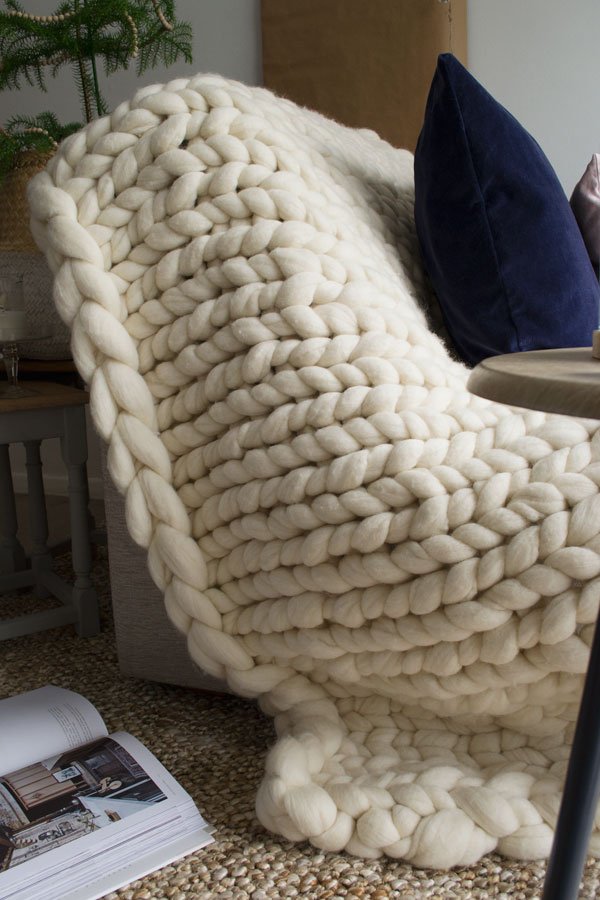
Cosy Lighting
Bust out the candles in all shapes and sizes - church candles en-masse, thin tapers, or standard sticks in soft tones (I'm using a mixture of pale pink, grey and teal this year). I'm also a real fan of 100% beeswax which purify the air as they burn and have a longer burn time than other candles, so not only do they look great, but they're better for the environment too.Small fairy and garland lights are standard too at this time of year-goes without saying, right?
Introduce The Outdoors
I have a real thing for mini fir trees at this time of year - they're ideal if you're short of space but still want the look and smell of a real tree. I picked up a beautiful Norfolk Island pine with vibrant, frondy branches to decorate with some simple wooden beads and displayed it inside a natural woven belly basket - I love that it looks barely touched. If I'm honest, if I had my own way, I'd only have a few lights on our tree and leave it at that...but then I'd probably ruin Christmas for the kids who love getting involved with decorating it!You don't need to spend a fortune on flowers and such either-at this time of year I park at the road side and pick seed heads and berries, any touches from the countryside that are fine to take. Don't forget to think about scent as another dimension to your styling too. Hanging small bunches of herbs like rosemary from the walls or your ceiling over your table not only look gorgeous but smell so too and for some reason, the "fresh from the garden", free-form look feels far more homely. Display bulbs like hyacinths in small vases of water to show the exposed roots or make a feature from one inside a cloche sitting on a bed of moss as I've done here. You can pick them up for peanuts (I bought three in a pot from my local florist for around £2.50) and they grow and flower really quickly over the Christmas season with a strong, heady scent.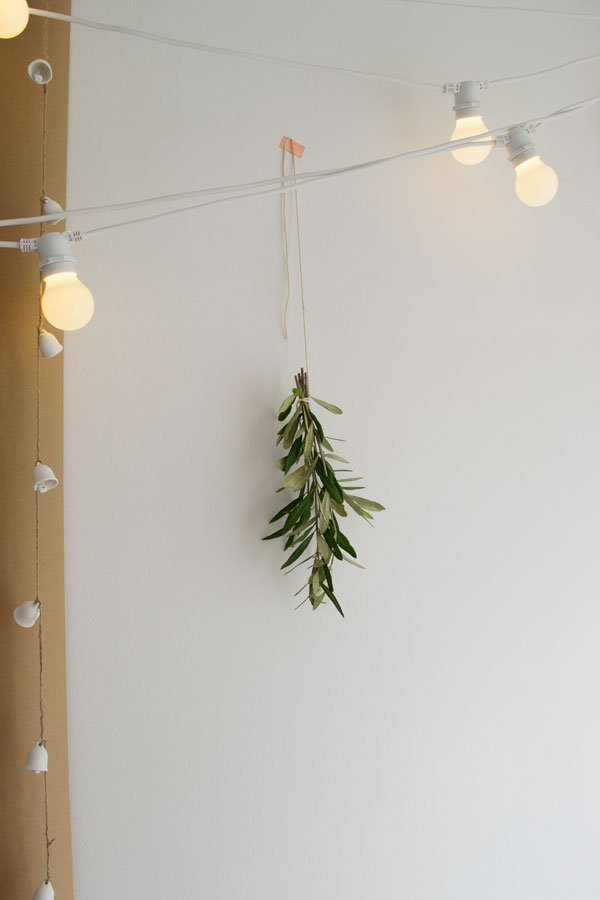
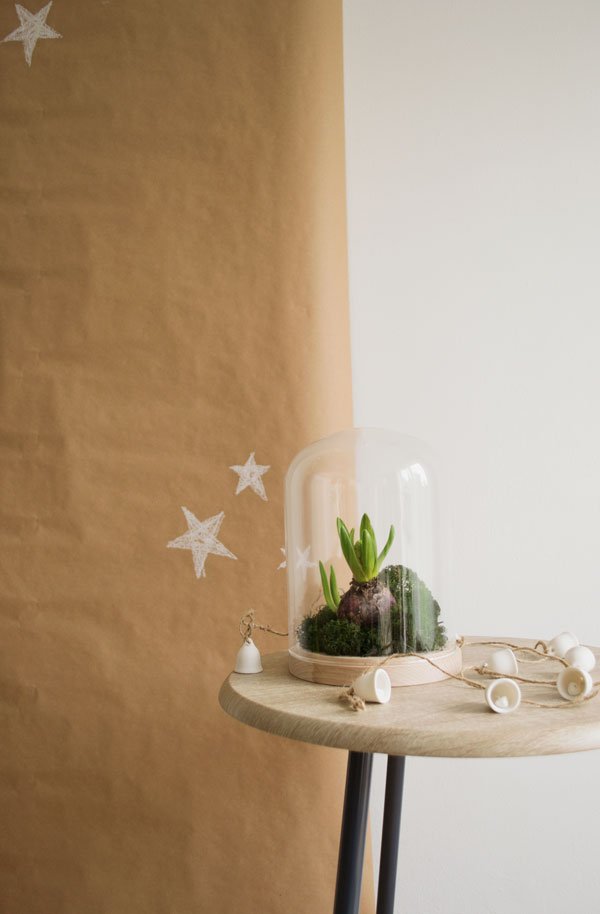

 So those are my tips for a natural look this Christmas, just a few easy to do touches to give your space a subtle festive feel. Next week I'm sharing part two with a few simple ideas for informal table decorations (that's my jam).How will you be styling your home for the festive season this year?
Shop The Look
Woolacombe Super Chunky Knit throw, Lauren Aston | White Dipped Belly Basket, Olli Ella | Royal Navy Velvet cushion, Posh Totty Designs Interiors | Beech Based Glass Dome, Rowen & Wren | Ceramic Bell Garland, Rowen & Wren | Side Table, Peastyle
This post is in collaboration with Not On The High Street
Photography & Styling © Tiffany Grant-Riley
Table Styling Challenge With Falcon Enamelware
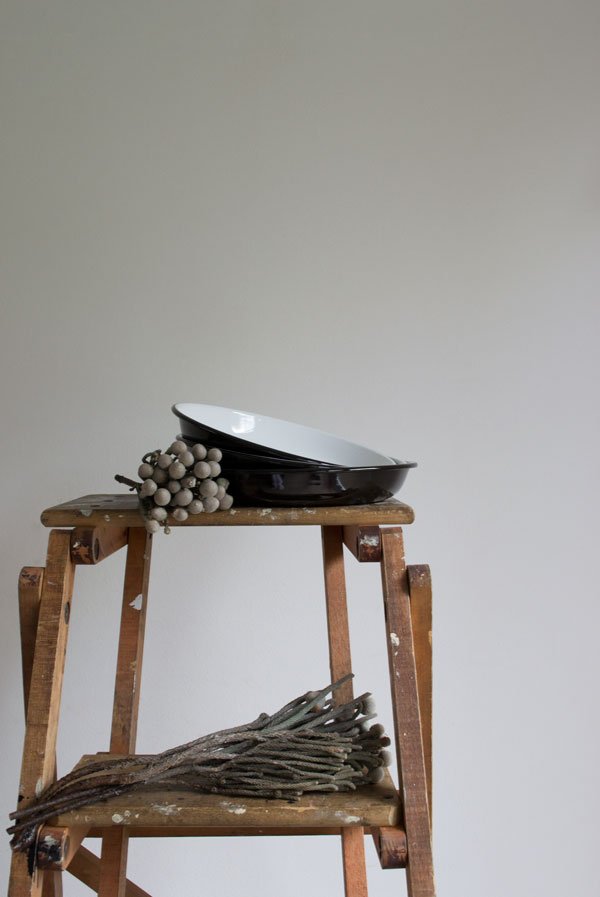 Are you familiar with AtMine's #StyleAtMine challenges? Each month, along with a blogger or IGer they introduce a new topic to inspire their community to get involved with, styling vignettes in their own homes to share with the AtMine community or on Instagram and a winner is chosen to receive a prize. November's challenge is 'table setting styling' I'm particularly excited to introduce this alongside AtMine (also our sponsors for the our inaugural Function+Form gathering next month) and Joy Jaynes from Mornings Like These over in the US.
Want To Get Involved? Here's How...
In collaboration with the iconic Falcon Enamelware, we want you to share with us your creative vision for styling your own table settings. Upload your shots on your AtMine profile to the 'Table Setting' category using #StyleAtMine in the comments section or on Instagram to enter (use both to double your chances!) following @atmine and @falconenamel. At the end of the month, the winner will receive their choice from the Falcon Enamelware collection and two runners up will receive a pie dishes and tea towel gift set in Pillarbox red. You can enter worldwide, so there's no excuses-get involved!
A Warming Pumpkin Pie For A Cold Winter Day
I don't often cover recipes or food styling here, and there's a good reason for it. Although I'm an avid "foodie" outside of my work, I prefer to leave working with food in the same category as working with children and animals in that it can in some cases be a little unpredictable-or best left alone! My pumpkin pie recipe today is a prime example - I'd had it in the oven for 30 minutes before I realised our oven had stopped working! Queue a mad panic before I called up a friend across town who kindly put her oven on for me whilst my sister drove me to her house at gone 7pm with it sitting unset on my lap. There are a lot of steep hills here, so it was a challenge to keep it from spilling everywhere! I'd say it was a sure-fire sign not work with food. Ever again...This is my mother's recipe, one that we grew up with, looking forward to every year from our tiny little terraced house in Bridge Street - the pumpkins carved and waiting for Halloween and the smell of winter spices and rich pastry warming in the oven. Now it's becoming something I share with my own children who, after I shot this piece wolfed it down with a great deal of enthusiasm. Doesn't it look great in those black and white enamel plates?For The Pastry:
- 175g plain flour
- 1/2 tsp salt
- 1tbsp brown sugar
- 1tsp baking powder
- 75g unsalted butter
- 1 egg yolk
- 3/4 tbsp double cream
For The Filling:
- 450g pumpkin pulp
- 2 large eggs
- 75g soft brown sugar
- 4tbsp golden syrup
- 225ml whipping cream
- 1.5 tsp ground cinnamon
- 1tsp ground ginger
- 1/2 tsp salt
- 1/4 tsp ground cloves.
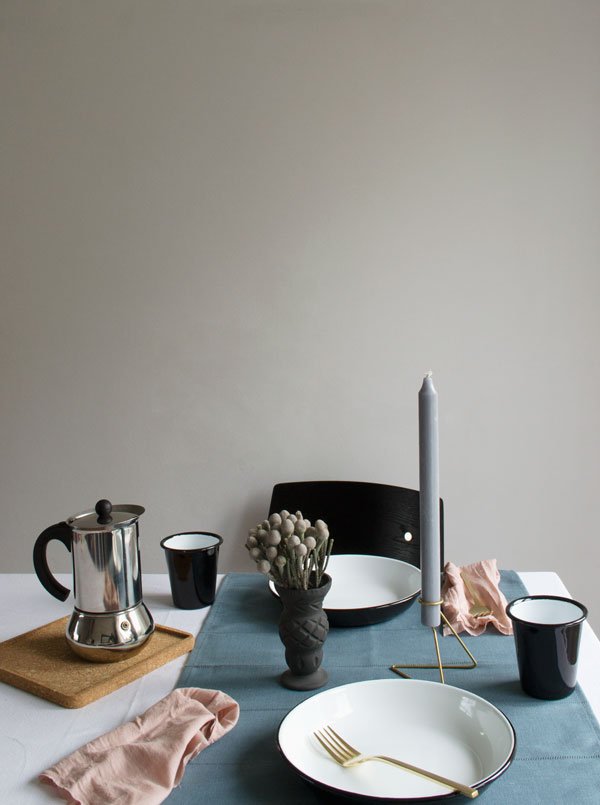 For The Filling:
- Bake the pumpkin pieces skin side up on a baking sheet for 45 minutes at 180 degrees until tender. Allow to cool.
- Remove the pulp from the shell and blitz in a blender until smooth.
- Mix in the rest of the ingredients and set aside.
For The Pastry:
- Sift in the flour, salt and baking powder in a mixing bowl and rub in the butter until you reach an oatmeal consistency.
- Blend the egg yolk and cream together and stir into the flour with a fork until you have a dough.
- Turn the dough onto a cool surface and kneed into a ball being careful not to over-work it.
- Wrap the dough in clingfilm and chill for 30 minutes.
- Meanwhile, grease a 10" pie tin with a loose bottom, then roll the dough out to fit the tin and fill it with crumpled greaseproof paper weighed with rice or baking weights.
- Chill again for 15 minutes. Preheat your oven to 180 degrees.
- Blind bake your pastry for 10 minutes - 5 minutes with the weighted greaseproof paper and 5 again without.
- Remove from the oven and allow it to cool on a rack.
- Pour the filling into the case and bake at 180 degrees for 40 minutes until the filling sets, placing it onto a hot baking tray once out of the oven.
Serve with cream!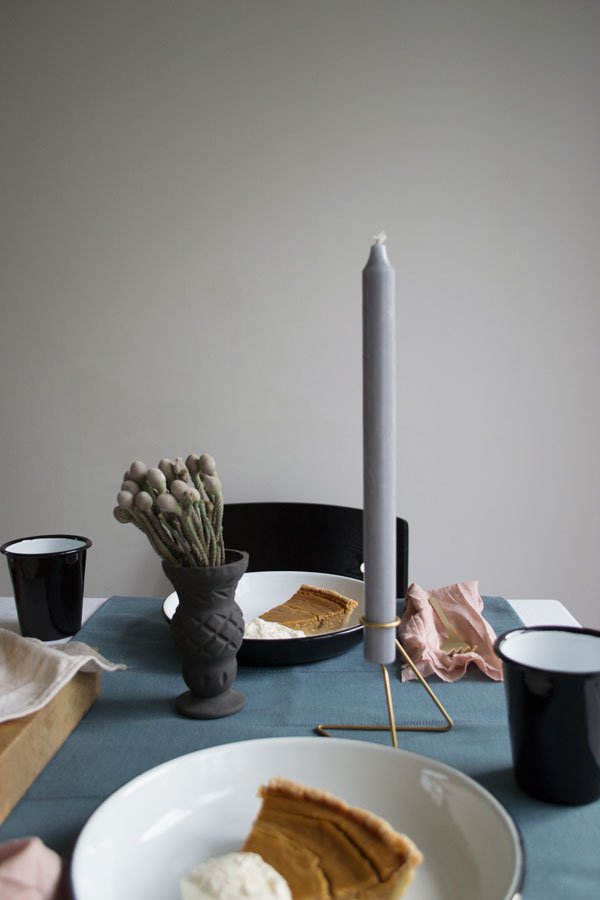
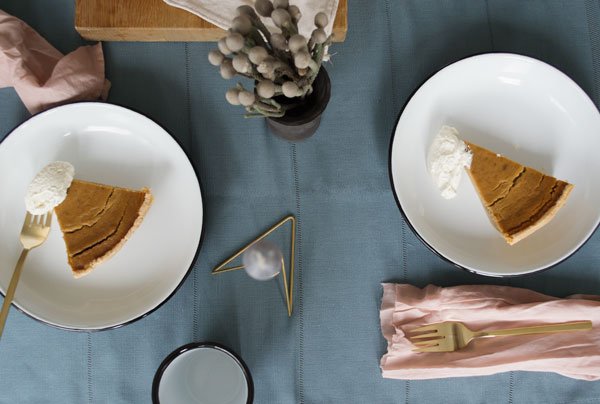
 Thank you to Meggy for driving me across town, Rob for holding the fort while we were gone and to Marcela for her warm oven, wine on arrival and wonderful hospitality. I'm sorry I had to take the pie away...xx
Product for styling includes:
• Coal black beakers • Coal black deep plates • Pigeon grey tea towel - all Falcon Enamelware.
Photography & Styling © Tiffany Grant-Riley
DIY Wooden Bead Chandelier
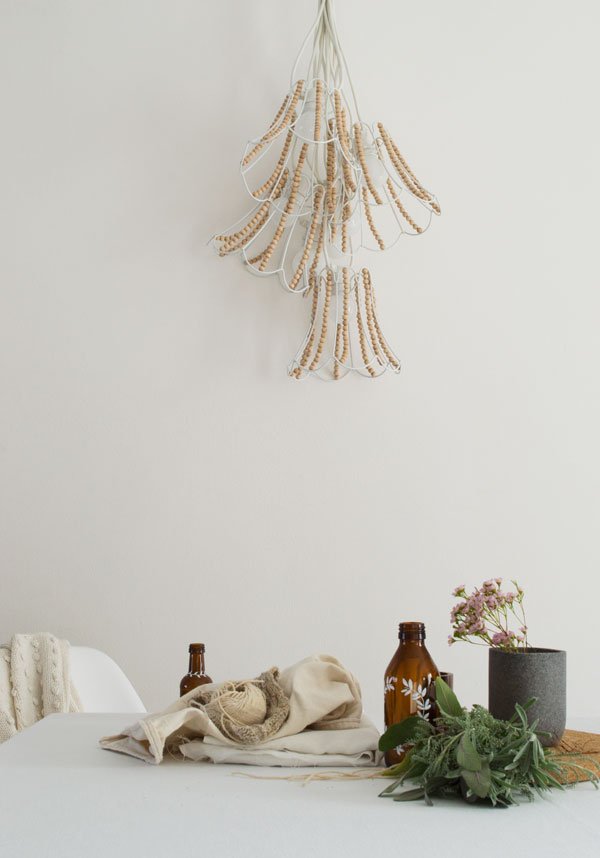 Winter is well and truly on its way, so let's cosy up and talk ways to warm up your home with lighting, shall we? I've even gone one step further and created a DIY wooden bead chandelier for you to drool over with the help of the brilliant Out There Interiors. You are most welcome. You can completely make or break a room based on the kind of lighting you choose and understanding how it can work for your space is important. This is a pretty in-depth subject to go into in any detail, so in this instance, I'm focusing on accent lighting as a way to add a mood or atmosphere. It's also a great way to draw attention to a certain area in your room.If like me you hate to use your main lights in your living space and prefer a softer, more intimate light, then you might like to consider introducing festoon (or garland) lighting. Years ago, it was virtually impossible to find these at a reasonable price to buy (and I had to hire them for client events) with the only option otherwise available being fairy lights. All very well, but the quality of light they gave was limited and whilst they're great at Christmas using them for the rest of the year just didn't feel right after I was no longer a student. Know what I mean? Thankfully now, they're easy to come by and although I don't like to follow trends, they're a popular accessory that's showing no signs of dropping out just yet. I love them for their versatility-whether you swag them across your ceiling or wall or choose to gather them up and hang them down the side of the wall from a statement wall hook, they just work.Layer a set or two of these up with a combination of table lamps and candles and you're on your way to a well-lit, cosy night.
 If you've seen and loved the luxe wooden bead chandeliers, then this DIY is a compromise. As you know, I believe simple is best, so I've not gone crazy, but when you see how many beads goes into making this grouping of five, you'll get the idea why! The wire shades are a great blank canvas for building on to if you wanted to give them something extra-I've seen them wrapped in scraps of fabric before which looked gorgeous. I've chosen pale, untreated beads here to connect with the neutral tones in the rest of our living space and have worked in natural textures and elements as part of the styling-dried seed heads foraged from the roadside, bunches of lavender leaves and sage for subtle scent, warm cork and brown glass bottles to hold my candles. Oh, and wax flower. Because at this time of year, if I see it, I buy it.
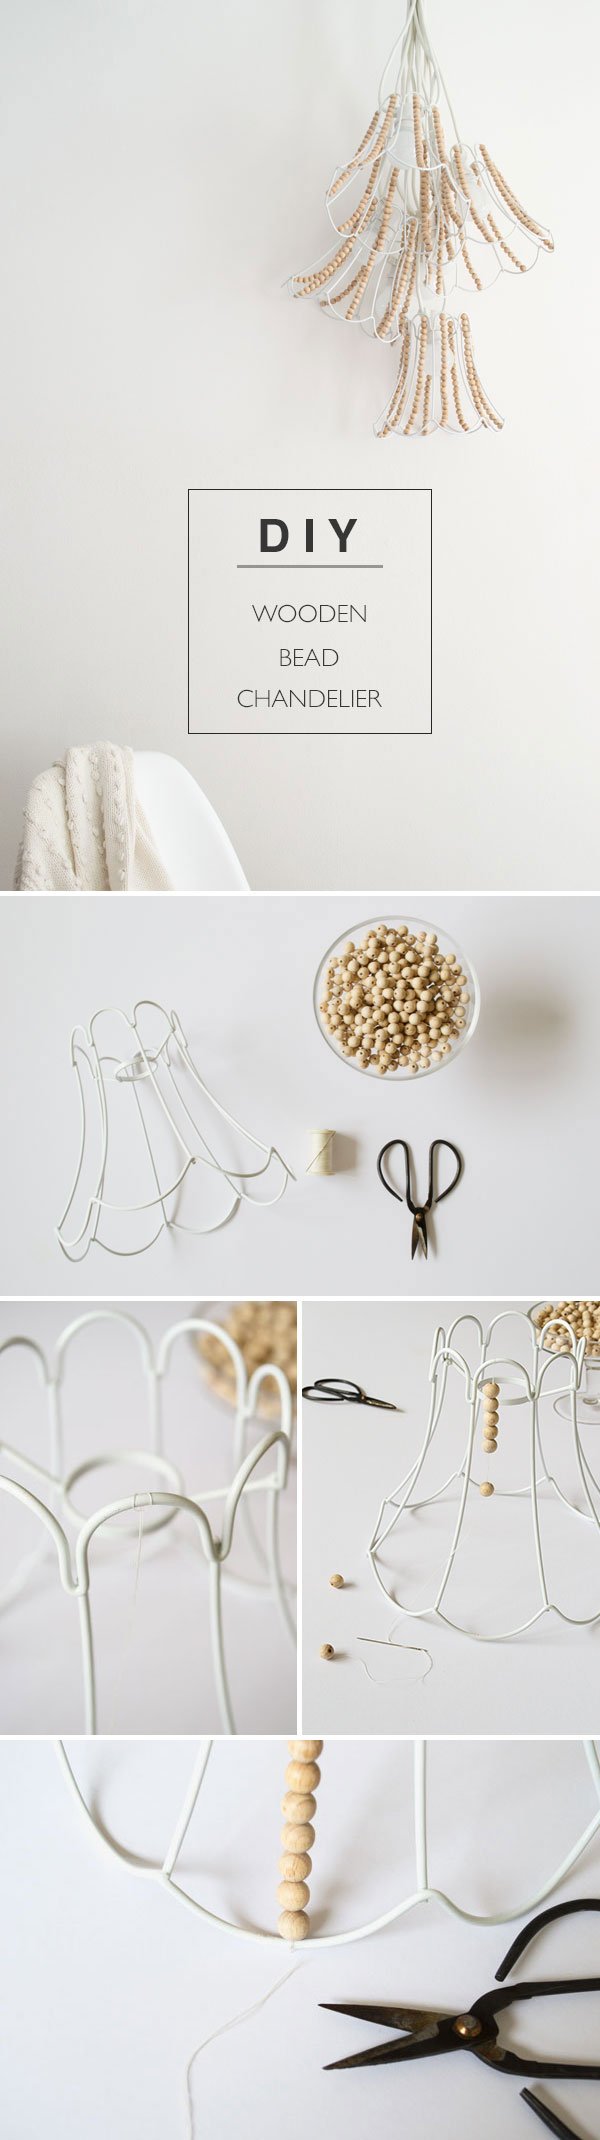 You Will Need:
- X5 Wire lampshades - I've used white tulip shaped Paralumi by Seletti
- 10mm pale wood beads - I used close to 1,000 with X20 in each section.
- White cotton thread.
- Needle.
- Scissors.
- Festoon/garland lights.
Step One: Cut a length of thread long enough so that when you double it over it will easily run the length from the top to bottom of your shade with excess for tying off. Thread your needle with the loose ends first.Step Two: Loop your thread over the top bar of your shade, pull the needle through and tighten. Thread your beads on until you fill up the space - this took x20 for each section.Step Three: Tie off and knot the thread thoroughly and trim the ends. Continue all the way around the shade until complete.Step Four: Repeat for remaining shades, attach to your string lights and group together in a cluster. Alternatively, hang them out straight across the ceiling.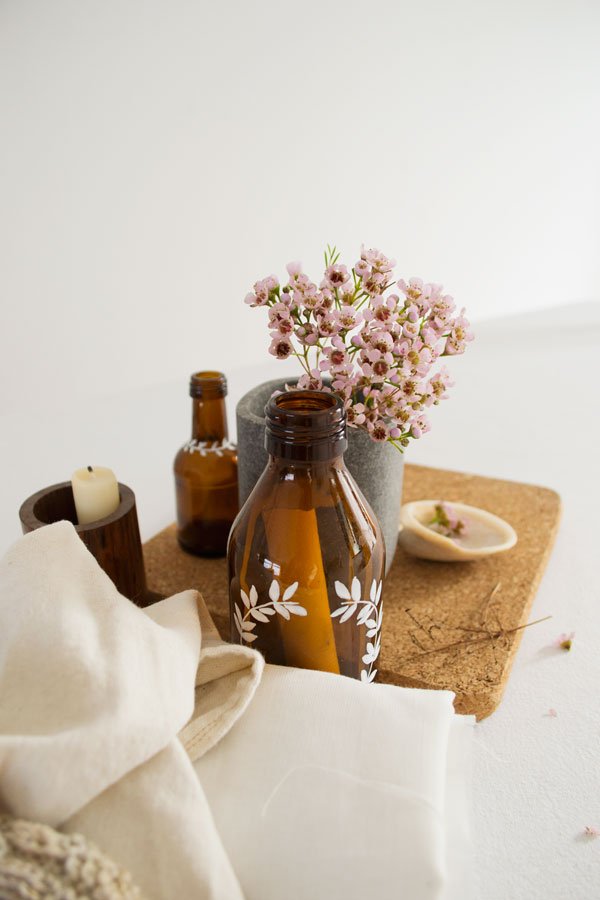

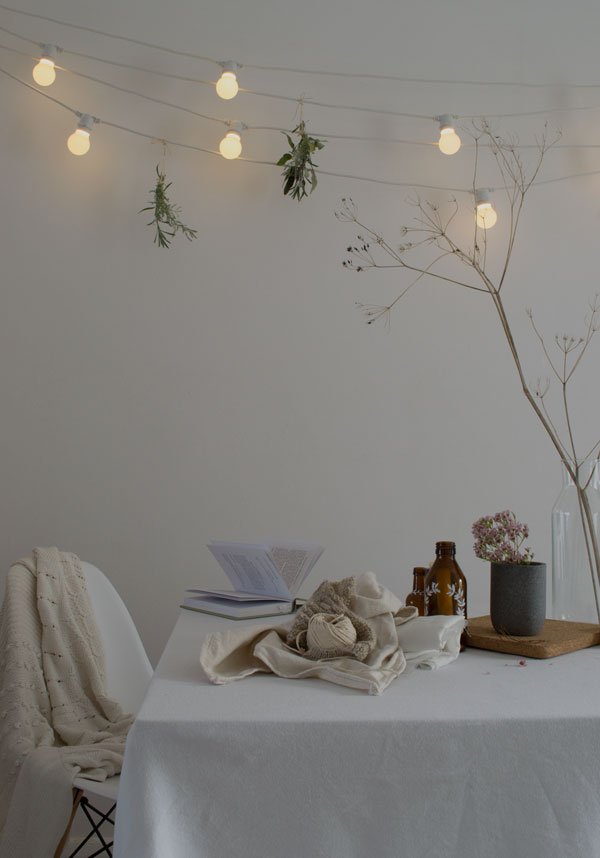 How do you work lighting into your home over winter? Are you a fan of mood lighting, or prefer a brighter feel? Got any lighting related questions you'd like to ask, feel free and I'll do my best to answer them for you...Photography & Styling © Tiffany Grant-Riley*This post is in collaboration with Out There Interiors.
Urban Jungle Bloggers / Plants, Art & Flowers

Given that I've barely been able to tell my arse from my elbow lately due to work and various commitments, you'll notice it's been a little quiet here. I know, I know, I'm sorry-but all will become clear. Promise. With this in mind, today's post is combining the last two months of Urban Jungle Bloggers topics, 'Plants & Art' with 'Plants & Flowers'...
Recently I accidentally gave my phone a bath having whipped it and flipped it out of my back pocket to check the time whilst the kids were soaking off the dirt of the day. Seconds later, I'd fished it out and was burying it in a tub of (brown) rice in the hopes of drawing out the moisture, as Google suggests. As I stood watching it (you know, in case it exploded or whatever) I could see that full camera roll recording our entire summer disappearing forever...and kicked myself for A: having not backed it up and B: printed at least some of them for framing. And I realised that I don't do that with any of my photographs. Terrible isn't it? In fact, the impact of that only really hit me when Reuben said "wow mummy, I've never seen a photo like that!" when I'd dug out an old family album to show him recently. So for September's portion of the challenge ('Plants & Art') I've taken a selection of my plants printed from my Instagram account to play with.

The subject of these images - the 'flower' part of October's challenge...well, I'm not even sure where to begin. These stunning, almost translucent bell-like clutters were foraged from a Pieris Japonica tree not far from here (thank you Instagram family for dispelling the mystery for me!) Their delicate scent is a sweet and subtle mix of honey and mead, the tree vibrating with the hum of an army of bumble bees, even now in the coldest half of October. Can you imagine what the honey must taste like?! It is completely magical. I stood under this tree in light rain one morning, the river just over the wall from me and listened to the sound of the steadily moving water and the singing hum of the bees whilst I took a few clippings.
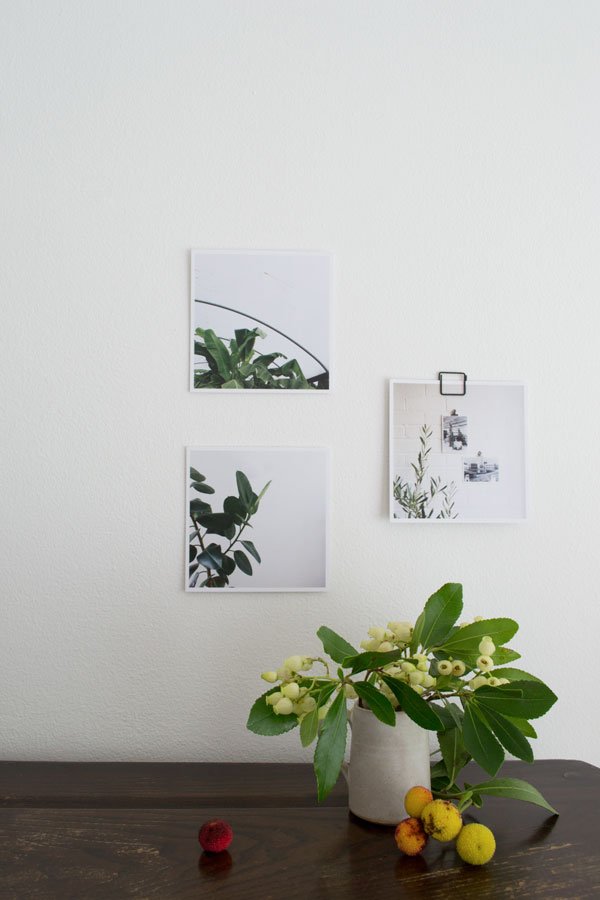
The fruit the tree bears can only be compared to lychees and although toxic they still look tempting. Starting out an almost translucent white like their flower, they turn from an acid yellow before warming into peach and ruby red. Aren't they fascinating?
And I love the continuity of these images, as the small jug they sit in was made by hand in the same place. A home from home.

To join our green fingered community or to follow the challenges, look for #urbanjunglebloggers on Instagram, Twitter and Facebook, or via the website.
Photography & Styling © Tiffany Grant-Riley
My Summer of Linen

A few weeks back I spent a jaw slackeningly relaxing evening with the Soak&Sleep team (remember this post?) at boutique hotel Artist Residence. During the course of the night we experienced a bespoke pillow consultation - a unique service S&S can provide to help you get over your pillow rut based on your sleeping habits. Amazingly, having spent years wrestling with two deflated feather things and it still not feeling "right", I was pared up with this latex baby and I will not be separated from it. Ever. If you do one thing for your bedroom this summer, make it this!
Today we've got the results back from our sleep survey and some of them are really interesting, for example 41% of you want to create a relaxing sanctuary in your rooms, not just for sleeping in but to kick back in too. Our bedroom has become just that for me in recent weeks and whilst I can't spend much time relaxing in the mornings, the evenings are all mine. With these bright and balmy nights we've been enjoying lately, I've been using those few post-bedtime hours once the kids are asleep to catch up on some reading, do a little learning and maybe try to find some inspiration. Believe me, after my last post, I've needed it.

I've brought in a few sprigs of just opened lavender from the garden, have a few healthier snacks to hand when I'm tempted and there's crisp, cool linen on the bed. I think I'm having a love affair with linen right now-I've always loved the crinkles it holds so well and how it softens over time. Have you tried it yet?
I try not to use any technology in our room if I can to help cut out unnecessary distractions, much like the 30% of you who agree with me. Apart from a little music, it's great to have the headspace to concentrate on something that isn't online. And I've made a few recent discoveries that have helped to get me going again. One is an incredible book by choreographer Twyla Tharp, which explores the creative process through her own and other artists' work. The Creative Habit. You need this in your life, my goodness yes.
On our way home at Toulouse airport a few weeks back I bought a copy of Ideat magazine which had a huge feature on Dutch photographer Erwin Olaf. I'd never seen his work before and was instantly taken with it. His 'Keyhole' and 'Grief' series look to capture private moments as if you were observing them from a distance or coming upon them by accident. Most are shot in home environments, with a nod to Mid Century style and although they're a little uncomfortable, I think they're beautiful.
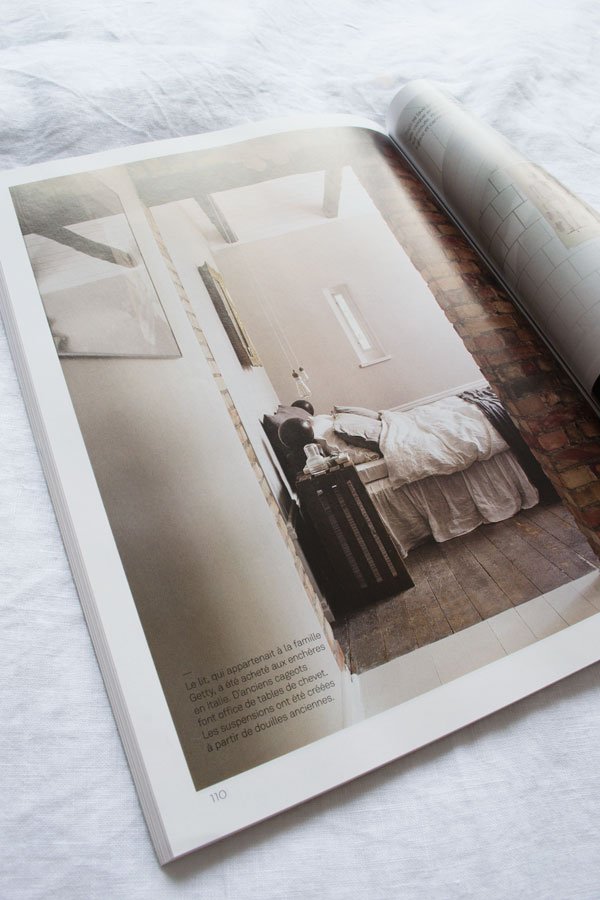 So tell me, how do you create a sanctuary in your own room? Maybe it's all about the bedding or it's locking yourself away with a good book?
 This post is in collaboration with Soak&Sleep.
Styling & Photography © Tiffany Grant-Riley
Infographic courtesy of Soak&Sleep.
Six Styling Tips For A Minimal Bedroom
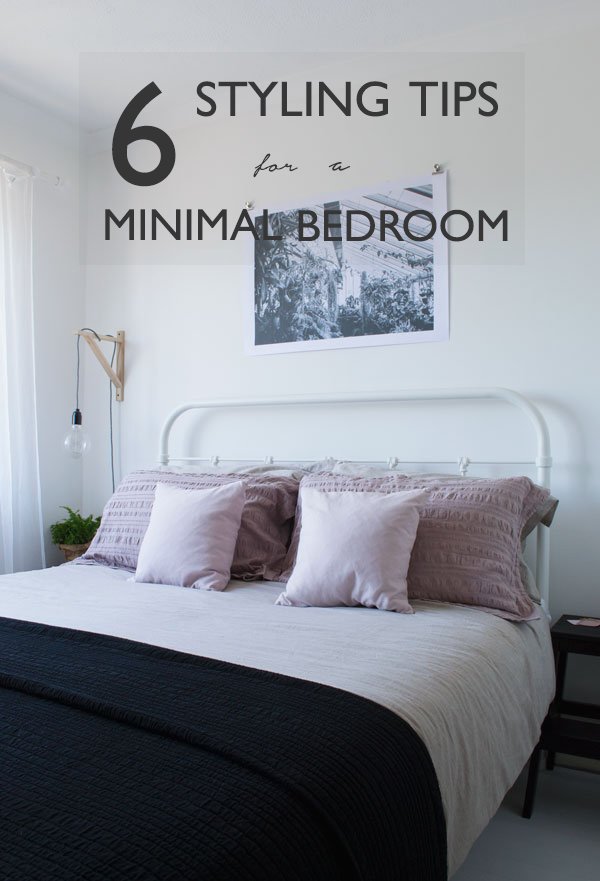 Hello, Friday and hello weekend! Wow has this week been one of those ones, if you know what I mean. Like trying to paint the kids room with them in it. I kid you not (if you'll excuse the bad joke). In fact, there's been a whole lot of focus on the bedrooms at home lately. Recently I've been experimenting a little with our style of bedding and attempting to move away from my go-to whites and greys. I know. Whaaaat?! I don't like to style according to season because I tend to use and wear the same colour palette all year round, but this time I just wanted to try something a little different, still in muted tones but a little further away from my usual monochrome. So I let Rob pick. And the boy done good...at least I think so now. When I got the sheets out I had a
 major minor panic but once I got used to the oatmeal (which I'd pared with 'pigeon pink seersucker pillow cases and a black matelasse bedspread) it started growing on me. I took the soft pink throw pillows from the sofa downstairs and somehow they pulled the whole look together. Hello oatmeal! Just the right balance of feminine to masculine, don't you think? So, I thought I'd share with you some useful tips for styling a minimal bedroom, not so that it feels too sparse or even too perfect to live in, rather to enhance your down-time and help make your space a place you can relax and (hopefully) sleep in.
Clear Out The Clutter
If there's one thing that instantly gets me down, it's being surrounded by clutter. I don't mean for a second that I live in a squeaky clean white box with nothing in it (where's the joy in that?) merely that I choose very carefully the things that come into our home and they are there because they serve a purpose or they add something to the room. If it hasn't been used in at least six months, then it goes. So, have a good clear-out, go through your wardrobe and shoe collection and make some space. Is there room for you to store some items out of sight-under the bed or inside a cupboard for example?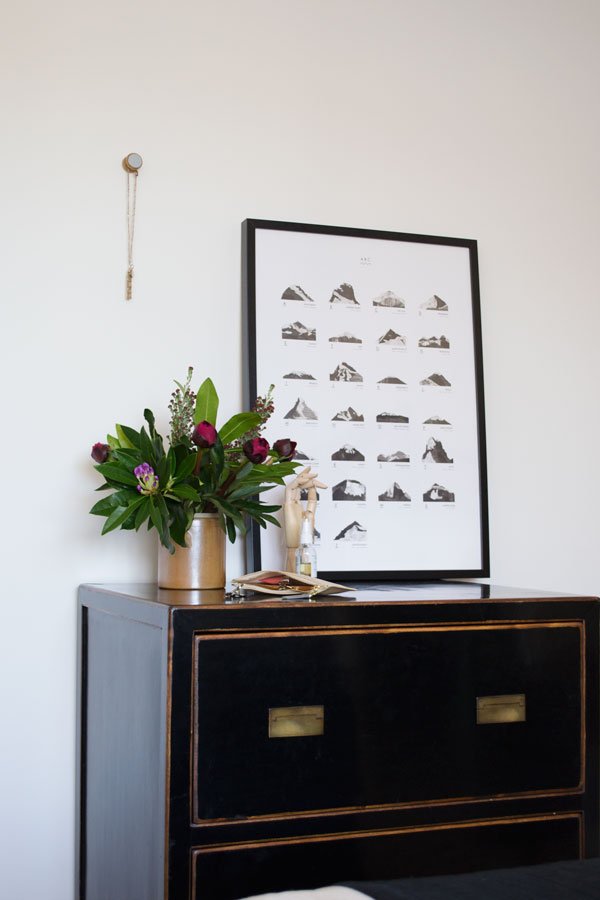
Neutrals Please
Find a neutral colour of paint and refresh your walls. Ours were standard Magnolia when we moved in but I wanted and instant lift so went with a shade of white instead to make the most of the light we have during the day. It's worth noting, however, that white will only work in a room where there is plenty of light, without it, it can look really flat and cold. If you have a dark room, try instead a pale grey, beige or other soft colours such as rose pink or nude to give the room a restful feel. The same goes for your bedding choices. Pick out muted or monochrome shades and fabrics like linens and cotton for a more natural feel and layer them up with textured blankets, throws and pillows.
Functional Furniture
Choose your furniture with intention and use only what you know you'll need or have room for. I prefer pieces with clean lines, but minimal doesn't have to mean contemporary. Our room doesn't have space for a wardbrobe, but given that we're not huge fans of solid pieces of furniture anyway, we have a simple, black clothes rail instead which still gives the room a sense of space as you can see through and around it. The same with bedside tables-it doesn't have to be your typical idea of one (particularly if you're pushed for space) but you could utilise an old fruit crate or a set of steps which will allow you a surface on the top for the essentials and have space inside on underneath for some books or magazines. Think also about the sort of materials your furniture is made from-plywood or pale woods work really well as part of a minimal aesthetic, as do black and white metal and high gloss surfaces.
Statement Lighting
Don't ignore your lighting! Sometimes, the single light hanging from the ceiling just isn't enough. Swap out that tatty old shade and replace it with something in a translucent paper for a warmer glow or a large sculptural piece if you've tall ceiling to take advantage of. Alternatively, forgo the ceiling lights completely and use black cabled festoons loosely hung over the bed or draped down the corner of a wall. We use vintage style Edison bulbs with gorgeous Italian fabric cable which we wall mounted with IKEA brackets to give us extra bedside space. Now they're a feature in themselves.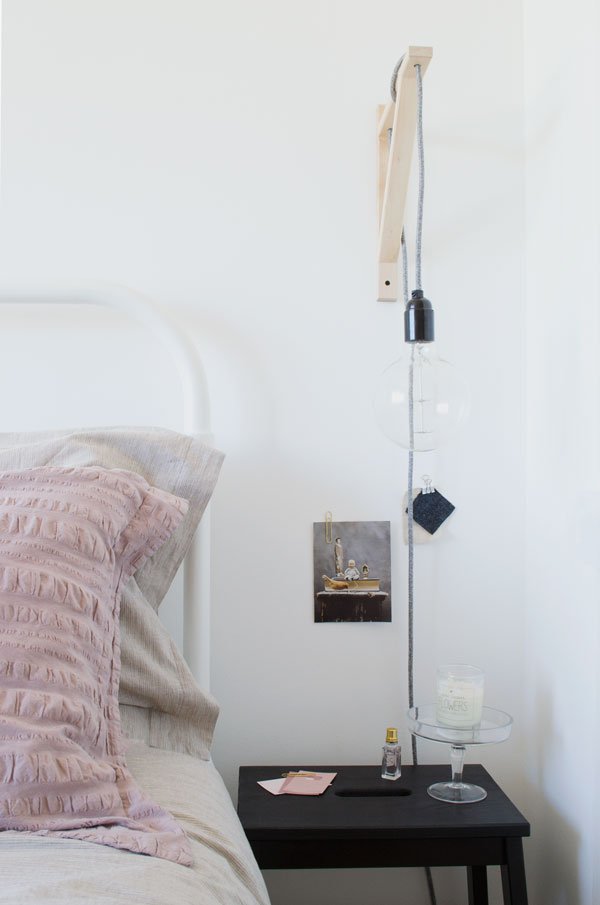
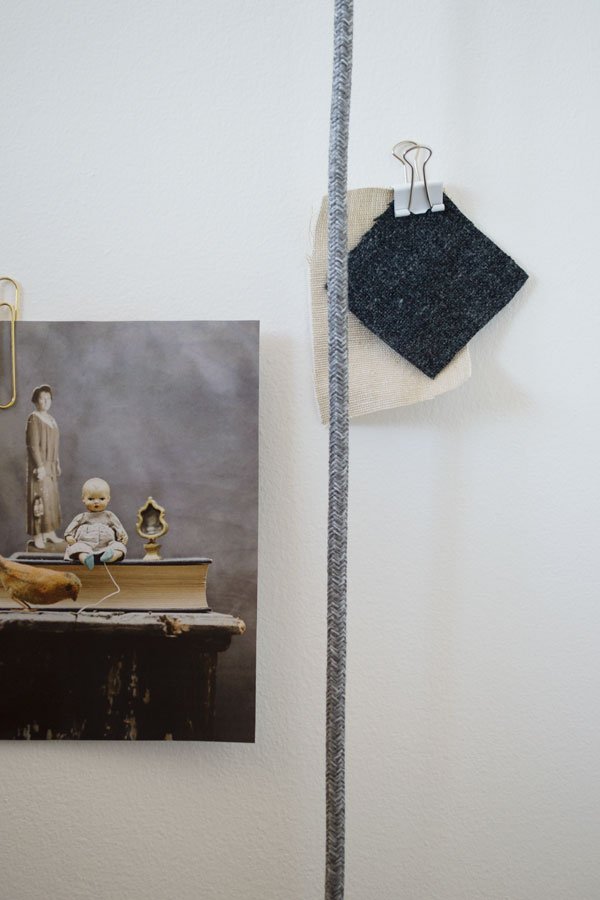
Touches Of Green
I wouldn't be doing my job as an Urban Jungle Blogger if I didn't tell you to go nuts with the plants - they bring vibrancy and texture to a room with minimal effort and you can pick them up cheaply in most supermarkets or IKEA which stock some really exciting varieties. Buying a small wrap of foliage from your florist and using single stems in a small bud vase or bottle is a simple touch if potted plants aren't your thing-I use eucalyptus and fern all the time. For today's post though, I went all out on a bunch of deep burgundy peonies. Can't wait for them to unfurl.
Be Artful
Don't forget to bring pieces of art into the room. I like to use singular, bold black and white designs that stand out against the white-leaving some of the walls blank gives a feeling of having some space to breathe. As an alternative, pull together a gallery wall of the pieces you've collected, lean larger framed art work against the wall on the floor or use wall-mounted frame ledges for a linear look. I like to use metal clips to display groupings of magazine cuttings I fall in love with and also use them to help me decide where I'm eventually going to hang a framed piece, like this one by Dot & Fox Print Shop.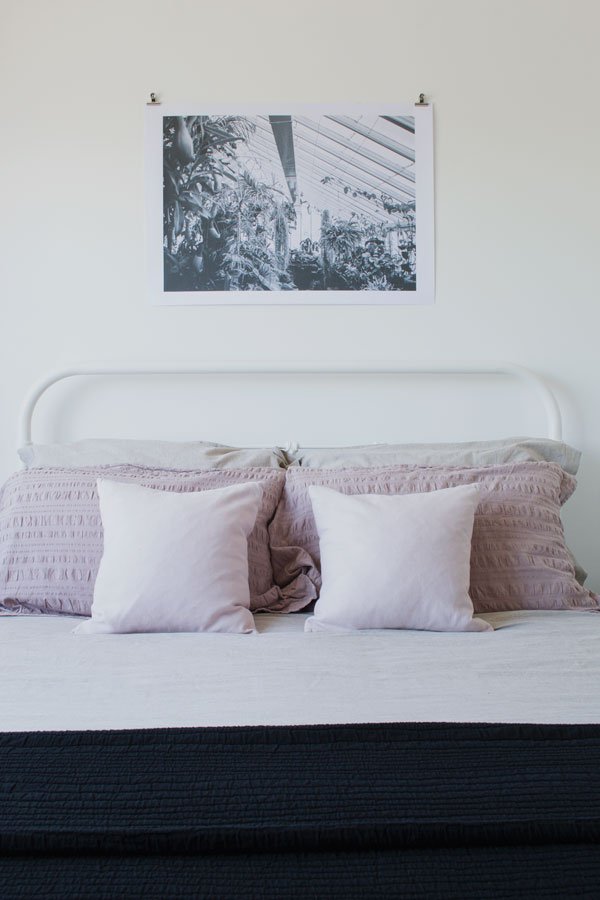
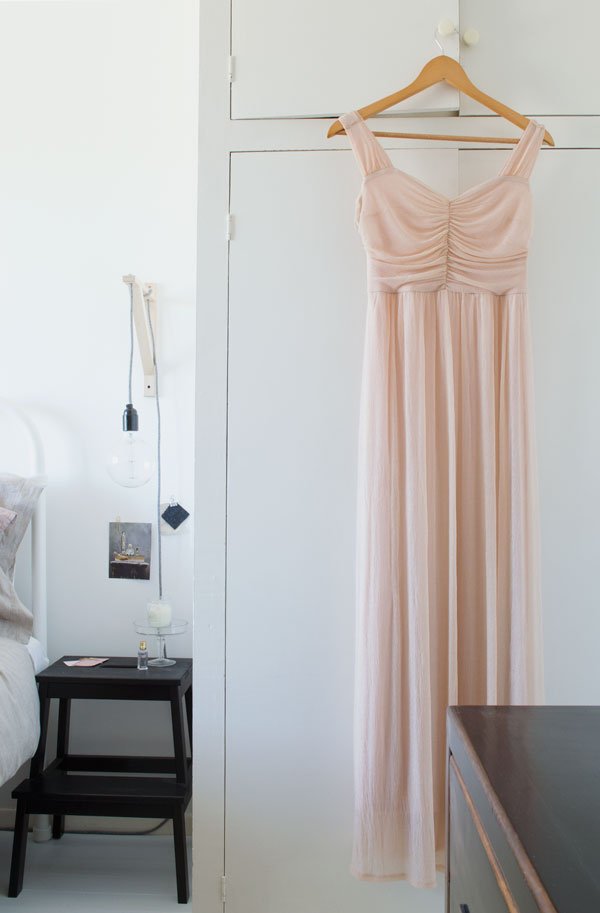 So there we are, six sure fire ways to style a minimal bedroom in a more meaningful way. Try saying that with toast in your mouth.
Photography & styling © Tiffany Grant-Riley
This post is in collaboration with Habitat as part of their #HabitatVoyeur campaign. Have you seen the ad on TV yet? Upload your Habitat product in your home for a chance to win a Hendricks sofa.
Urban Jungle Bloggers / Plant Gang
 Yes! to this month's Urban Jungle Bloggers topic - show your plant gang! Last month I shot a huge collection of my plants on our Ercol dresser and was blown away by how insanely, gobsmackingly beautiful they all looked that I really didn't need much encouragement to do it again! So here is 80% of my plant collection. I love how versatile an old folding ladder can be for displaying (and...eh hem...curating) meaningful pieces in the home. Amazingly, this set was in the garage when we moved in and I've been itching to use them for something. We don't have room to keep them out permanently (the set-up was done in our dining space) so I enjoyed having an hour or so to play with them. Using a simple white backdrop and natural jute flooring I focused on the shapes and shades coming from the plants and built up.
 This Boston fern very nearly didn't make it so I'm chuffed to see it centre stage, larger than life. Originally I'd bought it for my workspace but as the light in the room is so bright and concentrated it didn't take long to start showing signs of fading. Needless to say I moved it out quick and relocated it to the porch which has a softer, defused light which it loves. I don't like to lose. Can you tell?
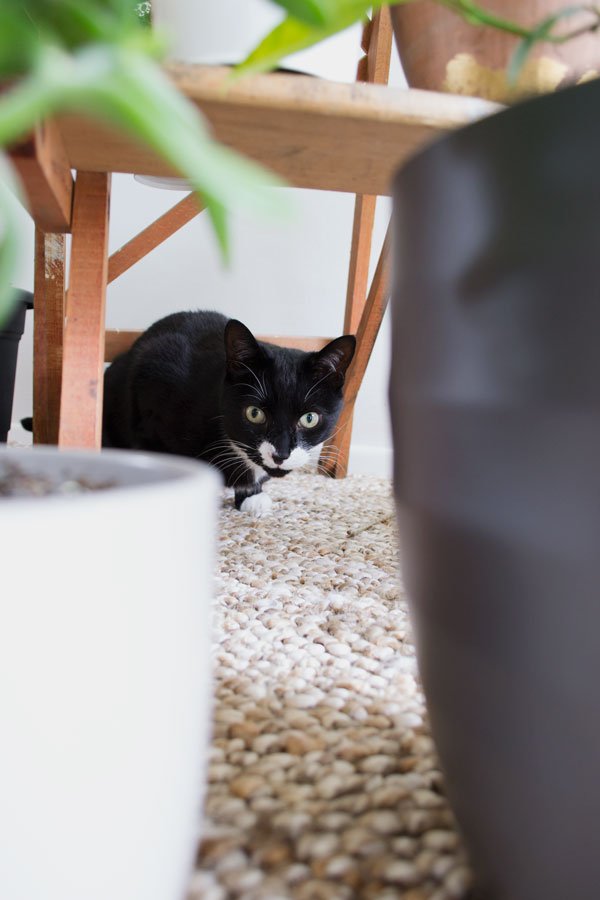 Mosey loved his temporary jungle.
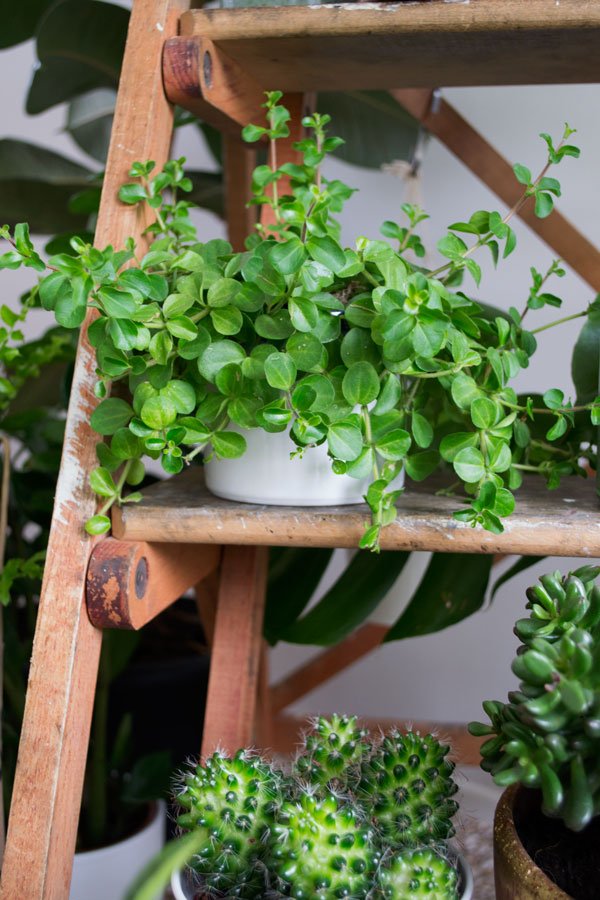 The Peperomia normally sits on the shelf in my workspace and as I'd hoped has started to trail and soften up some of the lines a little. Trailers are ideal for suspending from the ceiling too. This one is a guaranteed winner if you've plenty of light.
 This is Marvin (as in Gaye) who I rescued from a shop almost a year ago. He was just 5ft when I brought him home and is pushing 6.5ft now. I love him, such a gentle giant.
 And this is Tammi (as in Terrell) who normally sits opposite Marvin either side of the French doors. I like to think they sing 'Ain't No Mountain High Enough' but who knows...
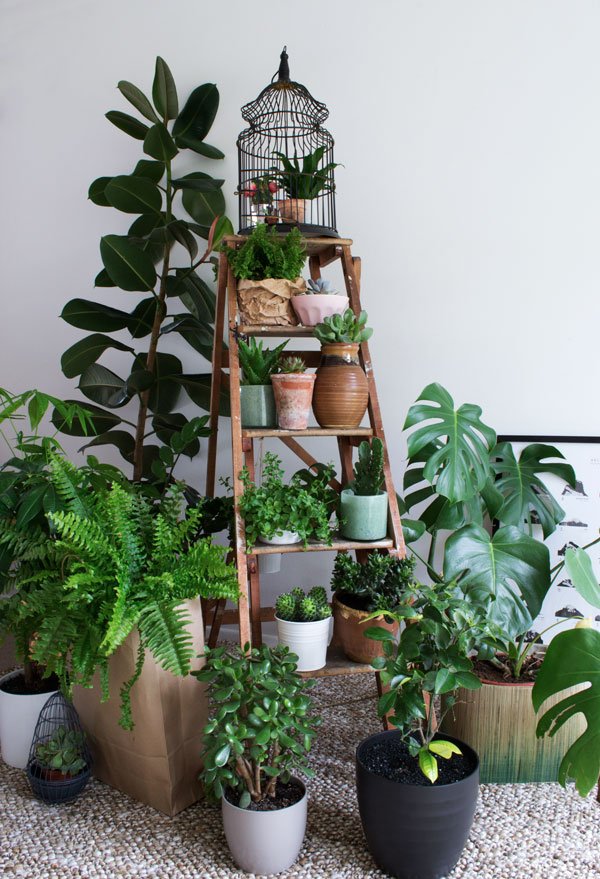 Urban Jungle Bloggers is an online community of plant lovers started by Igor Happy Interior Blog and Judith JOELIX, growing and sharing their love of plants one post at a time. Join us!